· For new users, install Kodi on your device to get started.
· Since Kodi prohibits the installation of third-party addon/repos by default for security issues, we need to set Kodi to allow installation from unknown sources to go on.
· Update Kodi to the latest version to avoid potential issues. The latest version of Kodi as of this writing is Leia 18.6.
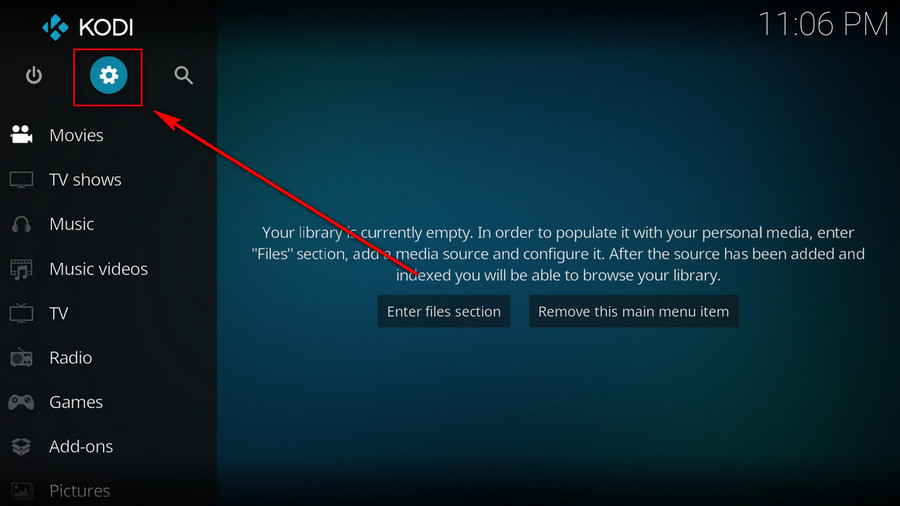
Step 1. Launch Kodi. Hit the cog icon from the upper side of the left panel to enter System.
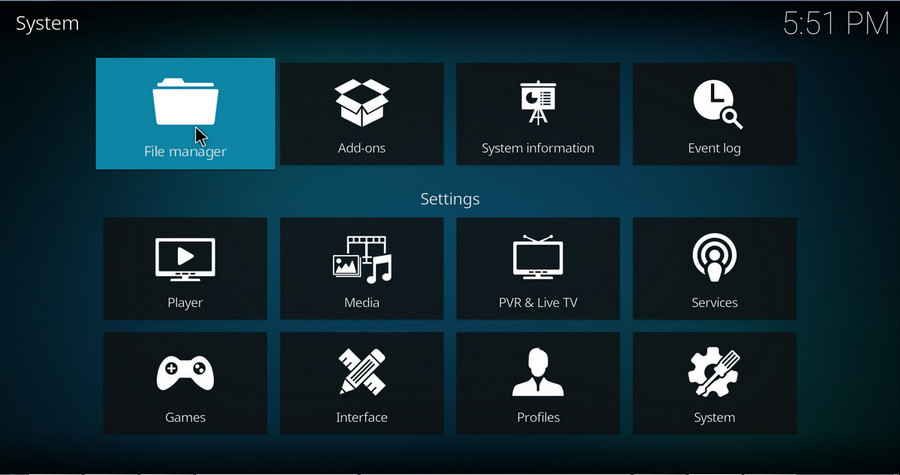
Step 2. Hit File manager from System page.
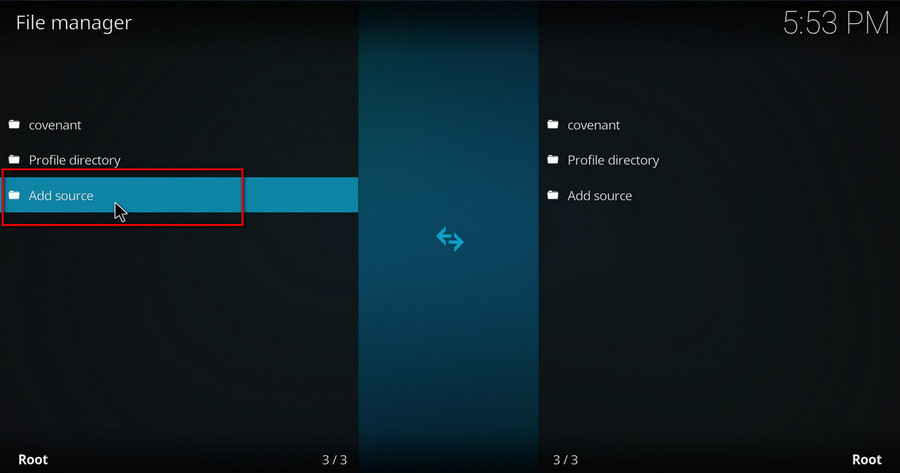
Step 3. Double hit Add source from the left column.
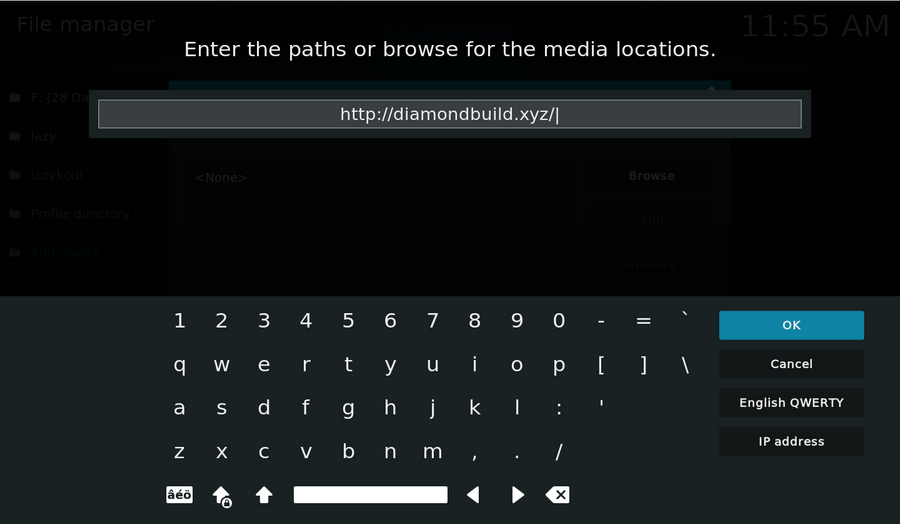
Step 4. Hit <None> from the box in the middle.

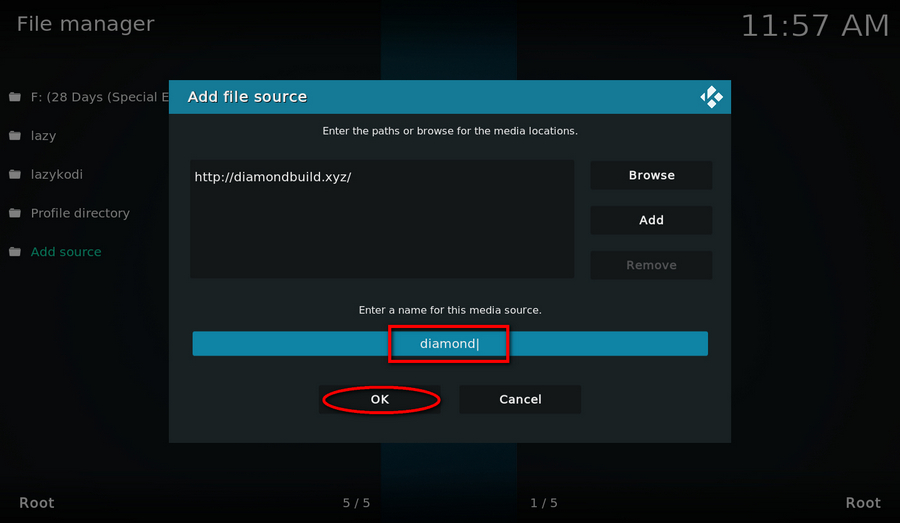
Step 5. In the pop-up box, copy & paste or type in exactly http://diamondbuild.xyz/ to the media location box, and hit OK button from the lower-right side.
Step 6. Define a name for the media source we just added as Diamond. Make sure all characters of the source name are lower-cases, or you might encounter a problem connecting to internet server later during installation. Then hit OK underneath.
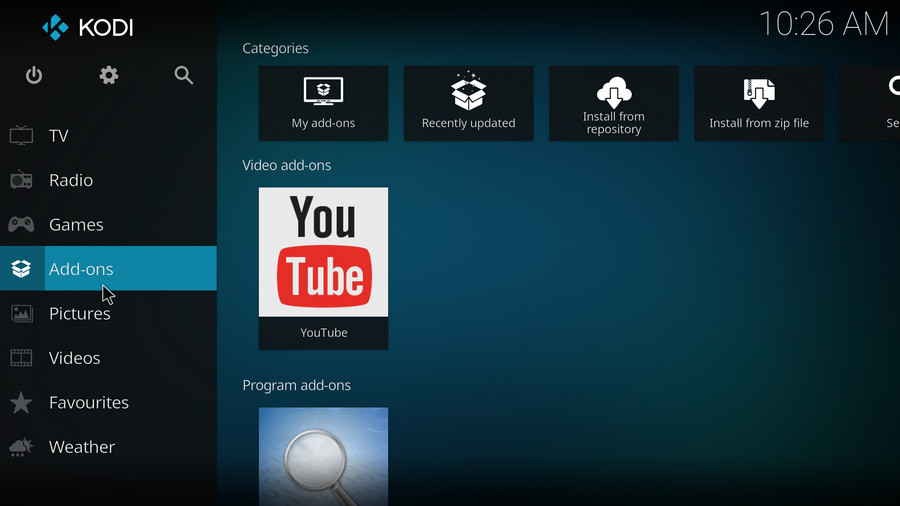
Step 7. Then get back to the main menu. Hit Add-ons from the left panel.
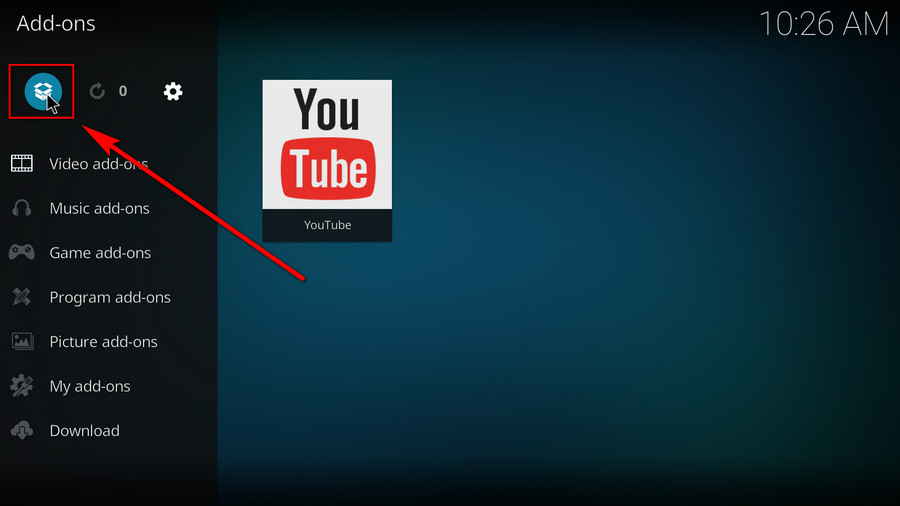
Step 8. Hit the box icon from the upper side of the left panel.
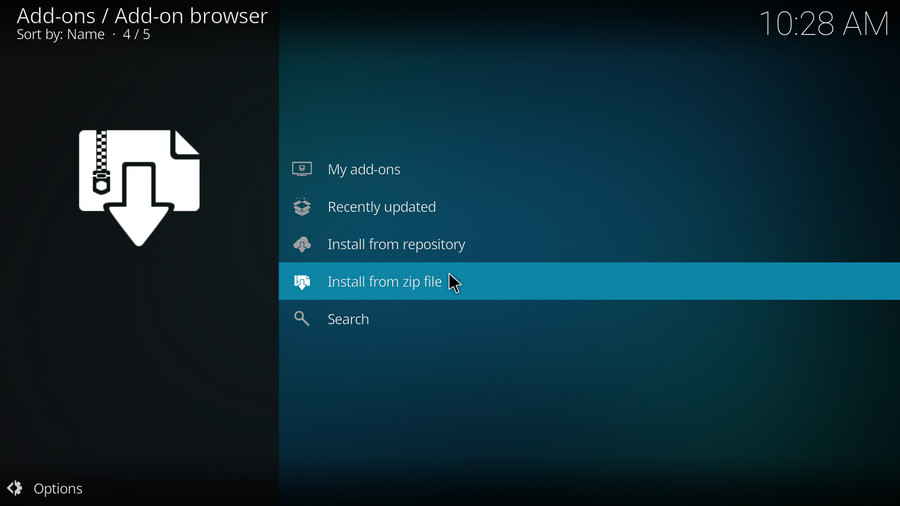
Step 9. Select Install from zip file.
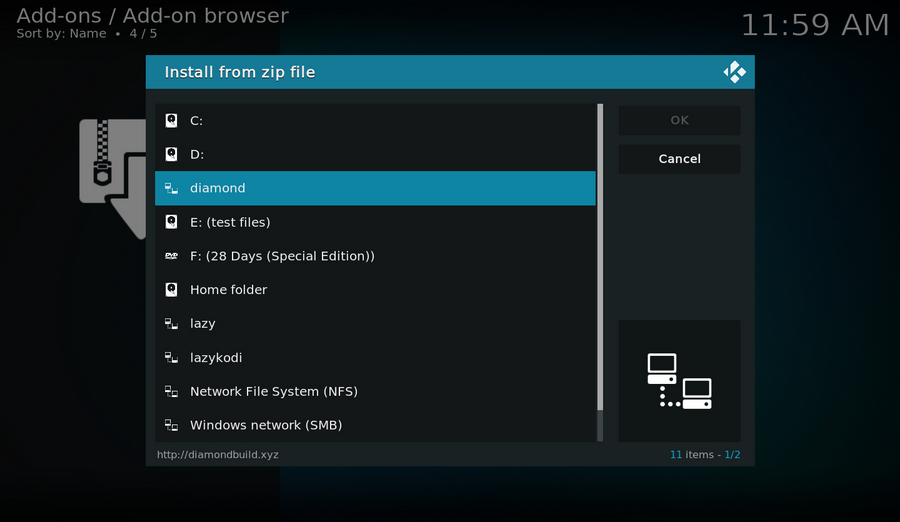
Step 10. Select the media source Diamond we just added to Kodi.
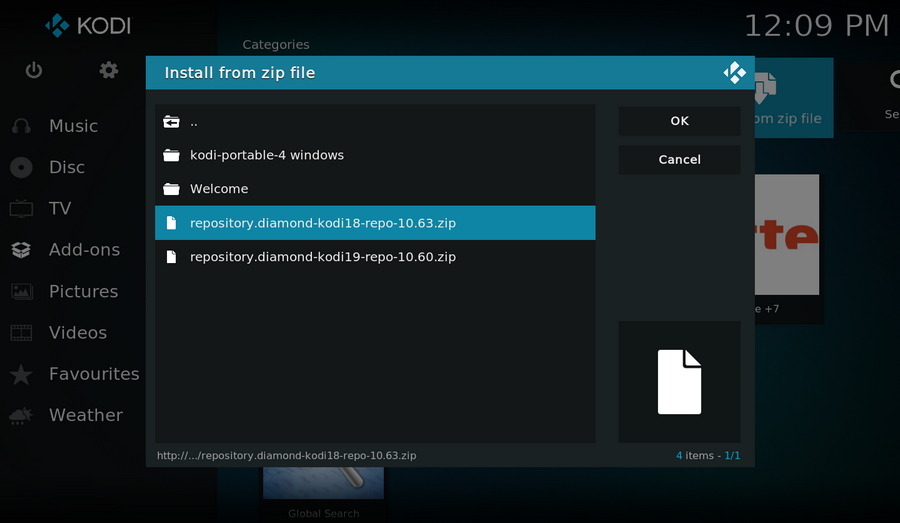
Step 11. Hit the repository.Diamond-Wizard-Repo-x.x.zip file within (x.x stands for the repo version).
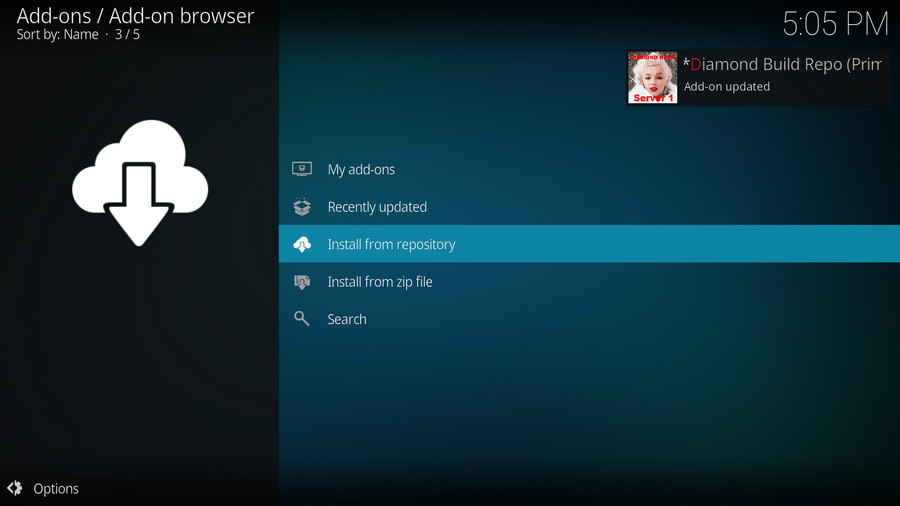
Step 12. Wait until you can see a message pops up on the upper-right side saying ***Diamond Build Repo (Primary Server, Main Repo)*** Add-on installed. Note that is just the installation of a repository but not the addon, then it's time to add addon on Kodi from repository.
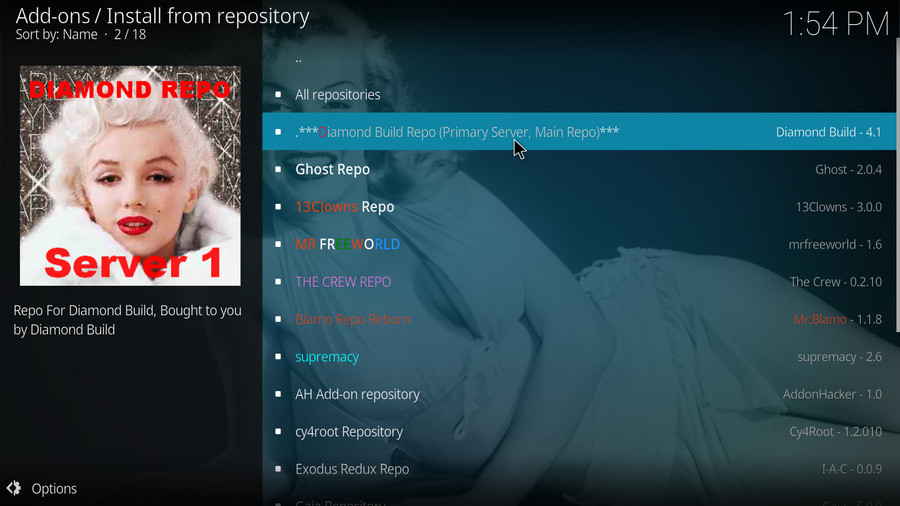
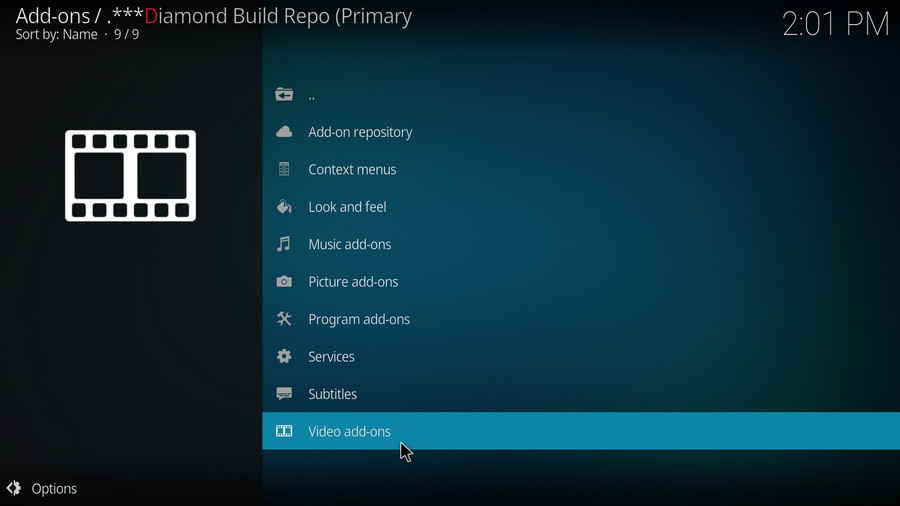
Step 13. Select ***Diamond Build Repo (Primary Server, Main Repo)***.
Step 14. Select Video add-ons.
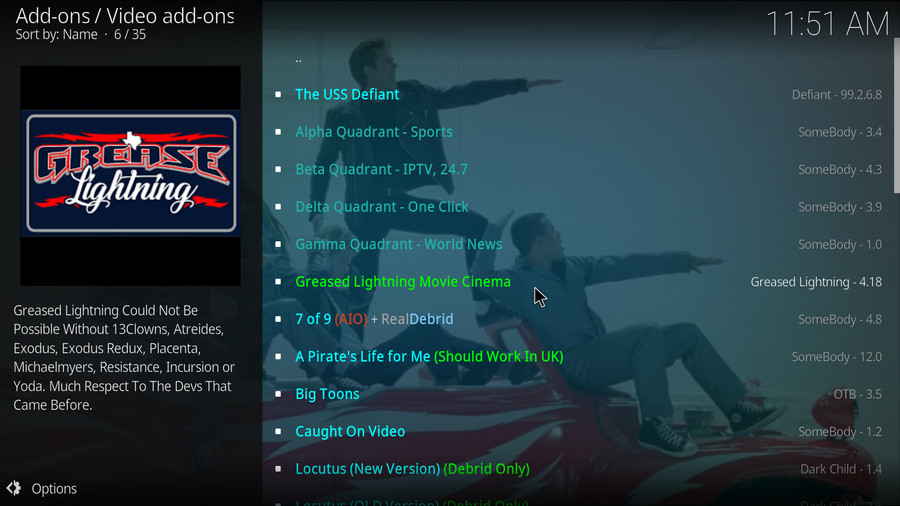
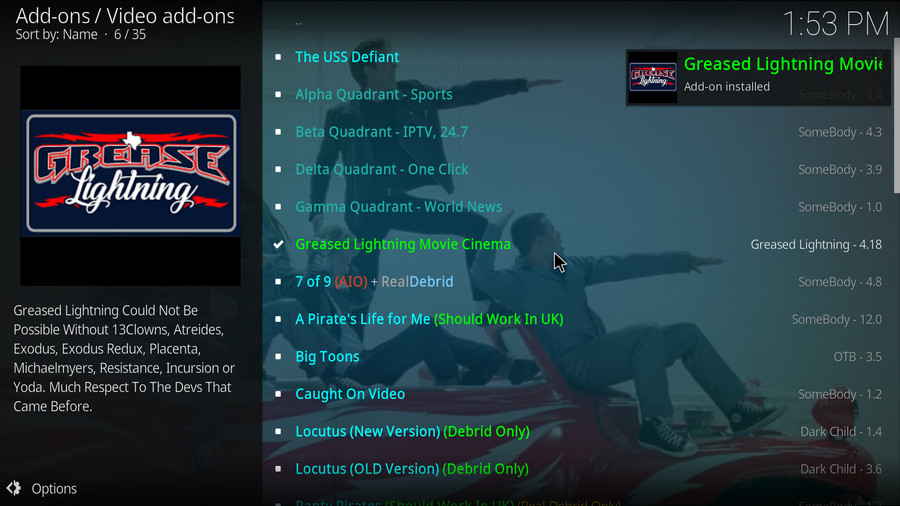
Step 15. Locate and select Greased Lightning Movie Cinema.
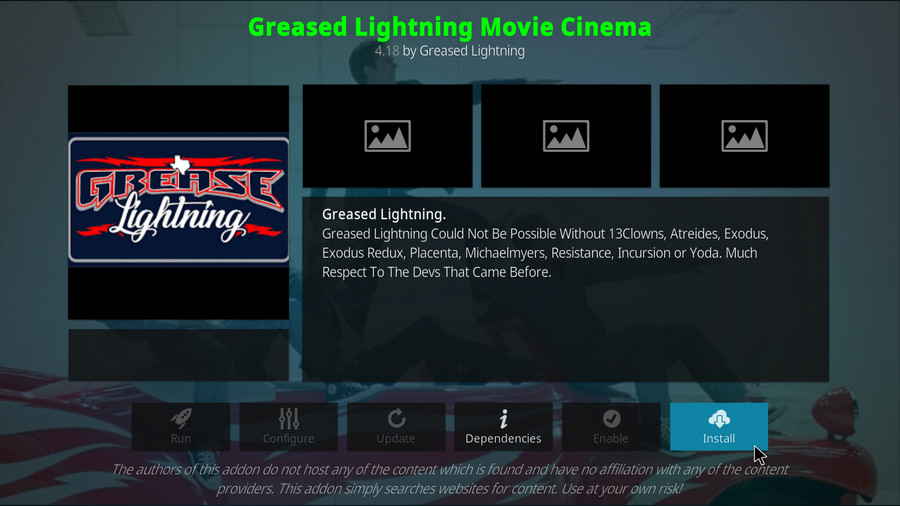
Step 16. Hit Install from the lower-right side to install Greased Lightning Movie Cinema addon
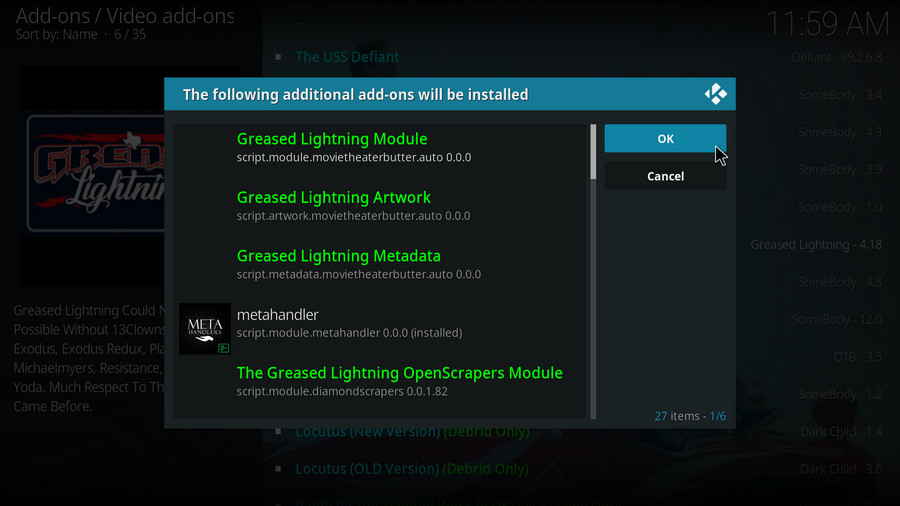
Step 17. Hit OK to allow installing additional dependencies when this dialog pops up.
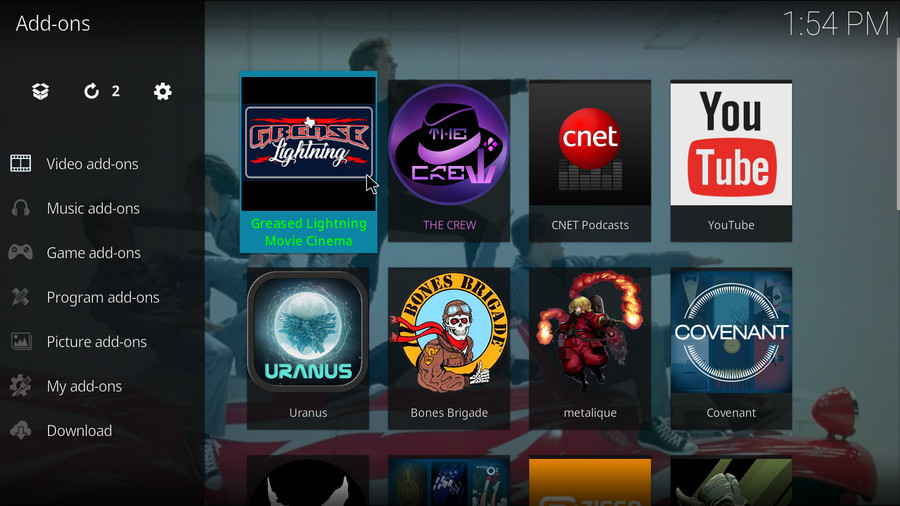
Step 18. Wait till you can see the message Greased Lightning Movie Cinema Add-on installed pops up. That's it! You can now find the installed addon from main menu > Add-ons, enjoy your Greased Lightning Movie Cinema!

 How to & Tips