SoftwareHow to & Tips

Video FormatsConvert Video

Resources

Guide on How to Install Working Venom Addon on Kodi Leia & Krypton

Author by Oswald

Last updated on July 14, 2023

Venom addon is one of the best addons on Kodi for watching high quality movie and TV shows without buffering. In this guide, I'll show you the detailed steps on how to install working Venom Addon on Matrix & Leia.

Important Update

Venom addon is currently unavailable.

Part 1. What is Kodi Venom Addon?

Kodi VenomKodi Venom

Venom is a new and more frequently updated Exodus fork, one of the bests of its kind. After I-A-C stopped updating Exodus Redux, Venom has become a great go-to movies & TV shows addon for many. Compared with its countless predecessors, Venom has a similar structure and use OpenScrapers as well but more concise and has sorted many loose ends.

What's more, Venom specially features auto playback, meaning users don't have to individually pick sources while watching, Venom will automatically decide what's on next. All in all, Venom is a great addon that movie lovers should totally have a try.

Given its outstanding performance and frequent updating, we've put Venom on our Best Kodi Addons list, movies and TV shows addons section.

Please note that Venom and Fen addon now uses My Accounts script to manage user accounts. You can find it from Add-ons > Video add-ons > Right-click (long press the select button on a remote or C on a keyboard) on Venom > Dependencies > My Accounts.

Disclaimer: This guide is for educational purposes only and should only be used to stream movies or TV shows under the public domain. WonderFox is in no way collaborated, affiliated with or hosting any Kodi add-ons, repositories or builds. We do not endorse or advocate copyright infringement, the end-user should be responsible for any content accessed via the services or apps referenced on this post.

Part 2. How to Install Working Venom Addon on Kodi Leia & Krypton

Add-on name: Venom

Repo Name: Venom Repo

The Latest Working Source URL: https://123venom.github.io/

Media source naming: venom

Before starting,

· For new users, install Kodi on your device to get started. Installation guide: Windows | Fire TV Stick | Android Phone | Android Box

· Since Kodi prohibits the installation of third-party addon/repos by default for security issues, we need to set Kodi to allow installation from unknown sources to go on.

· Update Kodi to the latest version to avoid potential issues. . Update guide: Windows | Fire TV Stick

Step 1. Launch Kodi. Click on the cog icon from the upper side of the left panel to enter System.

Click on cog icon

Step 2. Click on File manager from System page.

Click on File manager

Step 3. Double click on Add source from the left column.

Double click on Add source

Step 4. Click on <None> from the box in the middle.

Click on None from the box in the middle

Step 5. In the pop-up box, copy & paste or type in exactly https://123venom.github.io/ to the media location box, and hit OK button from the lower-right side. Check for typos if you encounter Couldn't retrieve directory information.

Enter the path of media location

Step 6. Define a name for the media source we just added as venom. Make sure all characters of the source name are lower-cases, or you might encounter a problem connecting to internet server later during installation. Then click OK underneath.

Name the media source venom

Step 7. Then get back to the main menu. Click on Add-ons from the left panel.

Click on Add-ons from the left panel

Step 8. Click on the box icon from the upper side of the left panel.

Click on the box icon

Step 9. Click Install from zip file.

Click Install from .zip file

Step 10. Click on the media source venom we just added to Kodi.

Click on the source venom

Step 11. Click on the repository.venom-1.6.zip file within.

Click on the .zip file within

Step 12. Wait until you can see a message pops up on the upper-right side saying Venom Repo Add-on installed. Then click Install from repository from current page.

Venom Repo Add-on installed

Step 13. Select Venom Repository. If you encounter "Could not connect to repository" error message, check out our troubleshootings.

Select Venom Repository

Step 14. Then add addon to Kodi from repository. Click Video add-ons. Within Video add-ons category, select Venom within.

Select Venom within Video addons category

Step 15. Then click install from the lower-right side.

Click Install

Step 16. Click OK to allow installing additional dependencies and add-ons when a dialog pops up.

Install dependencies

Step 17. Wait till you can see the message Venom Add-on installed pops up. Enjoy your Venom!

Venom installed

Part 3. How to Configure Real-Debrid for Venom

Real-Debrid is a service with which you integrate Kodi to acquire faster internet stream downloads for buffering-free video playback. To get started, go to https://real-debrid.com/ to sign up for a free account, if you haven't had one already.

· Here's a post where you can learn more about Real-Debrid.

Step 1. Go to Add-ons > Video add-ons, open Venom

Open Venom

Step 2. Click on Tools.

Click on Tools

Step 3. From the bottom of the option list, click on ResolveURL Settings.

Click on ResolveURL Settings

Step 4. From the Universal Resolvers tab, you can see there are multiple service that Venom supports, scroll down until you find Real-Debrid. Then click (Re)Authorize My Account from Real-Debrid section.

Click (Re)Authorize My Account from Real-Debrid

Step 5. A small window will pop up with an authorization code automatically generated, do not click Cancel now. Note that it's a temporary code that expires shortly, so we better hurry.

Real Debrid authorization code generated

Step 6. Visit https://real-debrid.com/device with your browser, enter the authorization code into the box exactly. Check if there's any typo! Then Real-Debrid will ask you to login, if you haven't.

Enter the authorization code

Step 7. You can now set an identifiable name for your current device, like Android TV living room and close this webpage.

Set an identifiable name for your device

Step 8. It's done! Real-Debrid is now fully setuped on your Venom Kodi addon.

Setup complete

Venom Not Working Fix

• Venom No Stream Available/Streaming Buffering/Stream Pending after Loading but Won't Play

The causes of no stream available and other streaming failed issue vary, most effective solutions include:

1. Use the option in your device settings or maintenance addons to clear Kodi cache.

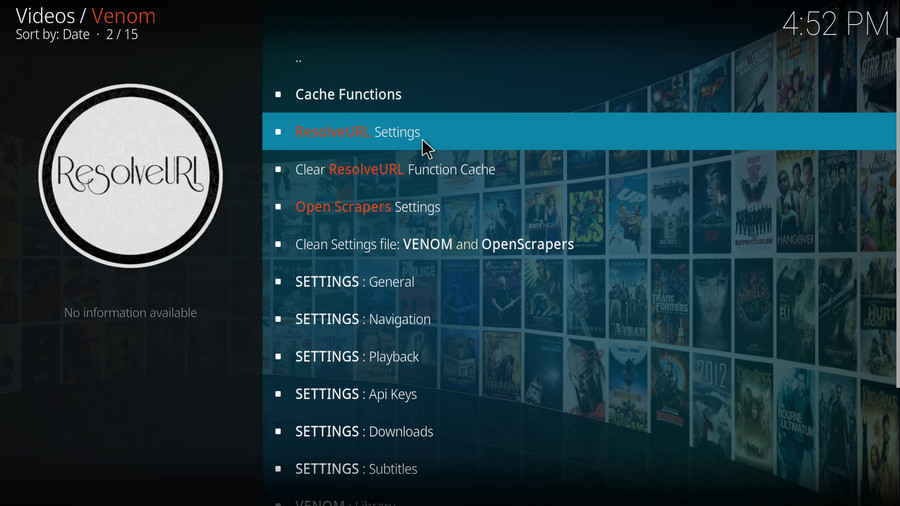
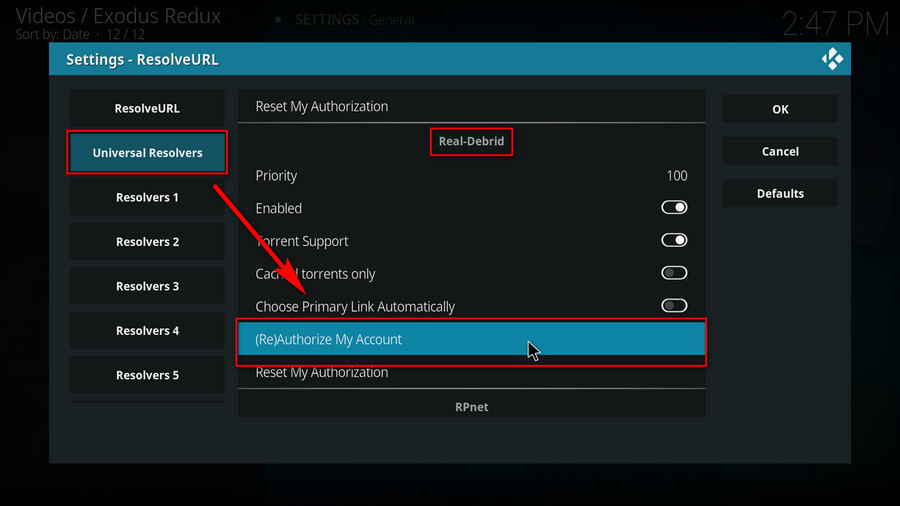
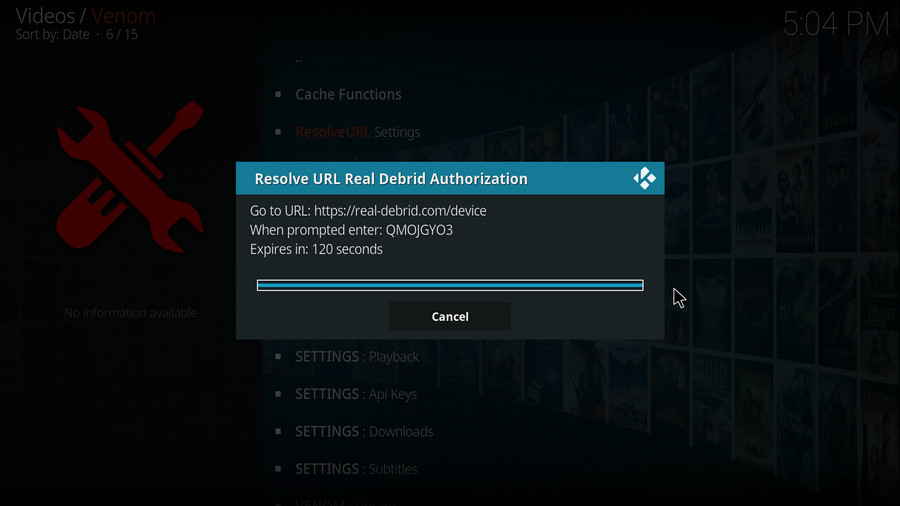
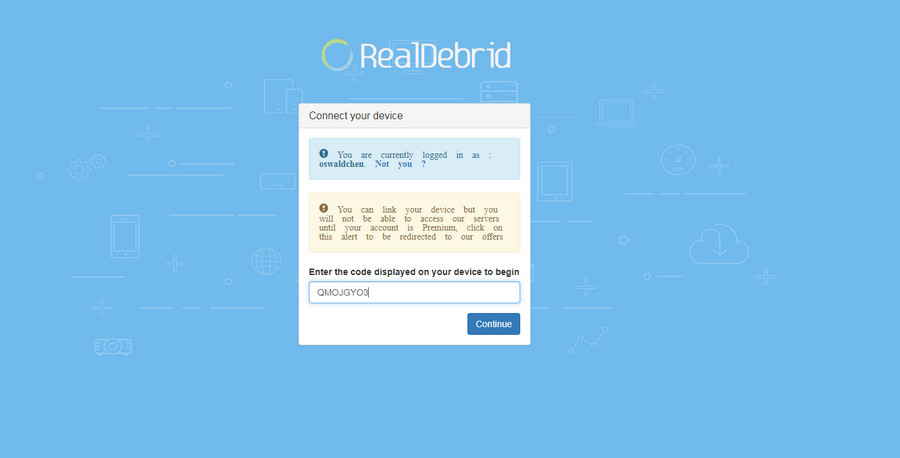
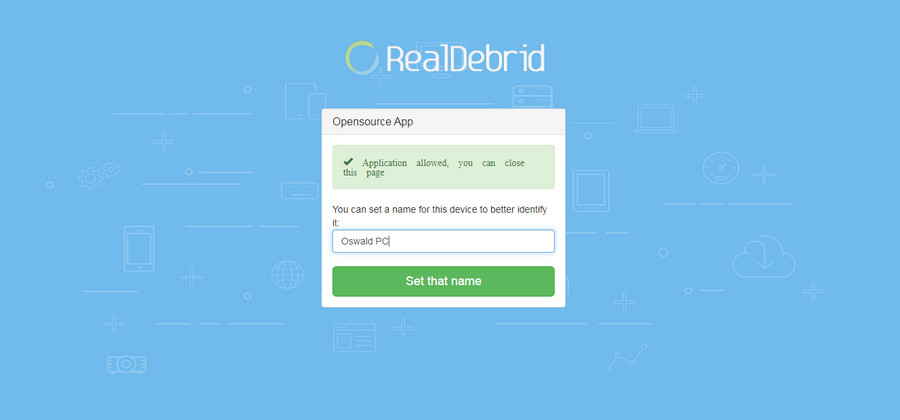
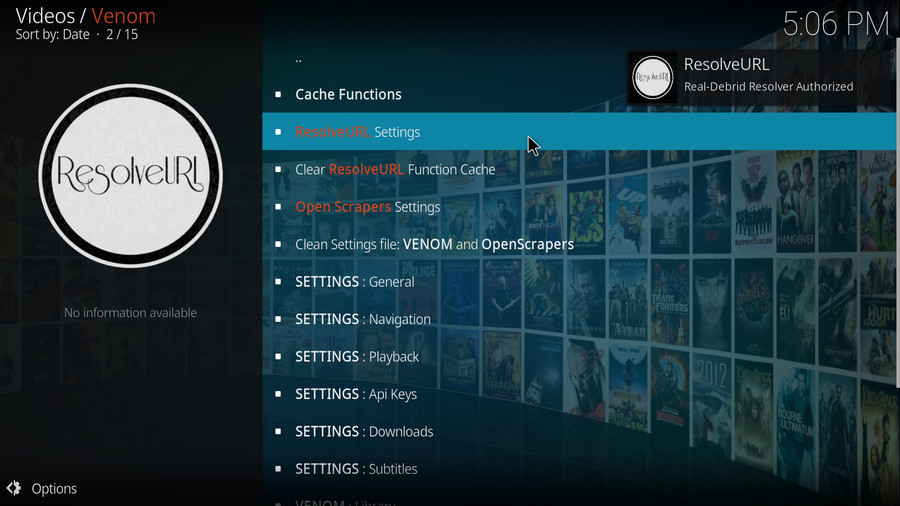
2. Reauthorize debrid services like Real-Debrid, Premiumize and All Debrid with the updated ResolveURL.

3. Go to addon settings and switch Auto Play feature to Source Select.

4. Stop using VPN with debrid services.

5. Use a proxy to bypass ISPs blocking.

• Venom Fails to Start/Launch

That could be the addon stopped working, we'll put up an announcement from the top of the page, in that case, stay tuned to our updates. In addition, working addons will also fail to launch, try the following methods to sort that.

1. Make sure the server and port number in your Kodi Internet access match the ones of your network. Check that especially if you're using a VPN. Learn more: Kodi Proxy Settings

2. Try clearing Kodi app cache in your device settings or with maintenance tools like Open Wizard, reboot Kodi, and launch the addon again.

• Venom Error Check the Log for More Information

First try clearing Kodi app cache from your device settings, reboot Kodi, and try the previous behavior again and see if this issue still occurs. If so, learn how to check log file on Kodi and draw support from someone who can read it. Please note that don't seek assistance for third-party addons from official Kodi support channels.

• Venom Links Fails to Play Requiring Stream Authorization

If you're asked to authorize stream when trying to play a link, you can either:

1. Use a static IP address to pair with the hoster site.

2. Use a debrid service with Kodi and disable free hosters in addon settings.

Learn more: Stream Authorizations on Kodi – Is it Safe? Several Ways to Deal with Them

• Venom The Dependencies Could Not be Satisfied

This issue results from python code discrepancy of addon's dependencies. In that case, you should use a compatible version of Kodi for the addon. As always, we only advise the use of the latest stable release version of Kodi and the latest version of continually-updated addons.

More Related Articles

How to Install Available InputStream Adaptive on Kodi Leia Orion Kodi: In-depth Review and Complete Setup Guide How to Browse Web with Kodi – Two Solutions
Implement Uptobox Streams Authorization or Disable Uptobox Install Aptoide Kodi Addon to Download and Install Apps from Kodi How to Setup Proxy Settings for Kodi On Fire Stick