To install Fusion on Kodi, enable the installation of addon from unknown sources first.
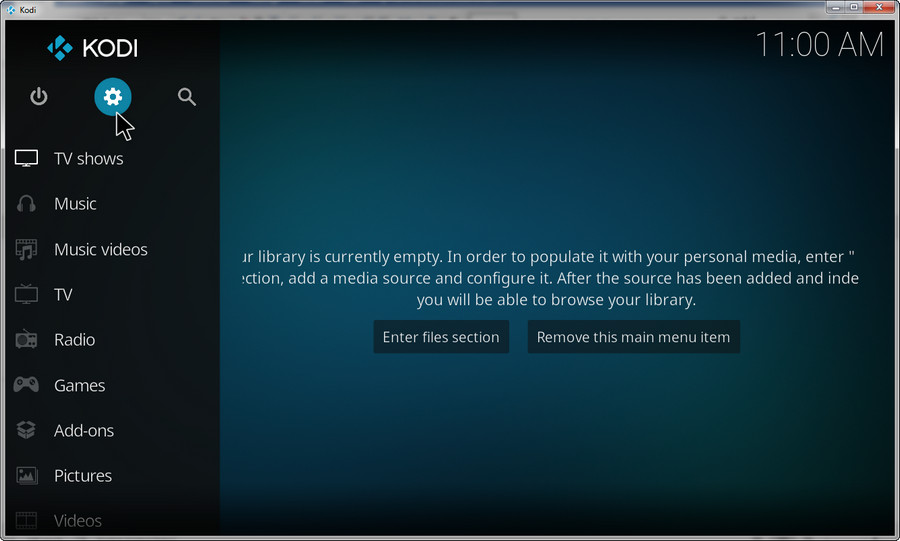
Step 1. Run Kodi and click Settings (the gear-shaped icon) on the top left of the main interface.
![]() by Vita
by Vita
Updated on July 11, 2023
Fusion offers loads of third-party add-ons and tools which can be installed on Kodi to stream movies, videos, music, and other media contents. Here we will walk you through how to install Fusion on Kodi firstly so you can install these add-ons with no effort. Read on!
Update: Fusion is currently unavailable.
One striking point distinguishing Kodi from other media players is that it allows you to install hundreds of plug-ins from a wide selection of repositories provided by Kodi itself, and also from external sources. Fusion addon for Kodi is such a good source where one can access multiple repositories and download add-ons for streaming media content and tools. It works like an app store in which a slew of add-ons and tools for different usages can be easily found and installed. Of course, it requires a bit of work to install Fusion on Kodi, which wouldn't be hard if you carefully follow the steps below:
Related Posts: Best Kodi Addons l Best Kodi 19 Matrix Builds l Best Live TV IPTV Addons for Kodi 19/18 – All Working, Free and Updated
To install Fusion on Kodi, enable the installation of addon from unknown sources first.
Step 1. Run Kodi and click Settings (the gear-shaped icon) on the top left of the main interface.

Step 2. Select System on the lower right corner.
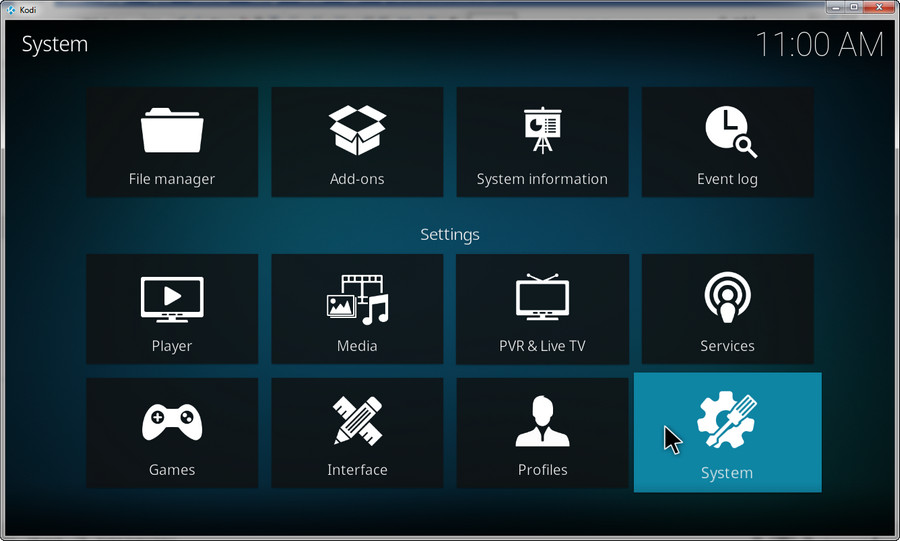
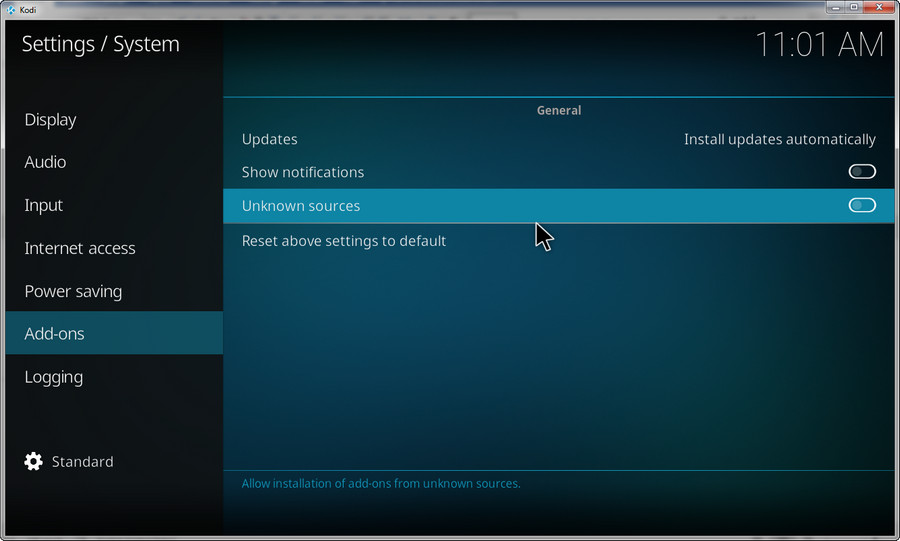
Step 3. Select Add-ons from the left column and enable Unknown Sources.
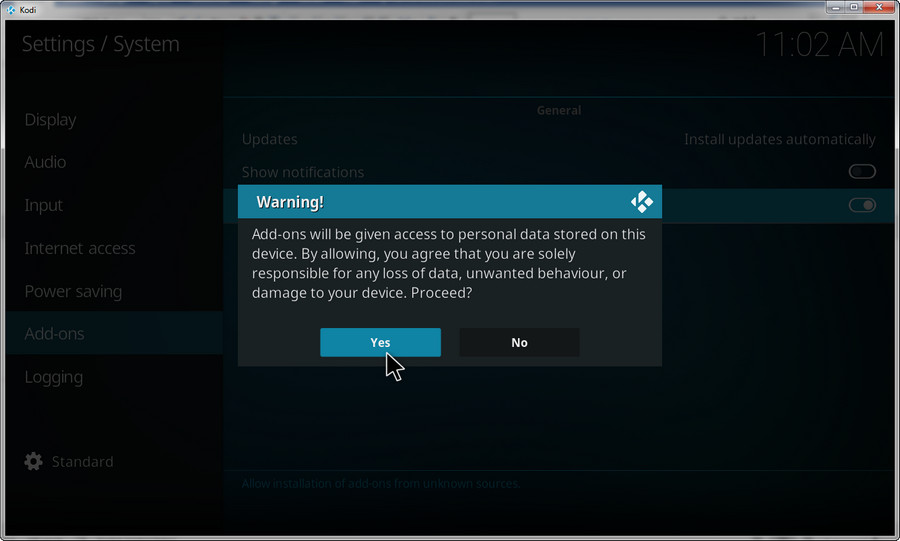
Step 4. A warning pop-up appears. Select Yes so that you can install add-ons from unofficial sources. Of course, Fusion is a well-tested and reliable add-on.
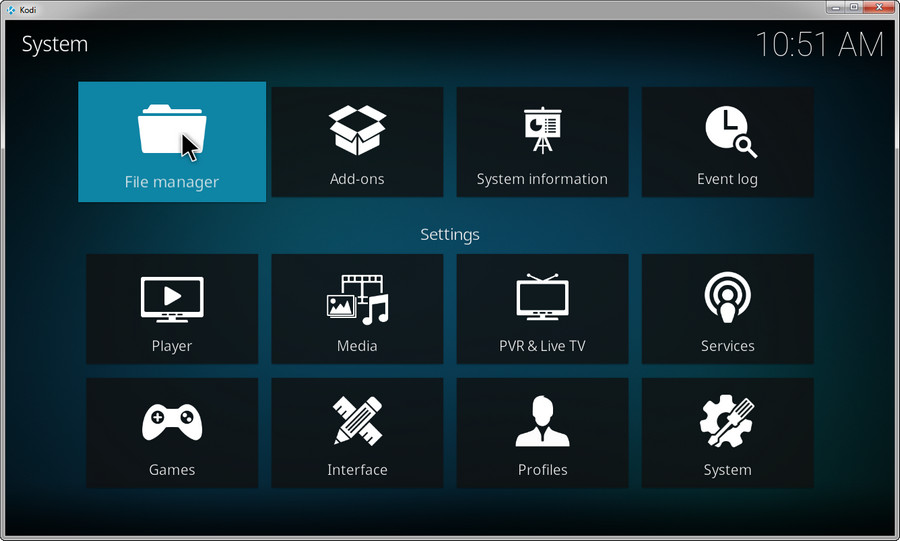
Step 5. Go back to the previous interface and select File Manager.
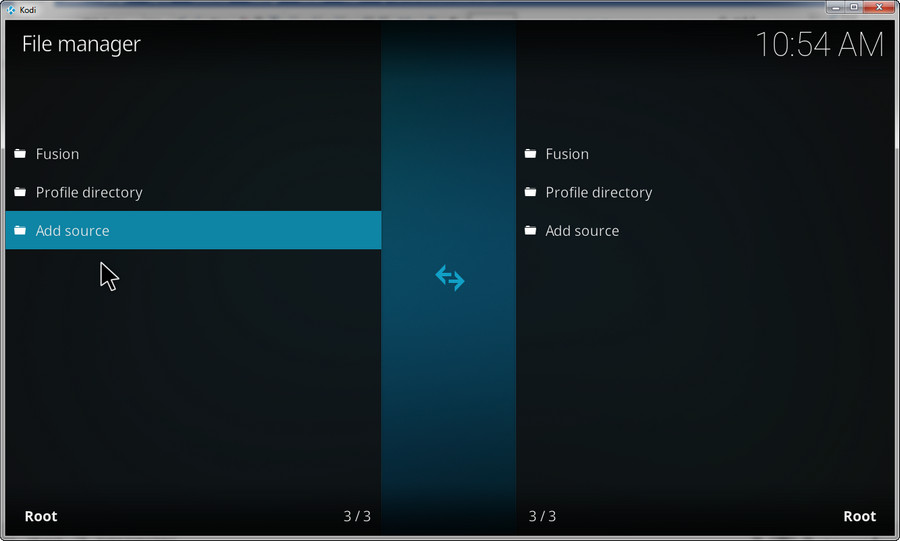
Step 6. Click Add Source. An Add file source window will pop up. If not, click and press Enter on your keyboard.
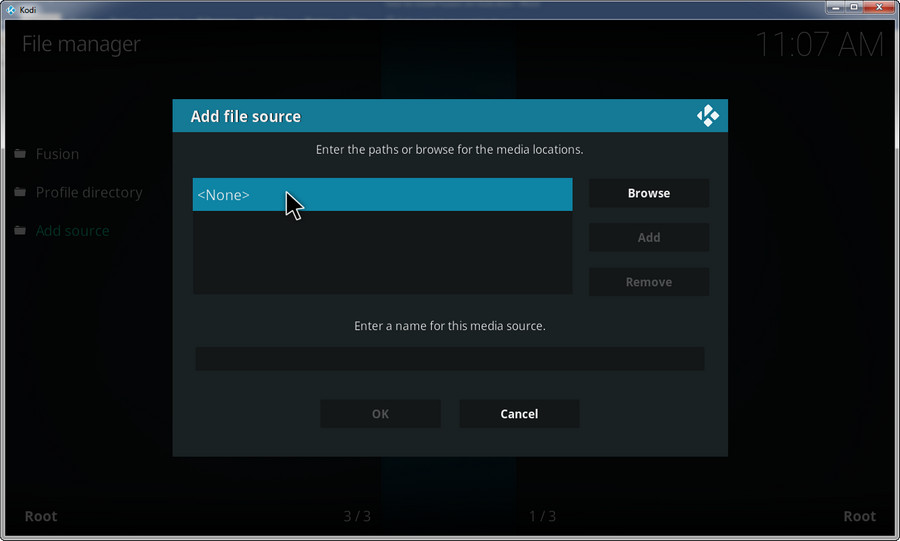
Step 7. Select None on the new dialog.
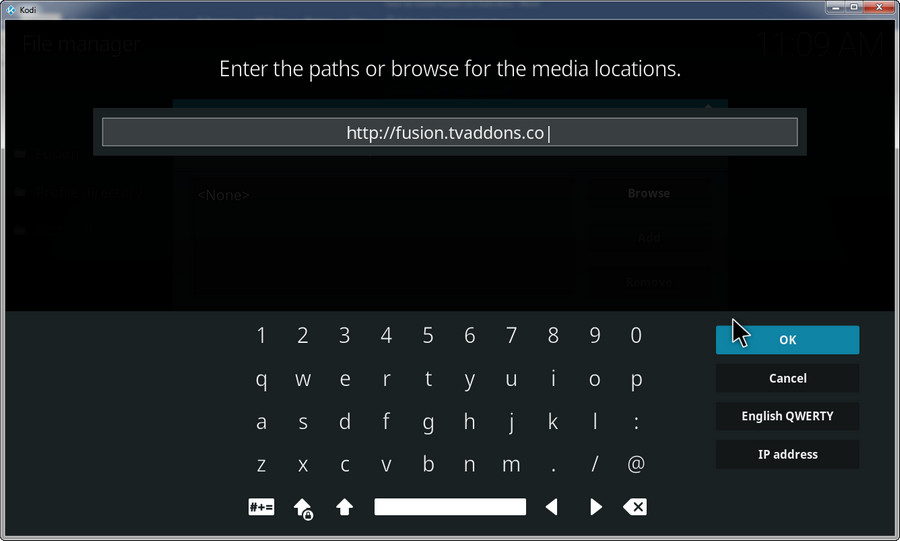
Step 8. Copy and paste http://fusion.tvaddons.co into the box, then click OK.
Step 9. Click the box under the Enter a name for this media source option and type the name according to your preferences but it's better to fill in a relevant name, such as Fusion. Then select OK.
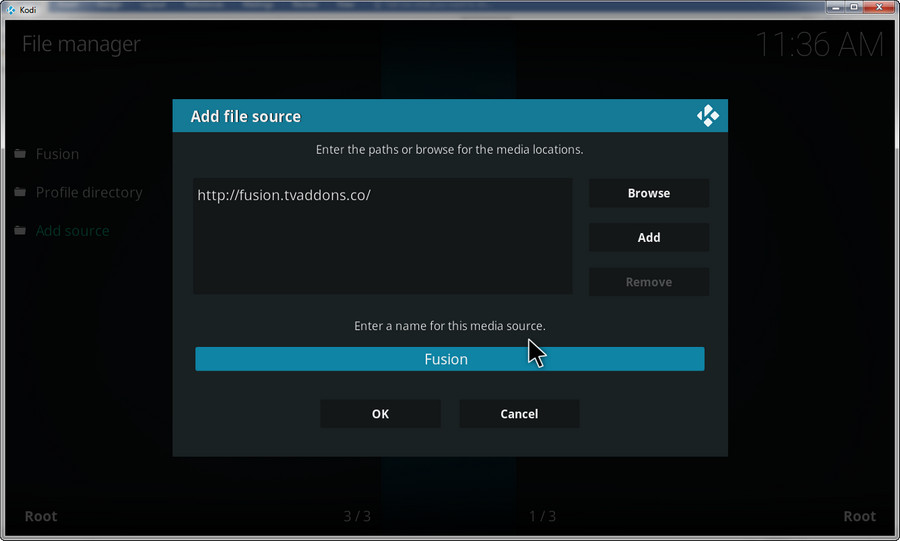
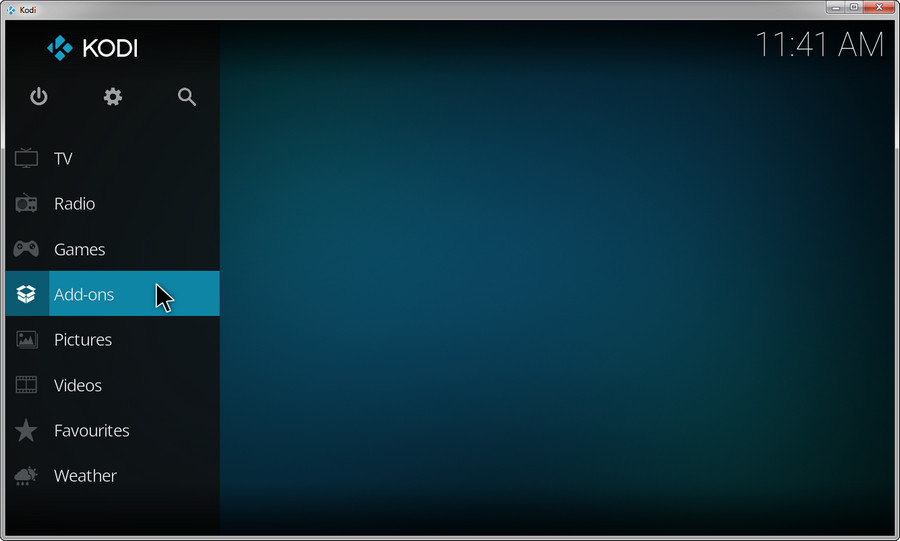
Step 10. Now the Kodi Fusion installer is ready. If you want to install add-ons from Fusion, then back to the main interface and select Add-ons.
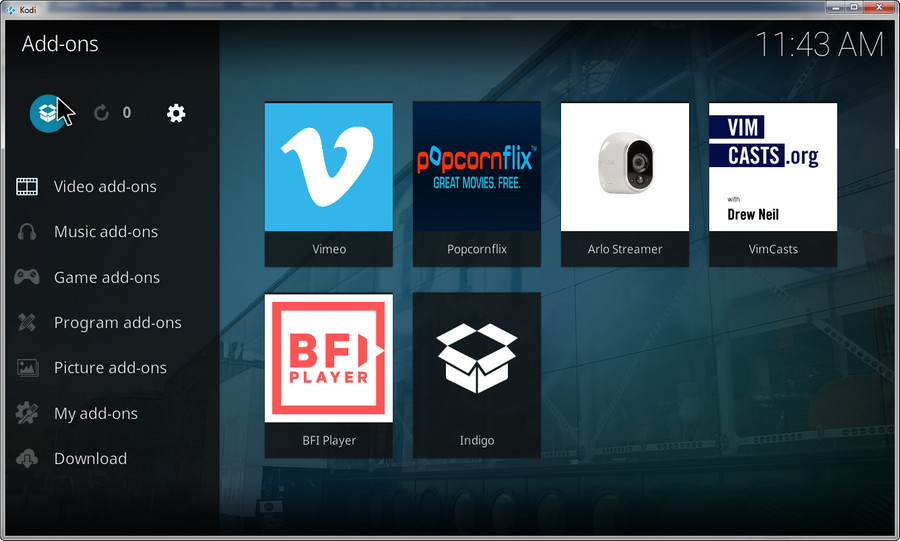
Step 11. Head to the packing box icon on the top left corner.
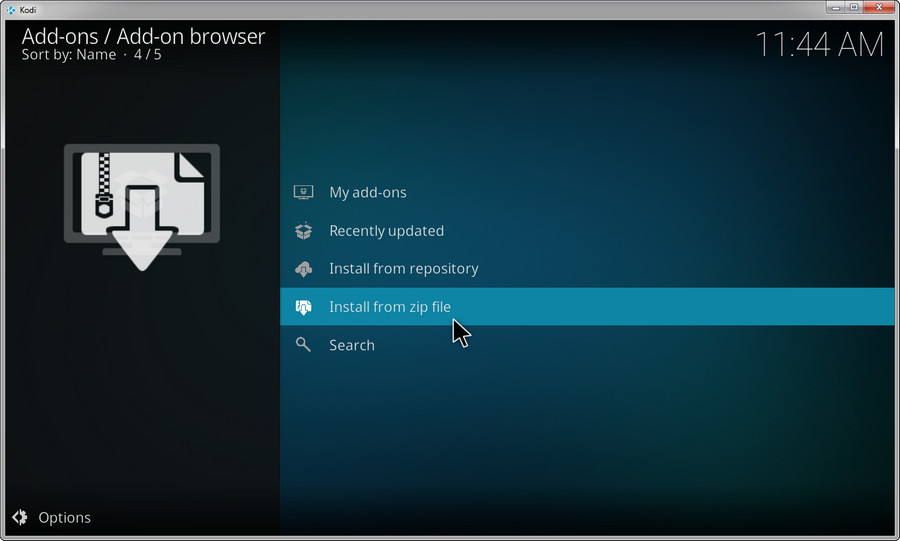
Step 12. Select the Install from zip file option on the new window.
Step 13. Locate and select Fusion.
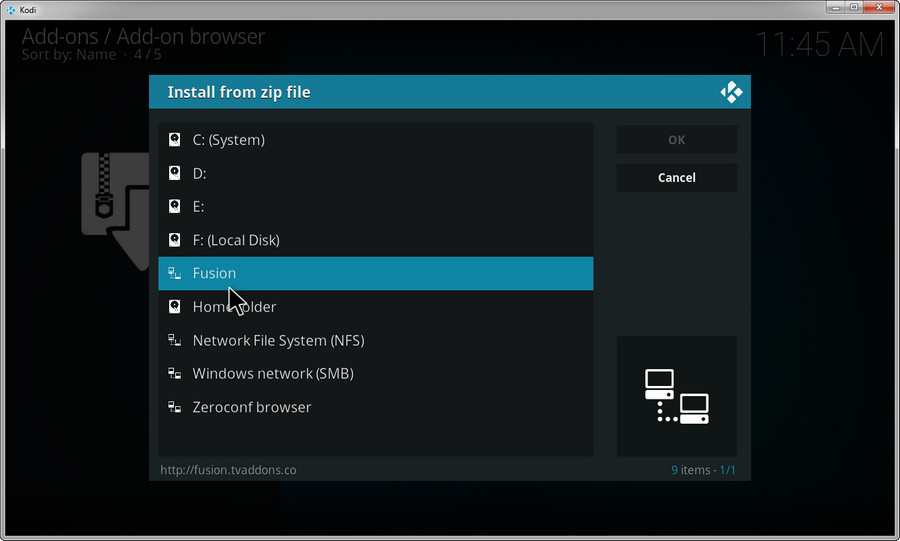
Step 14. After opening Fusion, you can see there are three options:
begin-here: There you can install Indigo addon that contains a full suite of diagnostic and repair tools.
kodi-repos: This category includes many kinds of repositories.
kodi-scripts: There are script modules for Kodi – Meta handler, ResolveURL, and URL resolver.
Here we elaborate on how to install Indigo on Kodi. Let's move to the next step.
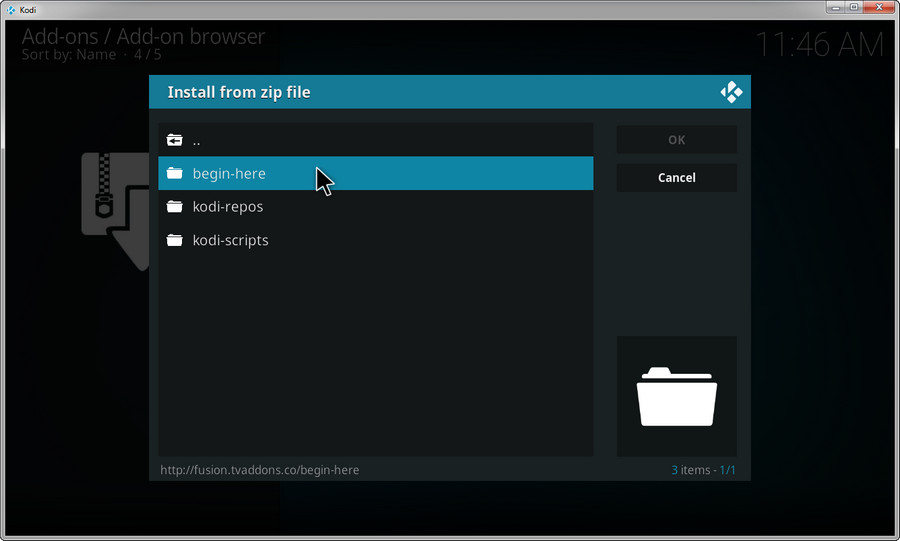
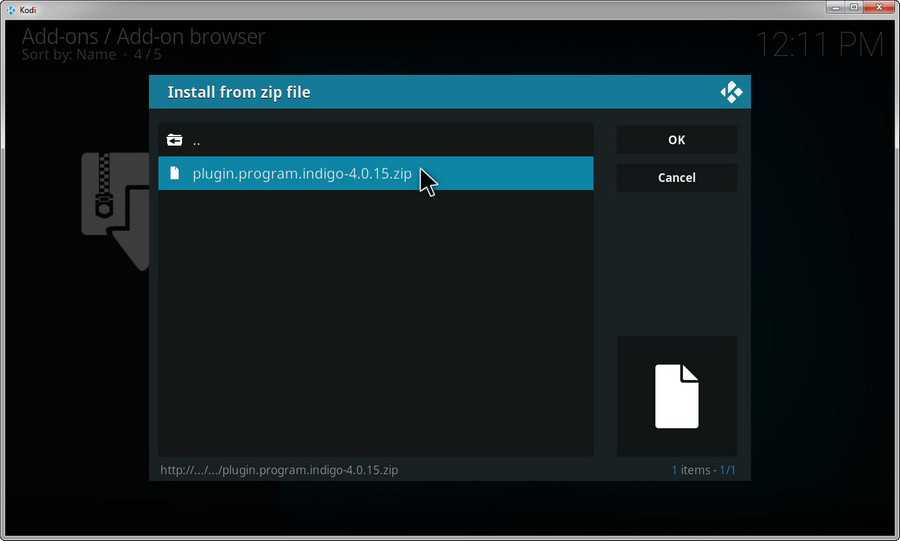
Step 15. Open begin-here, select plugin.program.indigo-x.x.x.zip. x.x.x here represent different versions of Indigo.
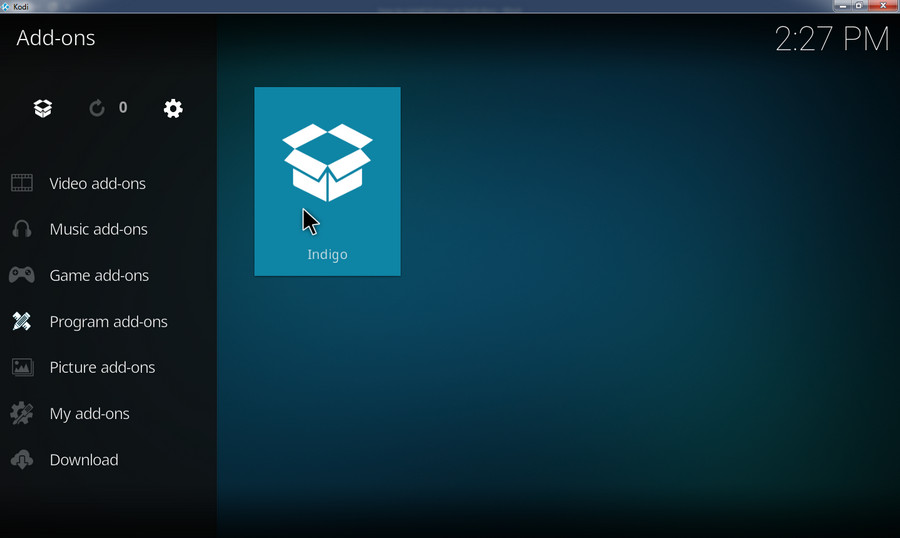
Step 16. A notification will pop up from the top right corner of the screen when the download process is finished. Go to the main window, select Add-ons > Program Add-ons where you can find and use the Indigo add-on.
It's also easy to install other add-ons and repositories from Fusion on Kodi. You can explore more tools and services suitable for you from Fusion now. Up to this point, we have explained the whole Kodi Fusion installation procedure. If this article helps you in some ways, please share it with more friends.