If you have plenty of video clips or movies encoded using Xvid codec and want to burn them to a blank DVD disk for viewing in a home DVD player, you'll probably find that only a limited number of shareware supports Xvid to DVD burning work. Fortunately, you're in the right place. The following article will elaborate on how to burn Xvid videos to DVD at no cost.
You're recommended to download the freeware to convert Xvid-encoded videos to DVD compatible format for fast DVD burning: https://www.videoconverterfactory.com/download/hd-video-converter.exehttps://www.videoconverterfactory.com/download/hd-video-converter.exe
Actually, only a handful of modern DVD and Blu-ray players own the ability to play Xvid files. You know what, Xvid is not a video format like the familiar MP4, MKV, etc., instead, it's a video codec that's used to compress and decompress video using MPEG-4 technology, which competes with DivX. So, if you want to play Xvid files in most DVD players, the most reliable method is to burn Xvid videos to a DVD-video disk.
On the other hand, XviD-encoded videos are generally stored in AVI and MKV containers which may not be supported by some DVD authoring programs. To save your time and budget, let's cut to the chase, I'll make a demonstration to show you how to burn Xvid files to DVD disk, totally free of charge.
Also Read: Burn DivX to DVD | Burn Camcorder to DVD | Burn AVCHD to DVD | Burn TS to DVD | Convert YouTube to DVD
Before going any further, make sure you've prepared the following stuff:
1. A blank recordable DVD-R or DVD+R disk, you can choose either single-layered DVD5 or double-layered DVD9 disk based on the file size of Xvid videos.
2. An internal/external DVD drive burner that can read, write and burn Xvid files.
3. DVD Flick, one of the few free DVD authoring programs, helps burn nearly any video file to DVD, including XviD-encoded videos. No worries, it's completely clean and safe without any adware, spyware or limitation.
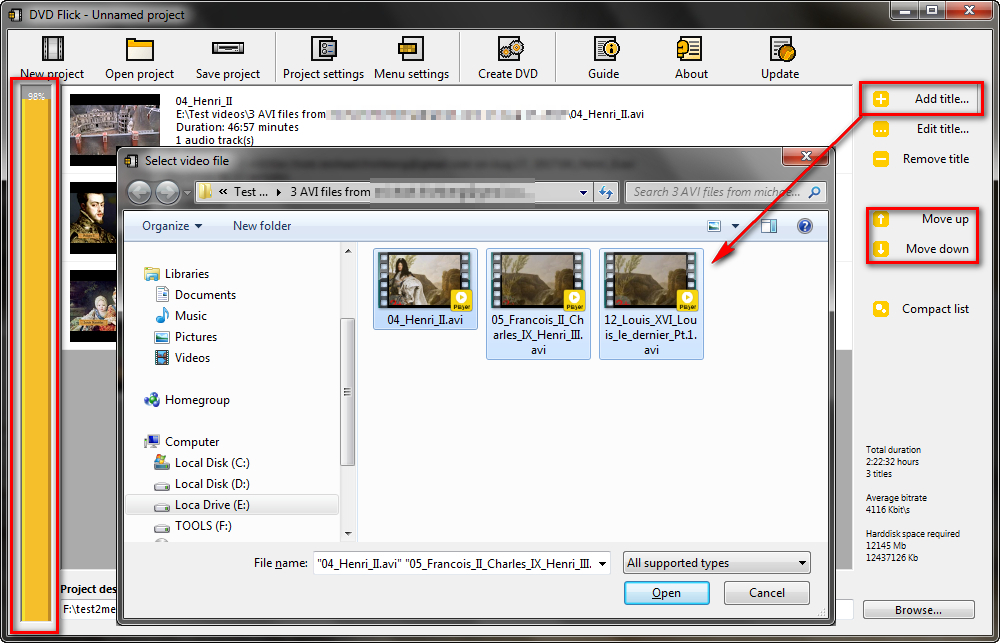
Insert a blank DVD5 or DVD9 disc into your internal/external DVD drive burner, then launch DVD Flick. Click "Add title" button on the right side to load the Xvid videos you want to burn. You're able to press "Move up" and "Move down" buttons to arrange the video sequence. Second thing to notice, is that DO NOT exceed the capacity according to the volume sidebar on the left.
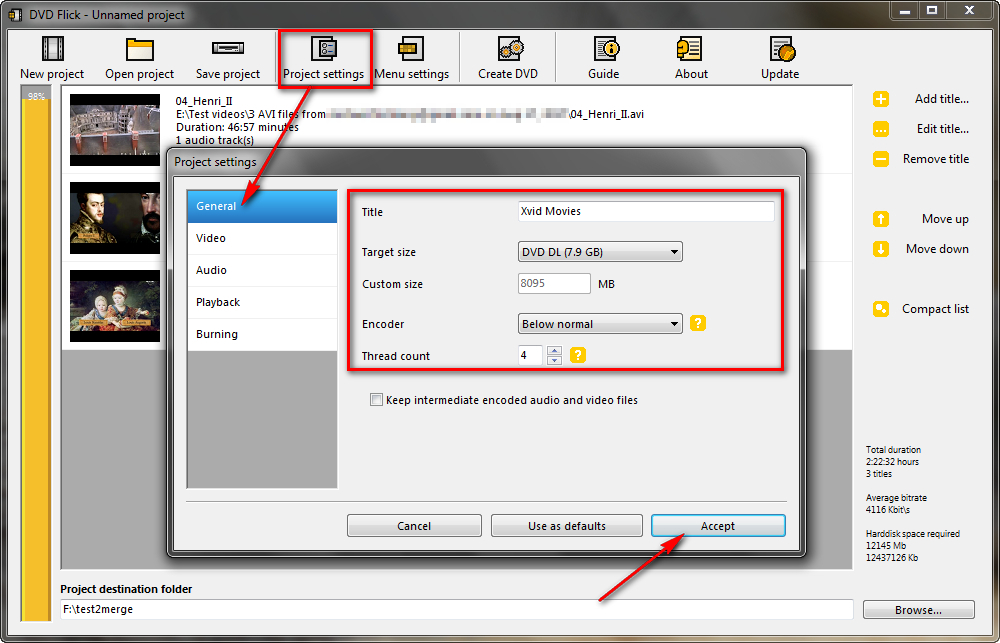
Click on "Project settings" on the top menu bar, go to "General" tab, you can change the title and video encoder right there. If you have inserted a double-layered DVD-9 disk into the DVD drive burner, select "DVD DL (7.9 GB)" in the drop-down list of "Target size".
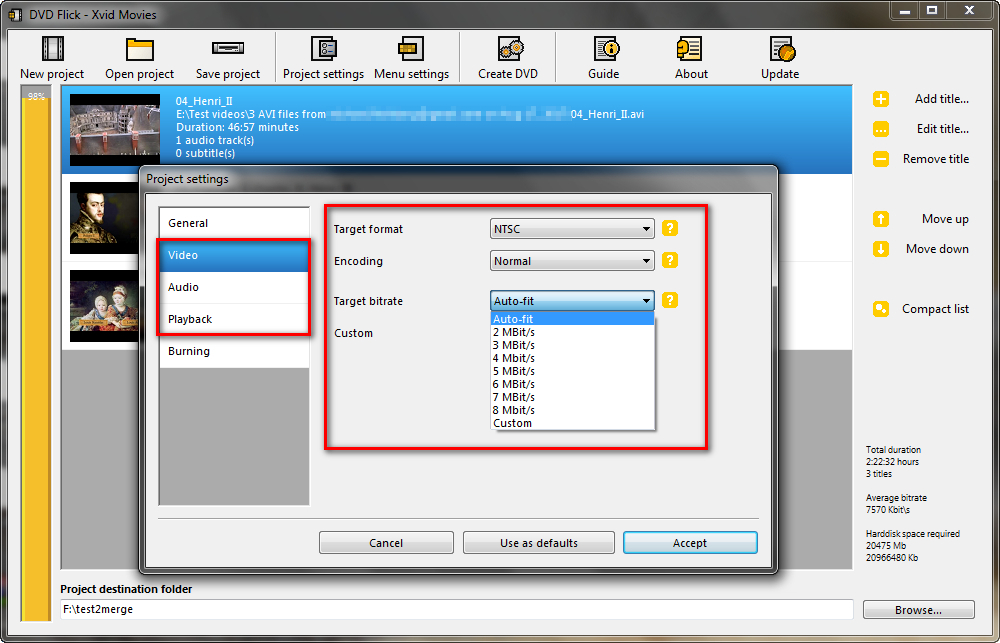
Switch to "Video", "Audio", "Playback" tabs in sequence to customize the DVD standard format (NTSC format or PAL format), encoding speed, bitrate, video deinterlace, audio volume and playback method as you wish.
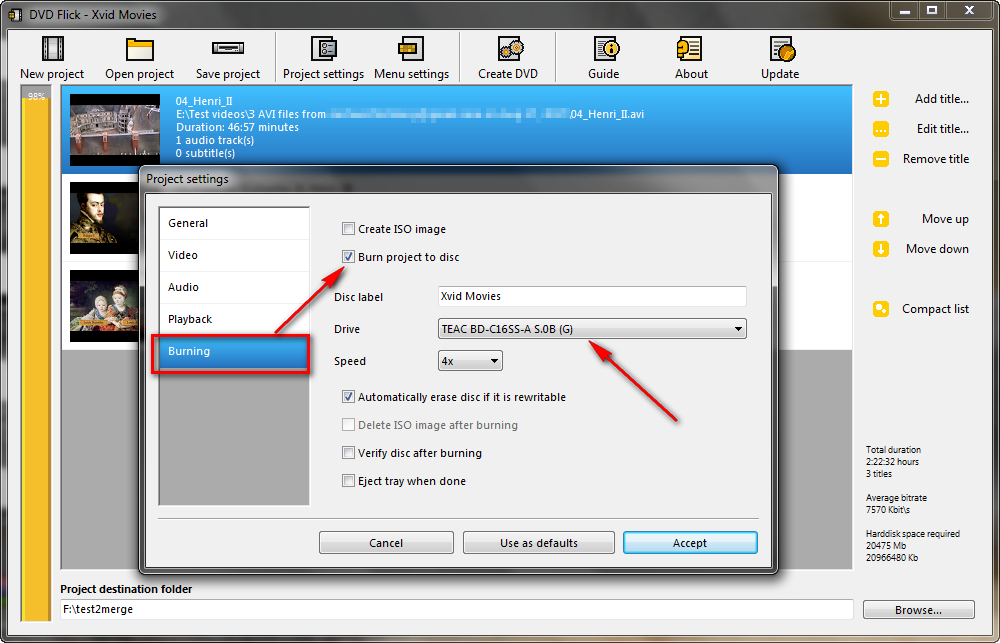
And most importantly, switch to "Burning" tab, ensure that the "Burn project to disc" option is checked, and you've chosen the correct DVD Drive burner, then press "Accept" button.
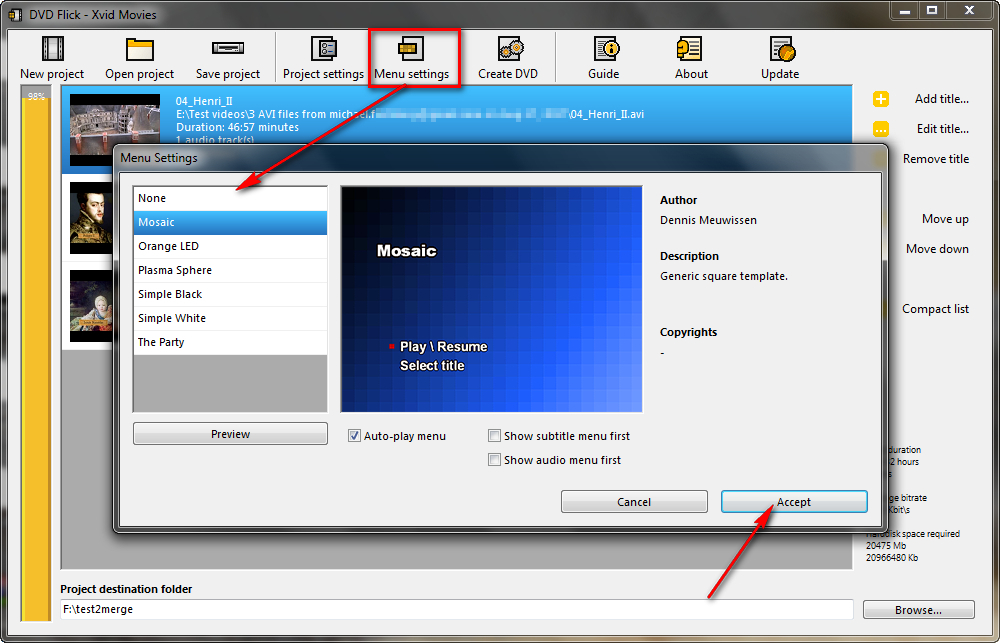
This is an optional step. You're allowed to add a DVD menu for easier navigation. Head over to "Menu settings" to choose a build-in DVD menu template and hit "Accept" button.
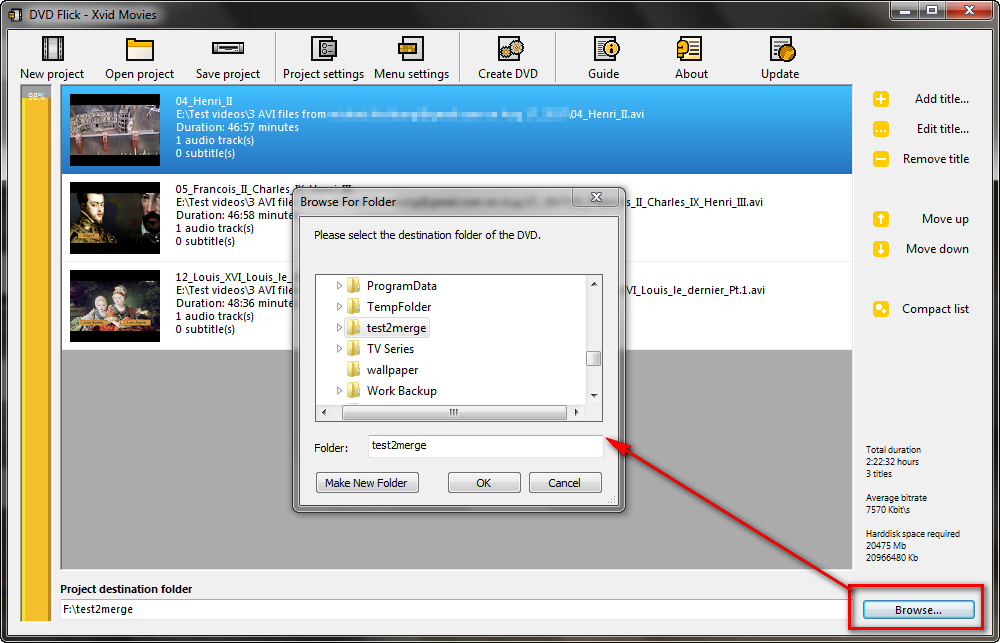
On the bottom of DVD Flick, click on "Browse" button to set the project destination folder to save this burning project work. You're best advised to create a new folder, because you'll be prompted to empty everything in the folder subsequently.
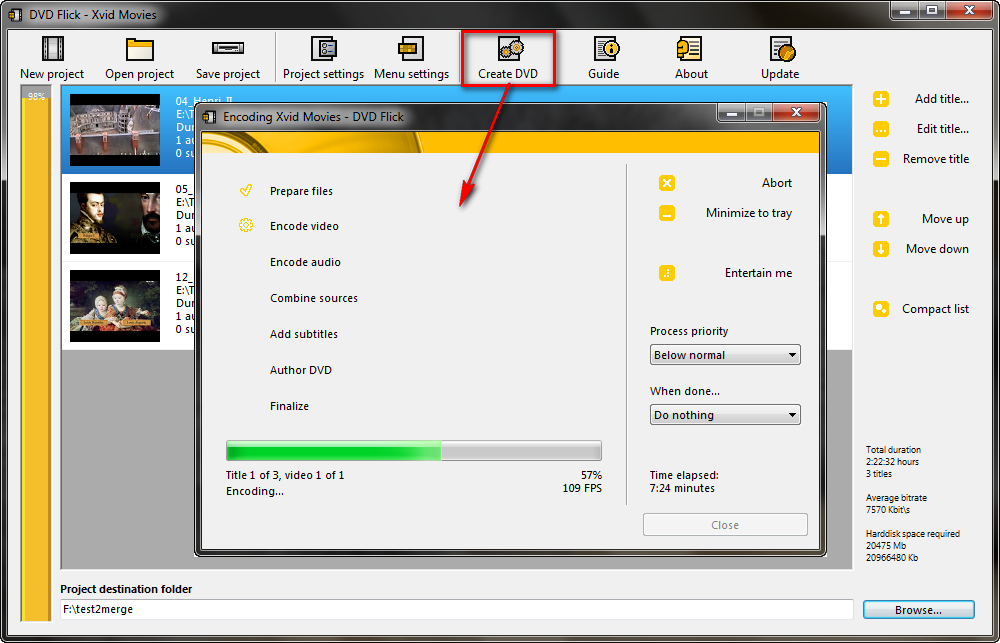
Finally, click on "Create DVD" button on the top menu bar and press "Yes" on the warning message window to start transcoding Xvid videos to DVD compatible format. It may take a while to finish the video encoding process, depending on your computer configuration and Xvid file size.
Once the encoding process is complete, ImgBurn will automatically pop up to take over the last step to burn Xvid to DVD disk. It will eject the DVD disk when the process is done, just be patient.
As you can see, it's fairly simple to convert and burn Xvid videos to a blank DVD disk that can play back on your home DVD player, media center or home cinema set. The main point is that, DVD Flick is totally free. Compared with those paid DVD creators, it's lightweight and easy to operate for green hands. In this guide, I hope everything is demonstrated in great detail. If there is anything unclear, you're welcomed to reach out to me at any time.

WonderFox DVD Ripper Pro
It's time to free up your DVD shelves. WonderFox DVD Ripper Pro enables you to digitize your own DVD collections and build the digital movies library on your local drive or media server, so that you can enjoy movies anytime and anywhere in just a few simple clicks without carrying the bulky DVD disk and DVD player. This program works well for either copy protected or homemade DVDs. Download and start your first trial.
Privacy Policy | Copyright © 2009-2026 WonderFox Soft, Inc. All Rights Reserved