Need to resize a video without a watermark? In real use, “resize” can mean several things: changing resolution, cropping the frame, switching aspect ratio for social media, rotating a vertical clip, or compressing the file size. This updated list covers free offline and online tools that can handle these jobs without forcing a watermark on the result.
Editor's Pick: WonderFox Free HD Video Converter Factory enables you to edit, compress, convert, and download for free: https://www.videoconverterfactory.com/download/hd-video-converter.exehttps://www.videoconverterfactory.com/download/hd-video-converter.exe
Top 11 Free Video Resizers and Croppers
Before picking a tool, decide what you actually want to change. If the video looks too large or too small, change the resolution. If it does not fit TikTok, Instagram, YouTube Shorts, or a widescreen player, change the aspect ratio or crop the frame. If the file is too big to upload or send, lower the bitrate, resolution, or codec settings. The tools below are grouped in the original order, but the notes have been updated to make the choice easier.
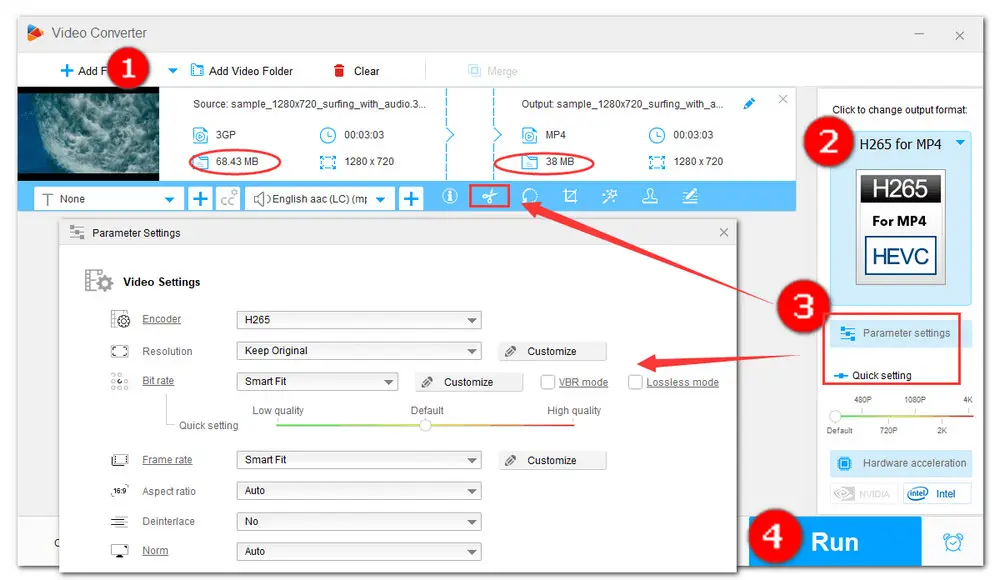
WonderFox Free HD Video Converter Factory is a free video resizer for Windows with no watermark. It is suitable when you want to change video resolution, aspect ratio, orientation, or file size without going through a complicated video editor. It also includes basic editing tools, so you can crop black bars, cut unwanted parts, rotate a sideways clip, merge clips, or convert the output to MP4, MOV, MKV, AVI, WebM, and more common formats.
For example, you can downscale 4K to 1080p, resize a video to 16:9, 1:1 or 9:16, crop out unnecessary edges, or compress a large video for easier sharing. Since the process is local, it is also a better choice than online tools for private videos or large files.
How to resize or crop a video: Add your file > choose an output format > open Parameter settings to change resolution, aspect ratio, bitrate, or frame rate. To crop the visible area, open the editing window, choose Crop, adjust the frame, and export the video.
Features:
Operating System: Windows 11/10/8/7.
→ Get Free HD Video Converter Factory Here → Get Free HD Video Converter Factory Here
WonderFox Free HD Video Converter Factory lets you import videos in common formats and resize them by changing resolution, aspect ratio, crop area, bitrate, or file size. It is free, clean, and easy to use for everyday video resizing tasks.
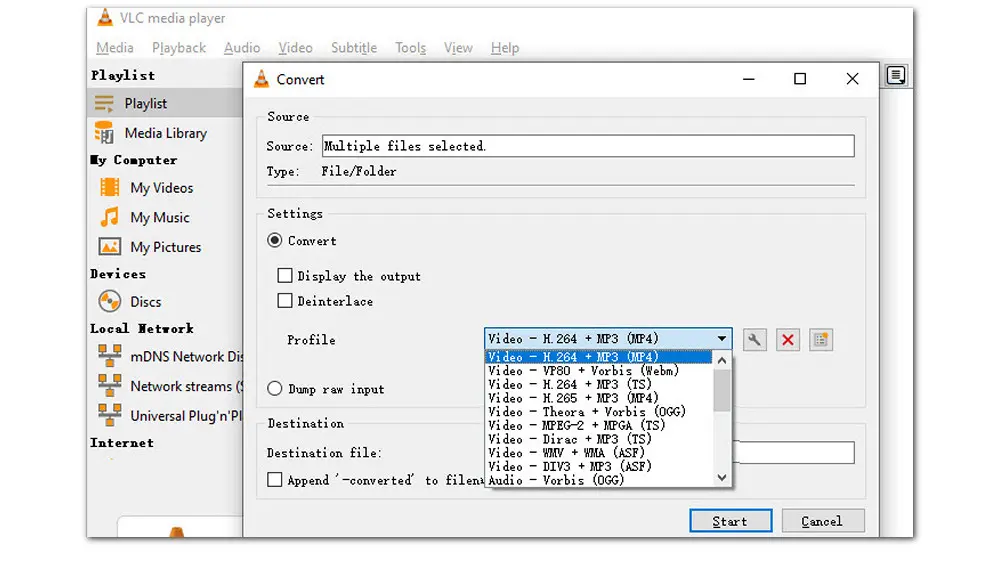
VLC is best known as a free media player, but it also includes conversion and filter options that can resize or crop a video without adding a watermark. It is useful for simple tasks such as converting a clip to another size, lowering bitrate, or applying a crop filter. However, the resize workflow is not as straightforward as a dedicated editor, so it is better for users who already have VLC installed and only need occasional adjustments.
Features:
Operating System: Runs on all platforms - Windows, Linux, Mac OS X, Unix, iOS, Android ...
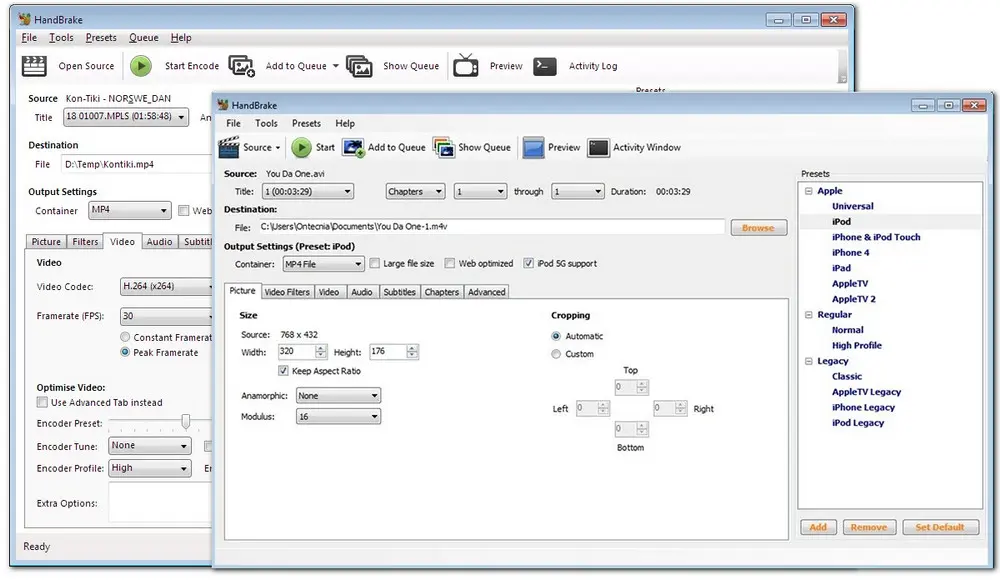
HandBrake is a free and open-source transcoder available on Windows, macOS, and Linux. It is strong at changing video resolution, cropping black bars, adjusting dimensions, and compressing videos with modern codecs such as H.264, H.265, AV1, VP9, and more. It is a good choice when you want more control over quality and compression, but beginners may need a little time to understand its settings.
Features:
Operating System: Mac, Windows, and Linux
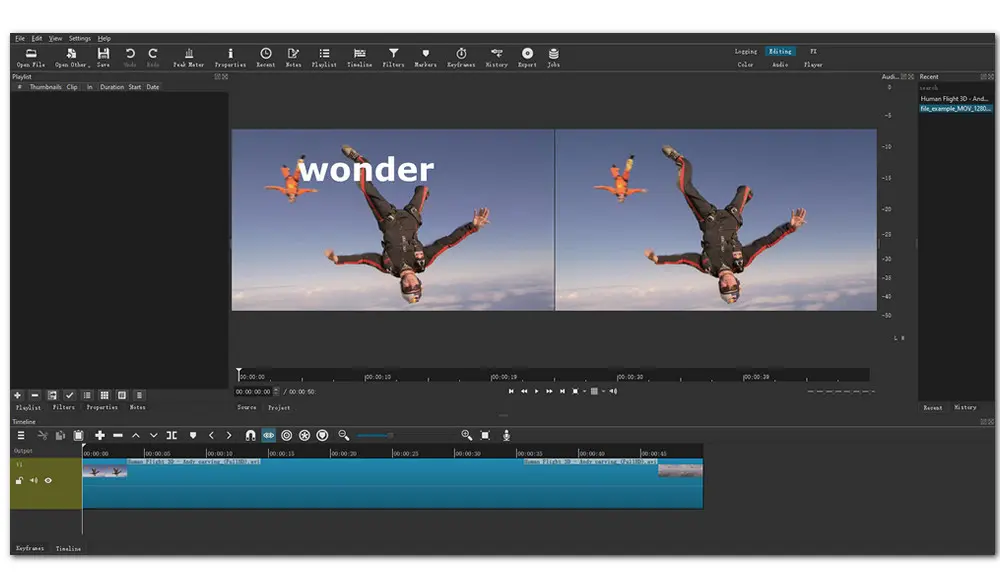
Shotcut is another open-source video editor that can resize, crop, and export videos without a watermark. It is more of a timeline editor than a one-click converter, so it is useful when resizing is only part of a larger edit. You can set a project resolution, crop the visible frame, export in a smaller size, or adjust codec and bitrate settings. Based on FFmpeg, it supports many video, audio, and image formats.
Features:
Operating System: Available on Windows, Linux, and macOS
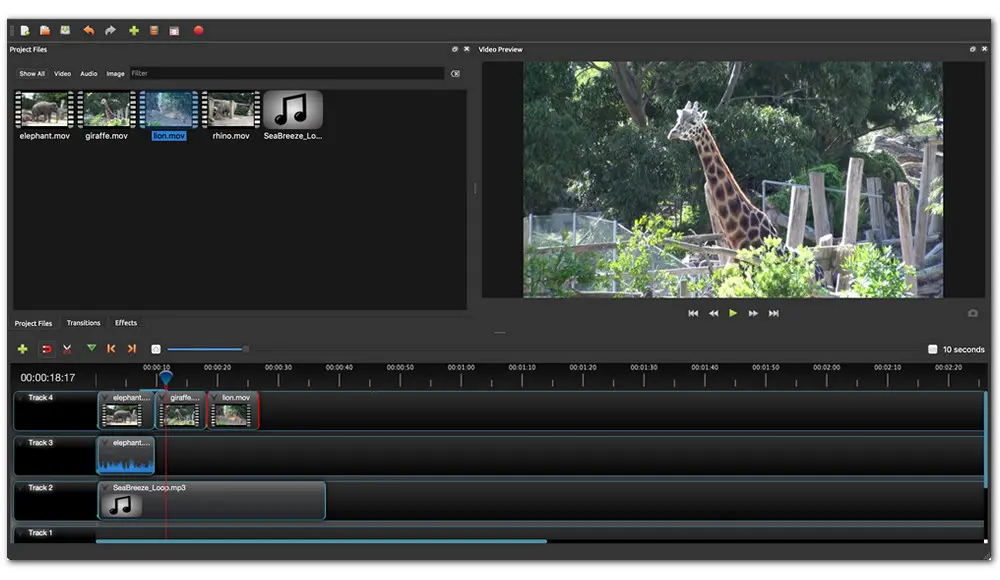
Based on the FFmpeg library, OpenShot supports many video, audio, and image formats. You can use it to crop a video, scale a clip on the canvas, trim unwanted parts, add simple effects, and export the result without a watermark. It is easier than many advanced editors, but it is still a full timeline editor, so it may feel excessive if you only want to quickly compress one video.
Features:
Operating System: Linux, OS X, and Windows
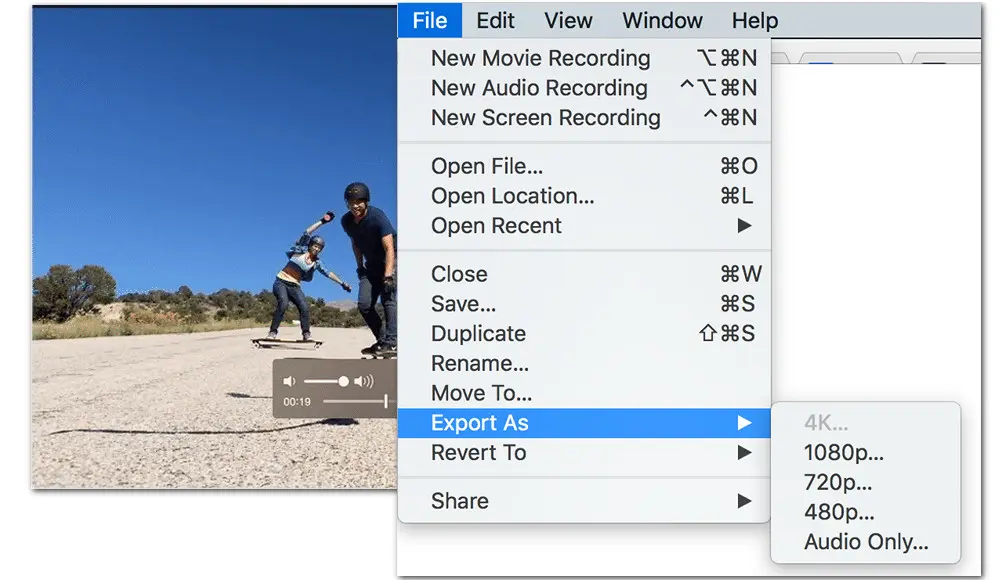
QuickTime Player is the built-in media player on macOS. It is not a full video resizer, but it can help with simple trimming, rotating, and exporting. If you only need to shorten a video or save it at a lower resolution on a Mac, QuickTime is convenient. For cropping the frame or setting a custom aspect ratio, use iMovie, a dedicated converter, or another editor instead. Note that QuickTime 7 for Windows is no longer supported by Apple, so it should not be recommended as a Windows video resizer.
Features:
1. Built into macOS;
2. Trim and rotate videos quickly;
3. Export to a smaller resolution in simple cases.
Operating System: macOS
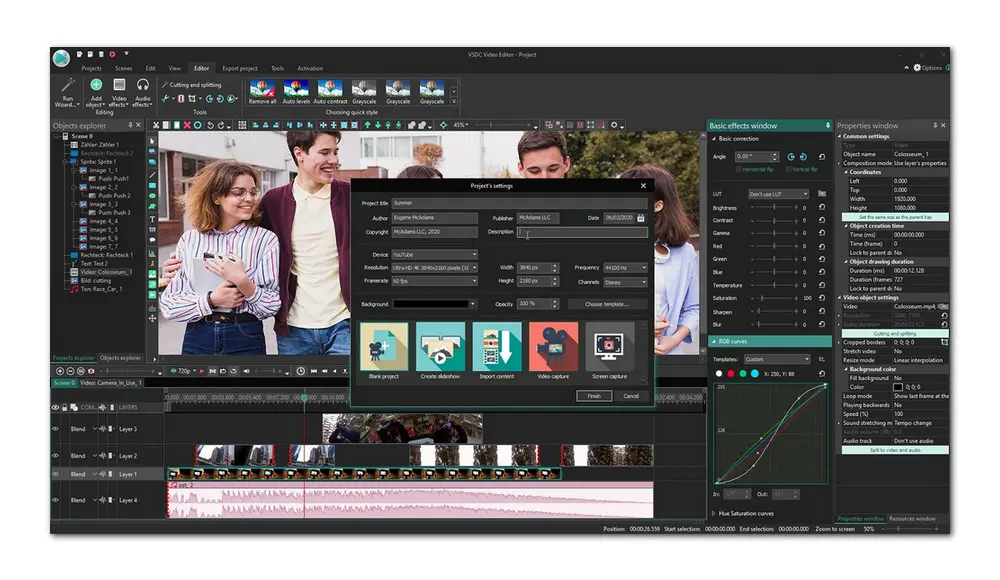
VSDC Free Video Editor is a good choice for Windows users. This freeware comes with many advanced editing features and supports a wide range of popular video and audio formats and codecs. To resize video without watermark in VSDC, you can change the project resolution, crop the frame, adjust export settings, or split a large video file into parts. It then exports the result to popular formats or device presets.
Features:
Operating System: Windows
You can also resize videos with a free online video resizer. Web-based tools are convenient because they require no installation and work on most modern browsers. But for large, private, or high-resolution videos, desktop software is usually faster and safer because you do not need to upload the file. The following online options are better for quick edits, small clips, and social media resizing.
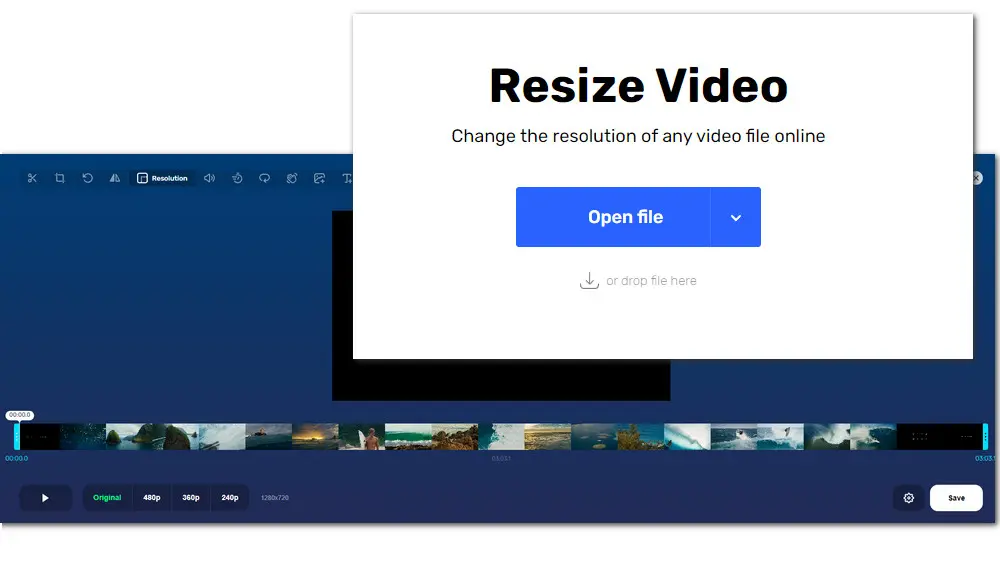
Online Video Cutter is a clean and easy web tool for changing video resolution and aspect ratio without installing software. It supports mainstream formats such as MKV, MP4, AVI, FLV, MOV, 3GP, WMV, and M4V. You can crop video, rotate footage, change speed, and make other simple edits. Large files still depend on upload speed and browser stability, so it is better for short clips than long movies.
Features:
Visit here: Online Video Cutter
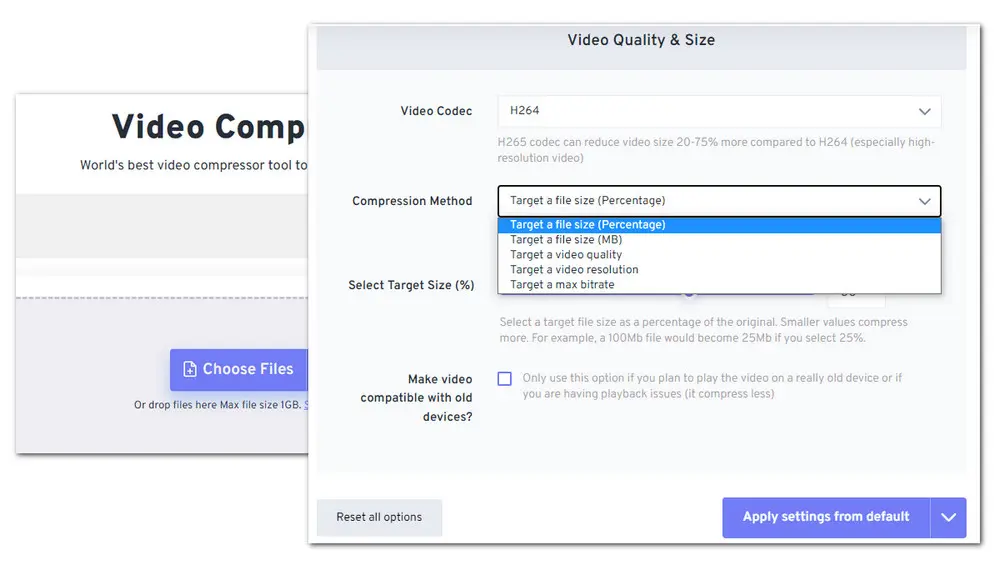
FreeConvert is simple to use. Drag and drop a video, choose the target setting, and open the advanced options to change resolution, codec, quality, or bitrate. It can also trim videos online, which makes it useful when you want to reduce file size by cutting unnecessary parts. The free upload limit shown on FreeConvert is 1GB, so very large videos may require another tool or a paid plan.
Features:
Visit here: FreeConvert
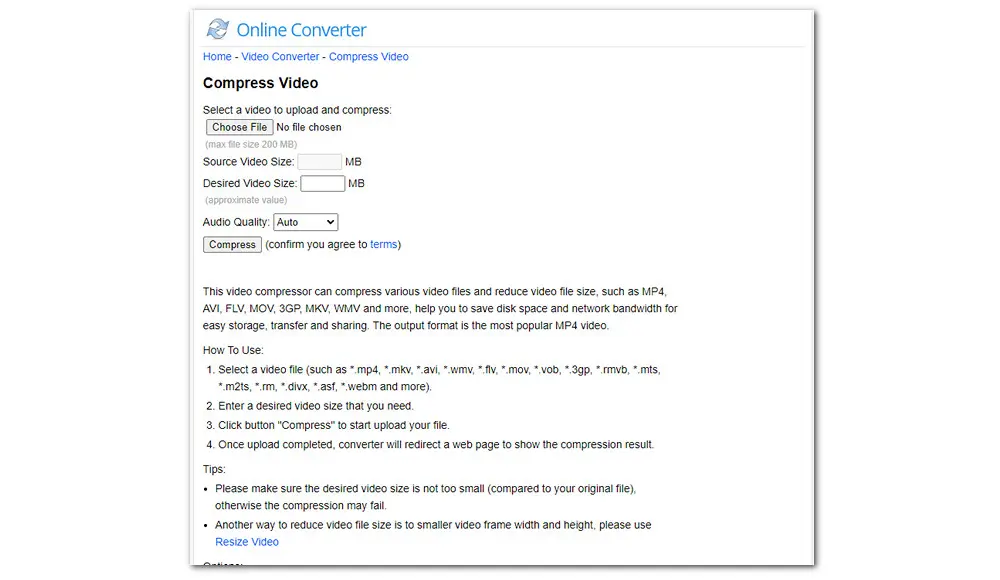
Online Converter is worth trying if you need a very simple video compressor. It is not as flexible as a full editor, but even users with little compression knowledge can reduce video size online without watermark. For example, when compressing a video to 25MB, you can upload a common video format and let the tool create a smaller MP4 file.
Features:
Visit here: Online Converter
Clipchamp is Microsoft’s browser-based video editor and is also available as a built-in app on many Windows 11 PCs. The free plan can export videos up to 1080p without a watermark, which makes it a practical choice for social media resizing. You can crop, rotate, trim, split, and resize videos for YouTube, TikTok, Instagram, or other platforms. Keep in mind that 4K export and some premium stock assets require a paid plan.
Features:
Visit here: Clipchamp
Resizing changes the video dimensions, such as 3840×2160 to 1920×1080. Cropping removes parts of the visible frame, such as cutting off black bars or trimming the sides to make a 16:9 video fit 9:16. Many users need both: crop first, then resize or export to the target resolution.
It depends on the settings. Downscaling from 4K to 1080p can still look good if the bitrate is reasonable. But heavy compression, very low bitrate, or repeated re-encoding can make the video blurry or blocky. For best results, export once from the original file.
Common choices are 16:9 for YouTube videos, 9:16 for TikTok, YouTube Shorts, and Instagram Reels, and 1:1 for square posts. Exact recommendations can change by platform, so check the upload page if you are preparing an important project.
They are convenient for short, non-sensitive clips. For private recordings, business videos, or large files, offline software is usually a safer choice because the video stays on your computer and does not need to be uploaded.
For Windows users, WonderFox Free HD Video Converter Factory is the most direct option in this list because it combines resizing, cropping, compression, and format conversion in one place. For Mac users, QuickTime is fine for quick trimming, while HandBrake or Shotcut is better for real resizing and compression.

Kevincy joined the WonderFox team in 2014 and has been a senior columnist ever since. With over two decades of experience in the video editing industry, he shares tutorials, tips, and how-to guides on video/audio processing and personal DVD backups. Family-oriented and passionate about helping others, he is dedicated to making video and audio processing easier for readers.
![]()
![]()
![]()
![]()

WonderFox HD Video Converter Factory Pro
WonderFox HD Video Converter Factory Pro is a stronger option for users who need batch resizing, faster conversion, more output presets, video compression, screen recording, and advanced parameter control. It can help resize videos for phones, TVs, social media, email, and storage without complicated editing steps.
Privacy Policy | Copyright © 2009-2026 WonderFox Soft, Inc. All Rights Reserved
