Microsoft PowerPoint is a well-known presentation program. It provides an intelligible way to create and design impressive presentations. Meanwhile, PowerPoint allows users to trim or cut video length and save as a separate media file. This tutorial expands on how to trim a video in PowerPoint. Just keep reading if you're interested.
Specifically, when we insert a video into a PowerPoint presentation file, we may only want to display a section of the video to our audience. Then, the built-in video trimming feature can be greatly helpful for this purpose and won’t take you much effort.
Here we demonstrate how to trim a video on PowerPoint 2016 for Windows. The method can also apply to other newer versions like PowerPoint 365, PowerPoint 2019, PowerPoint 2013, and PowerPoint 2010 on both Windows and Mac.
Related: Fix Codec Unavailable PowerPoint Errors l How to Play Embedded Video in PowerPoint l Convert PowerPoint to Video
WonderFox Free HD Video Converter Factory can trim videos from a computer and websites while keeping high quality. It supports virtually all video and audio formats and 500+ websites including YouTube, Vimeo, Facebook, Dailymotion….
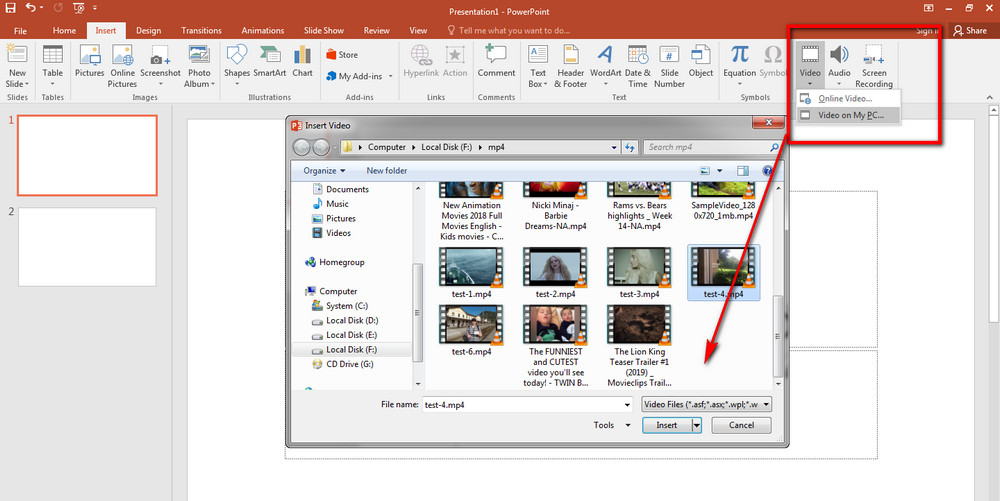
Step 1. Open a PowerPoint presentation file, on the ribbon, head to Insert, then select Video > Video on My PC.
Step 2. Select the target video and click Insert.
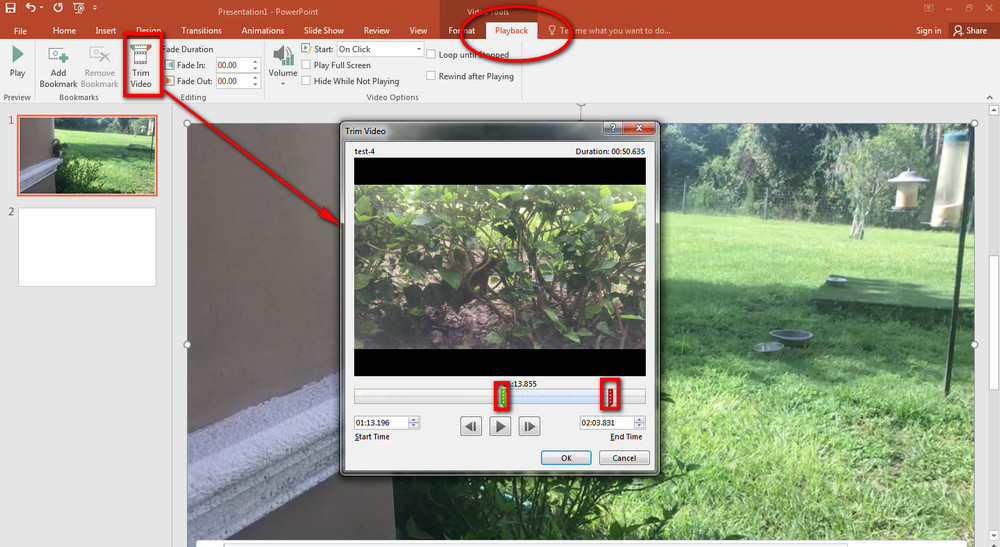
Step 3. When the video is inserted into the presentation file, there will be a Video Tools tab. Select Playback beneath it.
Step 4. Click Trim Video option. The Trim Video dialog appears.
Step 5. To decide the start point and the end point of the section you want to trim, you can follow the procedure:
Click the Play button.
When it reaches the point that you want to start the trimming, click Pause and drag the green marker to the exact point.
Next, continue to play the video and when it arrives at the point you want to end the trimming, pause and drag the red marker on the right to that point.
Moreover, you can make use of the Previous Frame and Next Frame buttons to determine the start and end points more accurately.
There are also the Start Time and End Time boxes in which you’re able to fill in the times manually.
The total length of the cutted video will be displayed at the same time.
Step 6. Click on OK to save the setting.
Microsoft PowerPoint includes an online video insertion function that allows you to add videos from YouTube. Besides, you’re able to adjust the video’s attributes for trimming. But this feature is for PowerPoint 365 or PowerPoint 2019 and it requires Internet Explorer 11 on your computer. What's more, if a YouTuber disable the video embedding feature, you can't insert the YouTube video either.
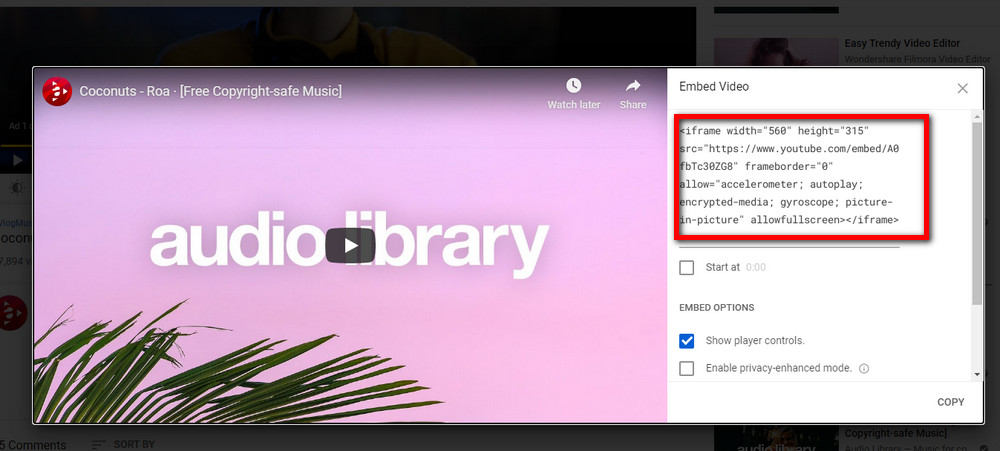
Step 1. Visit YouTube, open the video you want to insert into PowerPoint.
Step 2. Hit the Share button below the video player, select Embed and there will generate a string of codes.
Step 3. Copy and paste the embed code into a Notepad file, then modify the code to trim it. For example, if you want the video above to be played starting from 1:00 and ending at 2:30, you can add ?start=60&end=150&rel=0 before the video URL as follows:
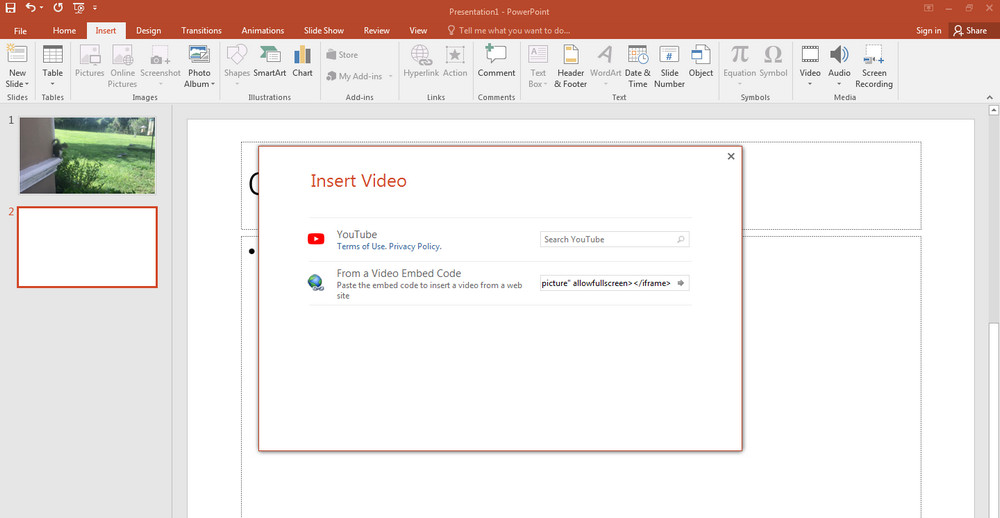
Step 4. In the PowerPoint presentation file, click Insert, then select Video > Online video.
Step 5. Paste the modified embed code into the embed code box.
Step 6. Click the Insert button.
Now you can display the presentation with the trimmed video to your viewers. If you want to save the clip to your computer, then you need to further make some settings, as the following shows.
Microsoft PowerPoint doesn’t support exporting online videos. This part is for videos from local hard drive only.
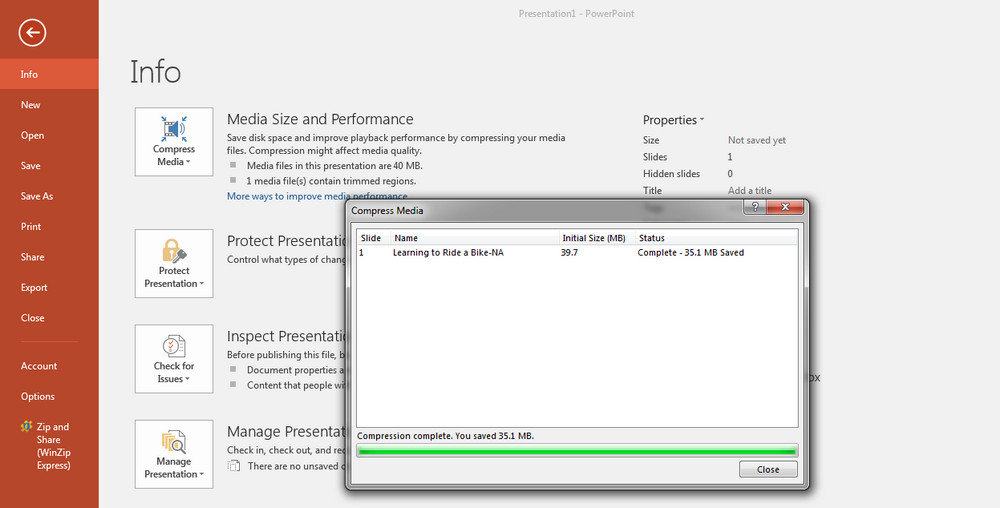
Step 1. Click File on the top ribbon.
Step 2. Select Compress Media option, then select a quality. It will take a while for finishing the compression.
Step 3. Open the slide embedded with the video, right click on the video, and select Save media as.
Step 4. Specify the file name and destination. Hit Save.
Using PowerPoint to trim videos is practical when you only need to use the file within the presentation files. However, if you export the trimmed video, the quality will be apparently downgraded, which may be far below your expectation. So we also introduce a special Windows video trimmer – WonderFox Free HD Video Converter Factory. It can trim both online videos and videos on your computer hard drive. The program is designed for simple video processing tasks so you can easily handle it.
Before start, please Free Download Free Download and install the software on your PC.
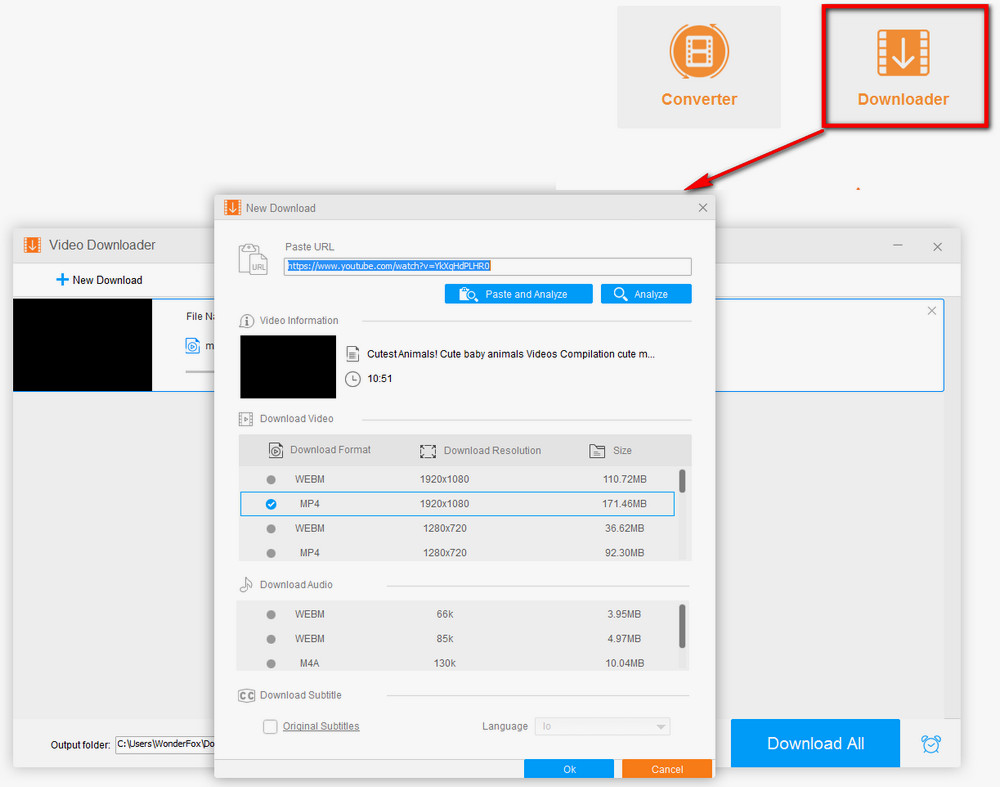
If you want to trim a video from YouTube, Vimeo, or other video-hosting websites, download the video firstly:
Copy the video web address (URL). Enter Downloader, click + New Download. On the New Download window, select Paste and Analyze. The analysis process starts. When it finalizes the analysis, choose a video format and resolution under Download Video, then click OK and Download All.
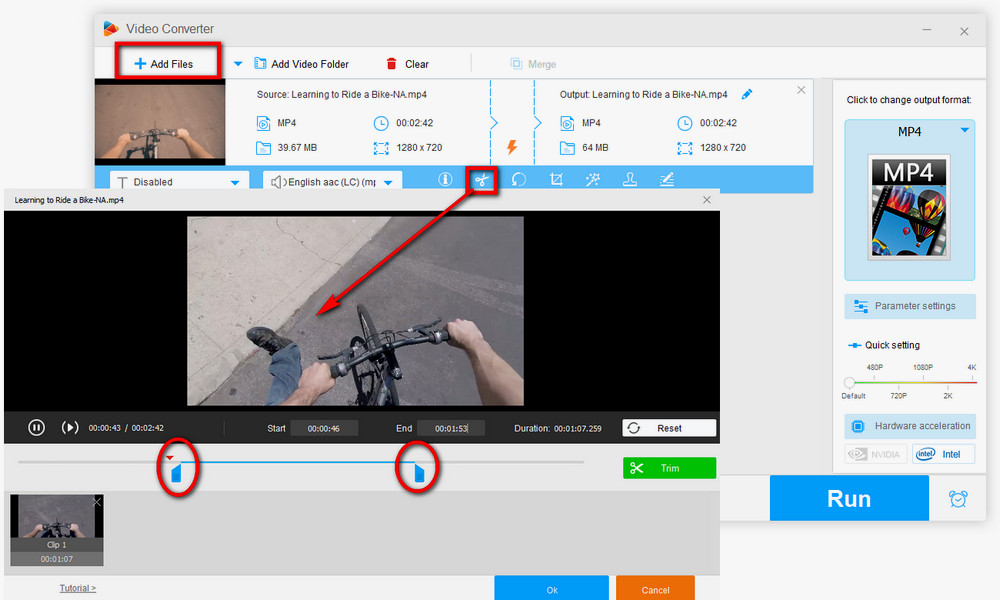
Back to the main interface and select Converter. Click on Add Files, select the downloaded video or any other video on the local folder, which you want to trim, click Open.
On the menu bar below the imported video, select scissors icon. Drag the two blue markers to determine the start pointing and end pointing. You can also fill in the accurate times. After you have selected the section, click Trim, then OK.
WonderFox Free HD Video Converter Factory can also split a video into multiple parts.
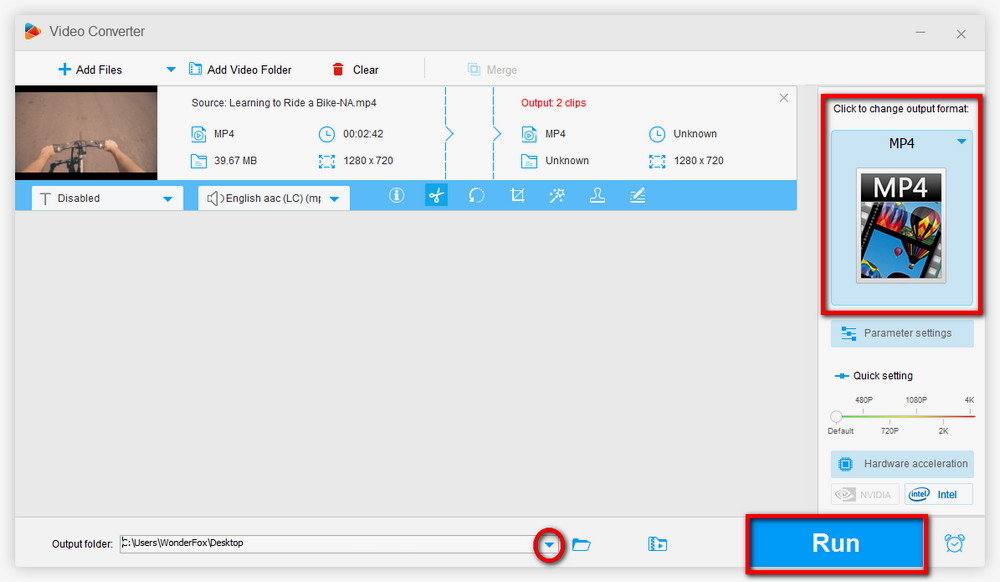
Hit the format icon on the right side, then select a video format if you have the demand.
Hit the triangle button at the bottom and specify the output path. Finally, click on Run.
Also Read: crop video | Rotate Video | Merge Video
Letting PowerPoint trim video is useful for better presentation. But people primarily delete undesired parts from a video or reduce video file size through video trimming. PowerPoint is still not as qualified as a video editor. So if you’re looking forward to bells and whistles, a dedicated video editing software should address your demands more.

WonderFox HD Video Converter Factory Pro
A mighty program gathers multiple tools in one body. It’s more than a video editor, but also a video converter, downloader, screen capture, GIF maker, and toolkit of more other gadgets. Tackle multiple video processing missions based on only one installation.
Privacy Policy | Copyright © 2009-2026 WonderFox Soft, Inc.All Rights Reserved
