If the issue still exists after checking the audio device, you can check the audio hardware in Premiere Pro. The audio hardware issue can happen when moving between headphones and internal speakers; your device might recognize you have removed the headphones, but Premiere Pro hasn’t.
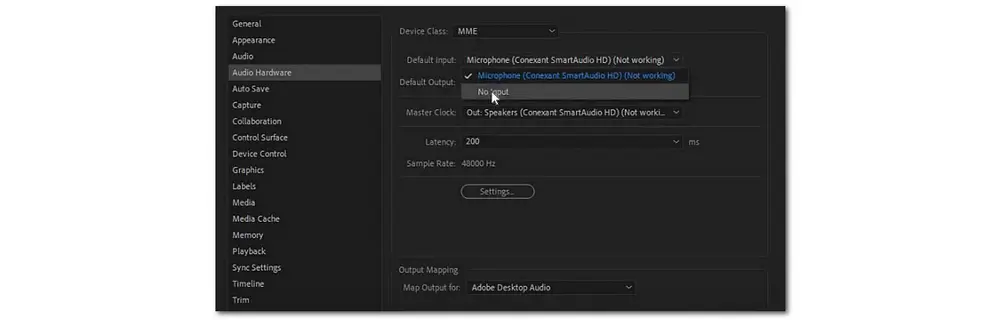
Step 1. Open the "Preferences" tab in Premiere Pro and go to the "Audio Hardware" tab.
Step 2. Make sure the "Default Input" setting matches the microphone you are using.
Step 3. Make sure the "Default Output" setting is set to the device you are using to hear your Premiere Pro audio.
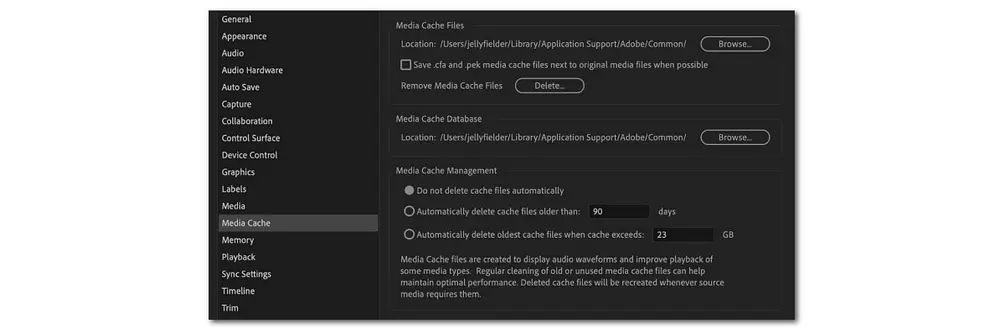
When you import and deal with media files, Premiere Pro builds cache files to improve performance. These cache files use CFA and PEK extensions and links will be made to these cache files in the Media Cache Database. The longer the duration, the larger the database and the cache files. Delete these cache files and database, then re-import and re-link the clips may solve the Premiere sound not playing issue.
Here are two ways for you to clear the media cache.
1. Open the “Preferences” tab in Premiere Pro and go to the “Media Cache” section, click the “Delete” button to directly remove all media cache files.
2. You can also manually delete the media cache files by going to the folder: "C:\Users\[XXX]\AppData\Roaming\Adobe\Common" on Windows or “/Users//Library/Application Support/Adobe/Common” on Mac. Then delete the folders to clear the Media Cache Files and Database.
Re-launch Adobe Premiere and open your project to check the audio is OK now.
* If Premiere Pro still has no audio, you can reset the preferences and the plug-in cache at the same time:
Step 1. Hold on the "Shift + Alt" keys (Windows) or "Shift + Option" keys (Mac OS) while starting the application.
Step 2. Release the "Shift + Alt" keys or "Shift + Option" keys when the splash screen appears.
Step 3. Then a box will pop up and ask if you want to reset. Click “OK”.
If the Premiere audio not playing in timeline, that may be because of the muted audio channel. On the left side of the timeline, there are some factors, and the “V1” and” A1” will determine what you can import into the timeline. If only the “V1” toggle is selected, then you can only import the video to the timeline. This will lead you to the Premiere Pro audio not playing in timeline issue.

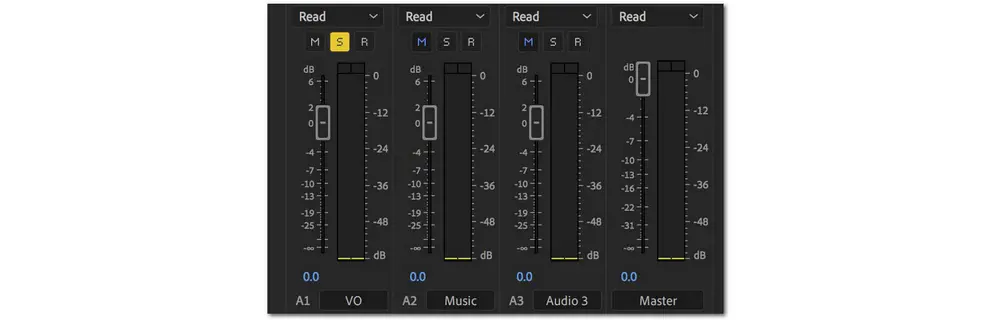
The Mute and Solo button can temporarily silence all other tracks which lead to the Premiere Pro no sound issue. So when the audio not playing in Premiere Pro, remember to make sure to solo or unsolo (mute or unmute) each audio track to check if you selected it accidentally. Also, don’t forget to check the master volume panel and check if you’ve clicked the yellow “S” button by chance. If yes, toggle it off.
There is another possible cause of the Premiere Pro not playing audio issue. If your videos in MP4, MOV, AVI, etc. have no audio after being imported to Premiere Pro, the imported clips may contain any codec that is unsupported by Adobe Premiere. So another fix to the no audio in Premiere Pro issue is to check and transcode the video to one of the Premiere Pro supported formats and codecs with a handy video transcoder.
Here I’d like to recommend you use WonderFox HD Video Converter Factory Pro, which is a powerful all-in-one video and audio processing tool. It can easily solve any video and audio incompatibility issues for various software, devices, and platforms. With it, you can quickly change the video (audio) codecs in just a few simple clicks.
Free downloadFree download this video converter here and follow the simple steps below to convert files without issue.
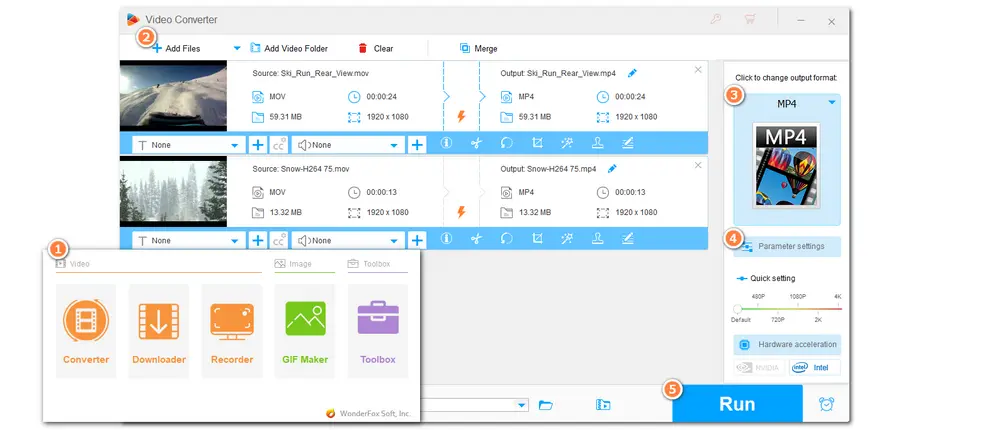
Step 1. Launch HD Video Converter Factory Pro and choose the “Converter” module from the initial interface.
Step 2. Drag and drop your unsupported files into the workspace. You can also press the “+ Add Files” button to import files.
Step 3. Open the format library on the right side of the interface and then select a Premiere Pro-supported format under the “Video” tab.
Step 4. Enter the “Parameter settings” window and change the video/audio encoder to a supported codec, e.g. H.264/AAC. Then click “OK” to save the changes.
Step 5. Click the bottom triangle button to set an output folder or leave it as default. Finally, hit “Run” to start exporting the converted files.
When the conversion is finished, you can open the folder and import the converted files into Premiere Pro again and see if the problem goes away.
This Converter can also help you troubleshoot the “Premiere Pro only importing audio” issue by changing the video codec and converting VFR to CFR.
For more detailed information, you can check this link: Premiere Pro Only Importing Audio? These Tricks Might Help!
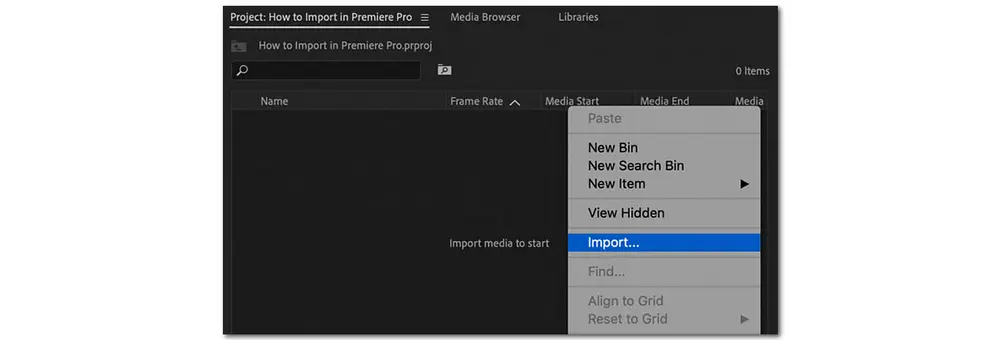
Some video files store the audio and video tracks separately, like MP4, MOV, and MTS files. If you use the dialog to import media, Premiere Pro may only import the video from one directory and ignore loading the audio track in another directory, which results in the Premiere Pro sound not playing issue. So to avoid the Adobe Premiere Pro no sound issue, you’d better use the Media Browser to import media files. The Media Browser is smarter and can access and import entire media files.
Just delete the imported clip and re-import it using the “Media Browser” under the “Window” tab. Then check if you can get the audio back.
How to fix when Premiere Pro audio not playing? I guess now you have known the solutions. Just troubleshot the Premiere Pro no audio issue with the provided fixes now. I hope the methods mentioned in this post can help you solve the Premiere Pro audio not working problem. But if none of the above solutions do the trick, call Adobe support for more help.
That’s all for fixing Premiere Pro not playing audio issues. Thank you for reading. Have a nice day!

WonderFox DVD Ripper Pro
WonderFox DVD Ripper Pro is a professional DVD ripping program that can easily rip any DVD, be it homemade or commercial, to all popular formats including MP4, MKV, MP3, WAV, H264, H265, Android, iPhone, etc. without a hitch. It also lets you edit and compress DVD videos at high efficiency. Download it to enjoy a fast and trouble-free DVD-ripping experience.
* Please DO NOT use it to rip any copy-protected DVDs for commercial purposes.
Privacy Policy | Copyright © 2009-2026 WonderFox Soft, Inc.All Rights Reserved
