Removing audio from a video is a common video editing task for replacing the audio track or others. If you are editing videos in Adobe Premiere Pro and wondering how to remove audio from video in Premiere Pro, this post explains the detailed steps for you.
Additionally, if you find using Premiere Pro too troublesome, this post also shares other free & easier methods to help you remove audio from videos more efficiently.
As a professional video editing application, Adobe Premiere Pro offers a plethora of video editing features, including removing audio from video clips. Without further ado, let's see how to use Premiere Pro to remove audio from video now!
Launch Adobe Premiere Pro on your PC, and you will get the option to create a new project. Just simply go to “File” > “New” > “New Project” Then, name the project and choose where to save it.
Navigate to “File” again and select “Import” from the drop-down menu. Browse the file folder to find the video you want to edit and add it to the project. Also, drag the video and drop it into the timeline section for editing.
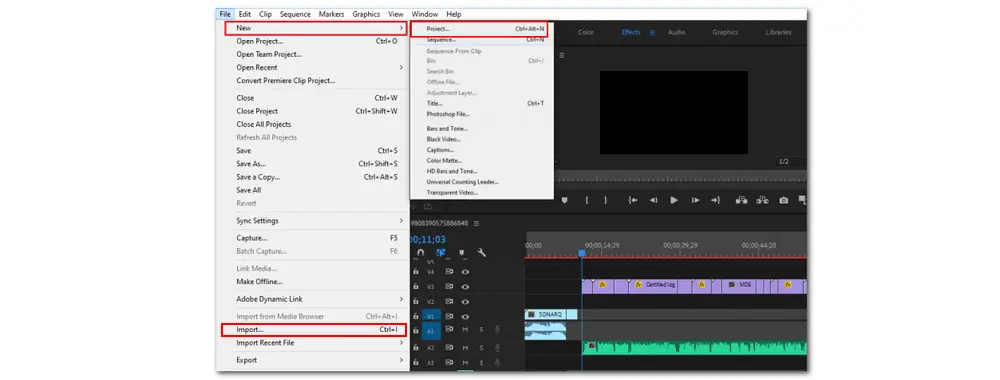
Note: To make your video footage be imported and edited smoothly in Adobe Premiere Pro, you need to make sure the file formats and specifications are compatible with Premiere Pro (Premiere Pro supported formats). Otherwise, you need to transcode or convert the videos to make them supported in Premiere Pro.
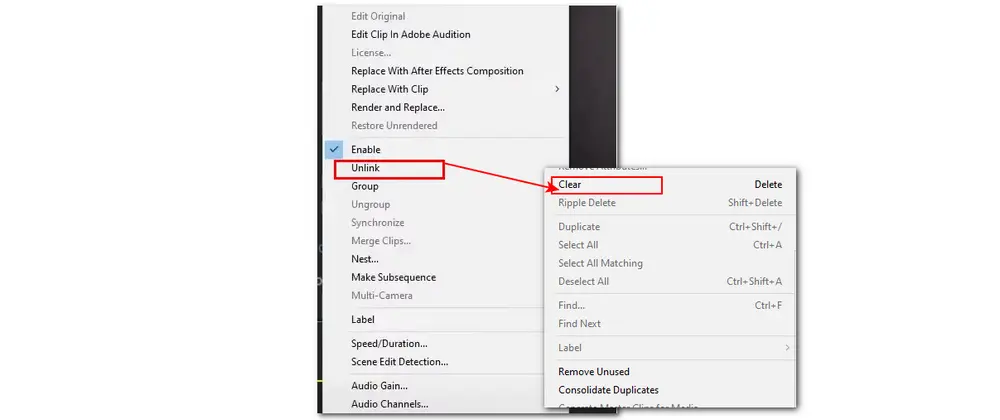
Select the video on the timeline and right-click it. Find the “Unlink” option in the pop-up menu. Press it to unlink the audio content from the video clip. When the audio is separated from the video, you can delete the separated audio layer by selecting it and hitting the delete key on your keyboard. Or you can also right-click on the separated audio layer and select the “Clear” option from the drop-down menu to delete the audio layer.
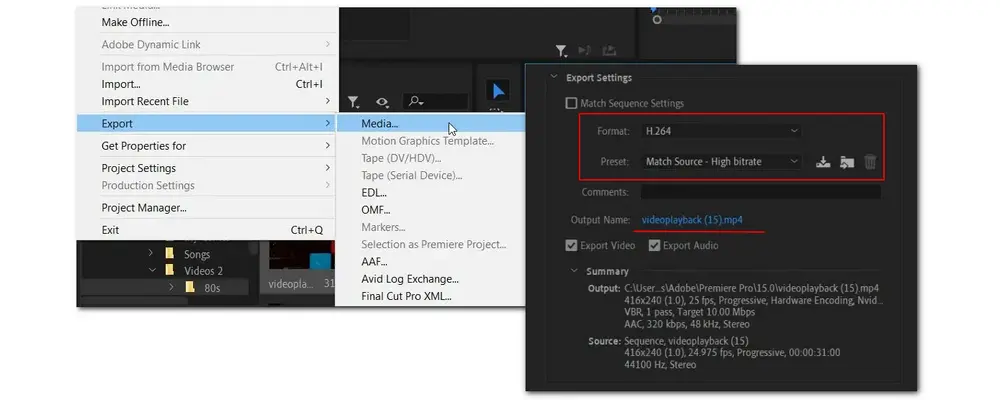
Now, you've successfully removed the audio from the video with Adobe Premiere Pro. After finishing the audio removal process, you can save the edited file by clicking “File” and going to “Export” > “Media” to adjust the output settings and save the video file. Or go further on other video editing processes.
As you can see, removing sound from video in Premiere Pro is not a difficult task with the provided simple guide. However, running this professional software requires a significant amount of processing power and storage memory. Sometimes, you may fail to import the media files into Premiere Pro. In this case, why not attempt some simpler tools?
The following shares a desktop and an online tool to help you remove audio from video more easily. Read on to pick one according to your needs.
Remove audio from videos with 1:1 quality
All formats input support and 500+ output presets
User-friendly interface and intuitive workflow
100% free, no watermark, no file size/length limit
WonderFox Free HD Video Converter Factory is a free video converter & editor that is designed for Windows. It comes with a set of video editing features for you, including trimming/cutting, merging, cropping, rotating, removing audio, adding subtitles/soundtracks, etc. With it, you can easily remove audio from video in a few simple clicks, with the original quality preserved.
Thanks to the powerful format and codec support, this tool can import video files without format incompatibility issues. After removing audio from the video, you can then convert the video files to MP4, MKV, AVI, MOV, and other mainstream formats while keeping the best quality. Moreover, its user-friendly interface and straightforward workflow enable beginners to easily get started.
DownloadDownload it here and see how to delete audio from video with it.
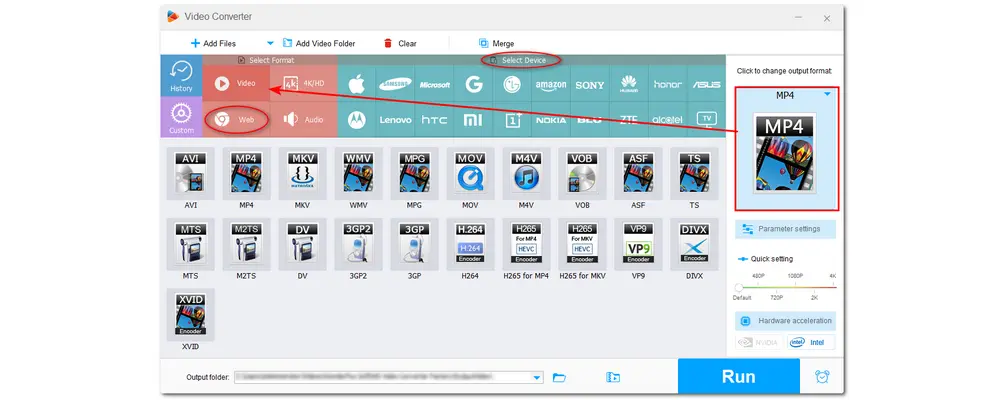
Step 1. Launch Free HD Video Converter Factory and open the “Converter” module. Click “+ Add Files” to import the videos.
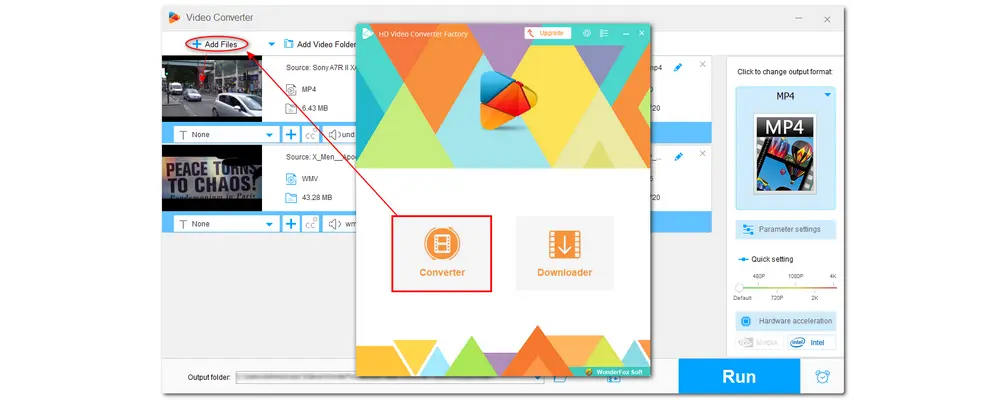
Optional. You can press the right-side format image to select a preferred format or preset under the “Video”, “Web”, and “Device” tabs as the output format.
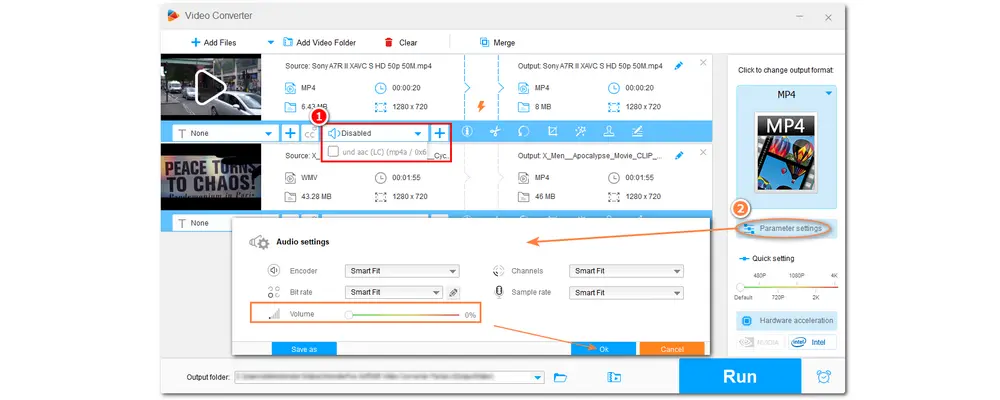
Step 2. To remove audio from a video, click the down-arrow icon in the audio track bar to open the audio track list, then unselect the unwanted audio source to remove the audio tracks.
Tips. You can also delete sound from videos by turning the volume to 0%. Just open the “Parameter settings” window and head to the “Audio settings” section to drag the volume slider to 0%. Then click “OK” to save the change.
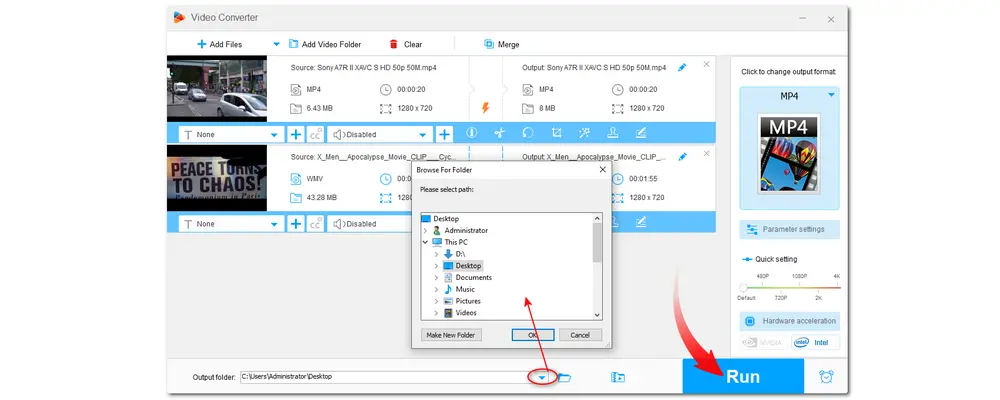
Step 3. Click the ▼ button at the bottom of the interface to specify an output path. Finally, press “Run” to start exporting the edited video.
Besides using the desktop audio remover, you can also find many online tools that are capable of removing audio from videos.
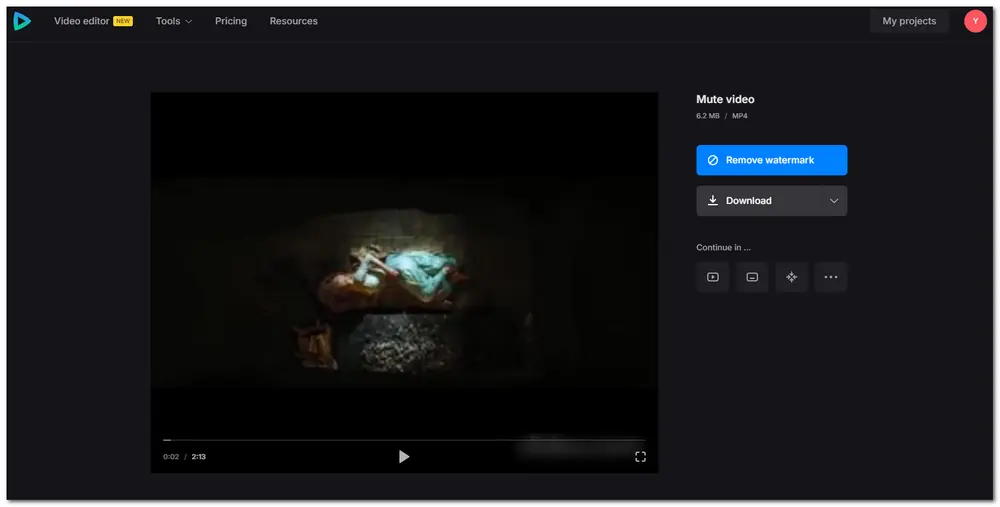
Clideo is one of such online video editors that can remove audio from MP4, AVI, MPG, VOB, MOV, and more. It works on all devices, including Windows, Mac, iOS, and Android. However, the free version will leave a watermark on the output file. To remove the watermark, you need to upgrade your account.
Nevertheless, it is really easy to use. Just upload the video and wait for a moment, then you can download the no-audio video.
That’s all about how to remove audio from a video in Premiere Pro. Hope you can successfully get the non-audio video with Adobe Premiere Pro. If you fail to import video files to Premiere Pro to remove audio or do other edits, just try WonderFox Free HD Video Converter Factory to convert the files or use it to directly remove the audio and do other simple edits. Thanks for reading till the end. Have a nice day!
Yes. You can drag your video to the timeline and right-click to select unlink the audio track from the video clip to detach audio from the video.
You can remove audio from a video clip with different software. If you find Adobe Media Player too difficult to use, just feel free to try WonderFox Free HD Video Converter Factory.

WonderFox DVD Ripper Pro
WonderFox DVD Ripper Pro is a professional DVD ripping program that can easily rip any DVD, be it homemade or commercial, to all popular formats and device including MP4, MKV, MP3, WAV, Android, iPhone, etc. without a hitch. It also lets you edit and compress DVD videos at high efficiency. Download it to enjoy fast and trouble-free DVD ripping experience.
* Please DO NOT use it to rip any copy-protected DVDs for commercial use.
Privacy Policy | Copyright © 2009-2026 WonderFox Soft, Inc.All Rights Reserved
