It would be annoying to constantly adjust the volume if you find the volume of playing video/audio is either too high or too low. Luckily, some programs can help you normalize the volume to an average level. You can also use VLC to normalize volume efficiently if you have this media player installed on your device. The following shares a detailed guide on how to normalize volume in VLC. Let's dive in now!
If you have VLC installed on your PC and use it as your media player to play various videos and music, you can just use it to normalize volume.
The process of VLC equalize volume is quite easy. Follow the content below to start!
1. Launch VLC. (Make sure you’re in the latest version.)
2. Click “Tools” from the top menu bar and select “Preferences”. You can also use the hotkey “Ctrl + P” to quickly open the “Simple Preferences” window.
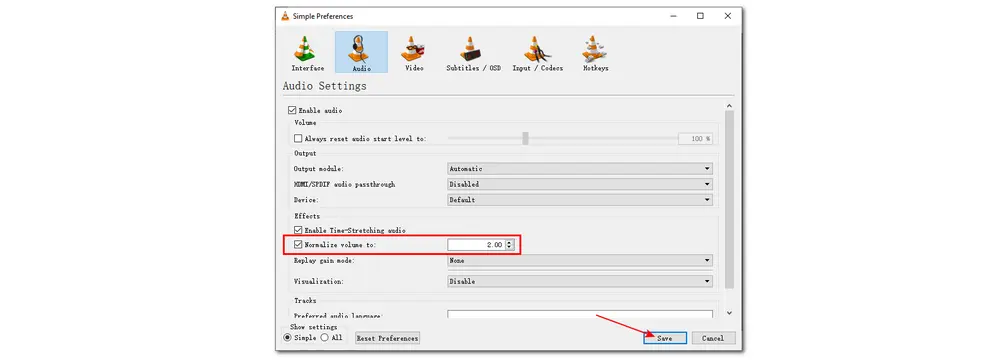
3. Switch to the “Audio” tab and check the box “Normalize volume to” under the “Effects” category.
4. Set the level that works best for you and press “Save”.
It is so simple, right? But this way only helps with adjusting the general volume and leaves the specifics alone. If you want to get a better watching/listening experience in VLC, you can do more with volume normalization. And the steps are given below:
Step 1. Open VLC. Enter the “Simple Preferences” window by pressing “Ctrl + P” on your keyboard. You can also go to “Tools” > “Preferences” on the top menu bar.
Step 2. Move to the bottom-left corner of the interface to select “All” under the “Show settings” option. Then navigate to “Audio” and choose “Filters”. Click the arrow icon beside it to expand the drop-down menu. Find the “Compressor” and press it.
Step 3. Now, you are free to make changes to the values as you see fit.

Generally, you just need to concentrate most on the “Makeup gain”, “Threshold”, and “Ratio”. “Makeup gain” help you raise the volume in the quiet section, and “Threshold” help you reduce volume when the audio peaks too high. The “Ratio” is the maximum level of all audio within a movie.
“Attack time” and “Release time” can graduate the volume changes to ramp them up at first and then down again to ensure a more fluid transition in and out of the scene.
Now that you know how to normalize volume in VLC Media Player, just import your video or audio file and normalize the volume.
Besides using VLC Media Player to normalize volume, you can also try WonderFox Free HD Video Converter Factory. It is an ideal volume normalizer that helps boost audio volume at a low level and turn down the high volume. Moreover, if you encounter an audio out-of-sync problem, you can also use it to fix it. Additionally, as its name suggests, it is also a video converter that can help with unsupported format/codec issues. Video editor, compressor, and downloader are also packed into this app.
Free downloadFree download and install it on your Windows PC, and follow the guide below to normalize volume at high speed.
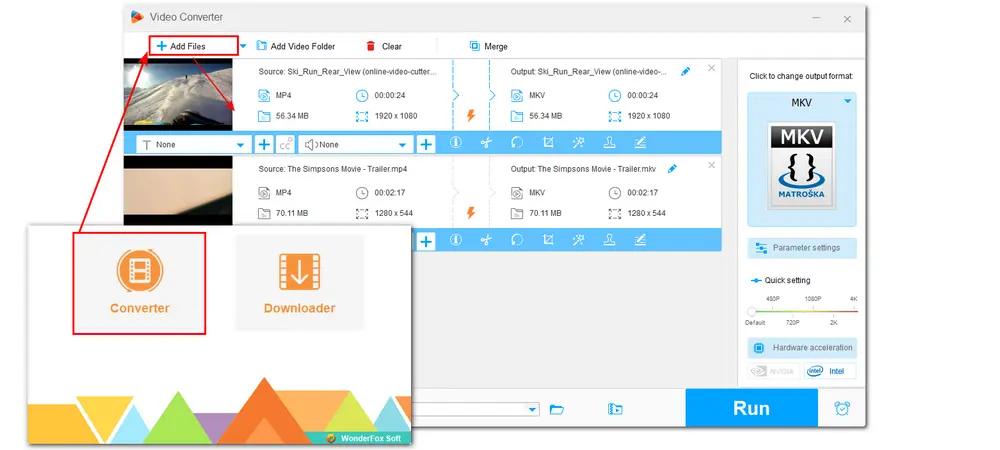
Launch Free HD Video Converter Factory after the installation and then open the “Converter” module. Click the “+ Add Files” button to import your video or audio files. You can also directly drag the files and drop them into the workspace.
Click the “Parameter settings” button to bring up a new window. Under the “Audio settings” part, drag the slider on the volume bar to normalize the volume.
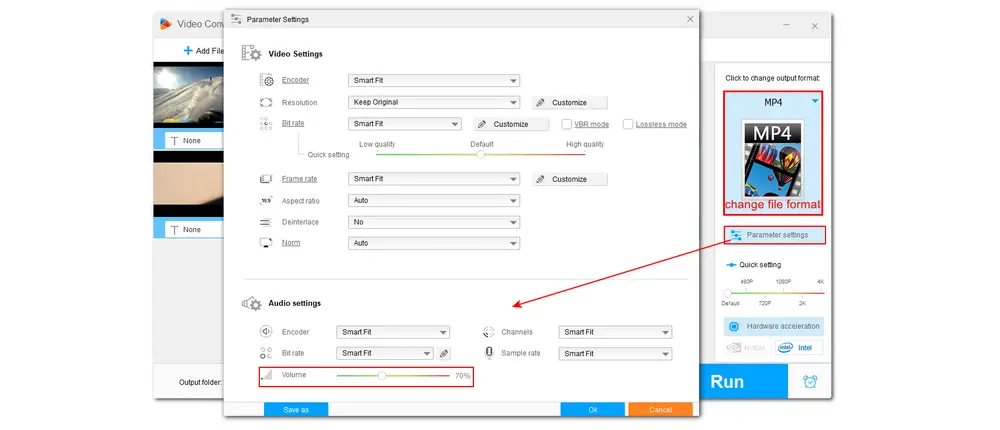
Tips: If the format image presented on the right side doesn’t match the input format or if you want to change the format, you need to press the format image to go to the output format library and select a format under the “Video” or “Audio” category.
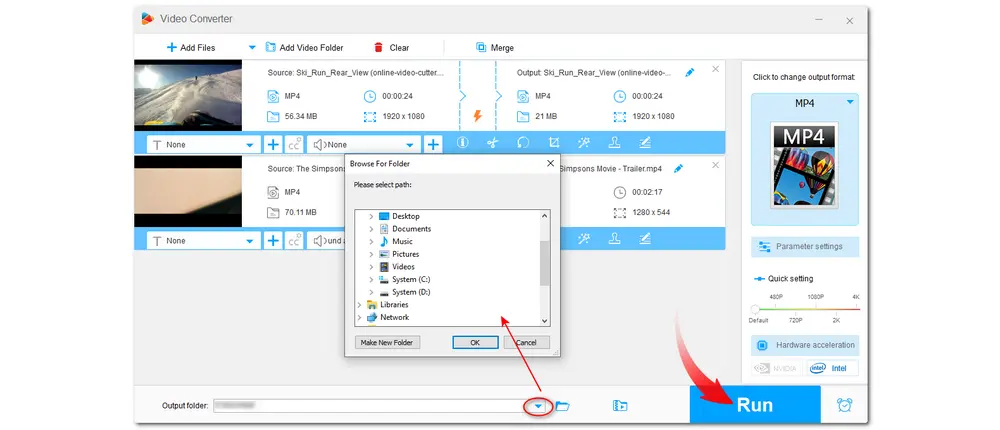
Press the inverted triangle button at the bottom of the interface to specify an output path. Once all the settings are OK, press “Run” to start exporting the files.
Now, you can play these files with normalized volume anytime and anywhere.
• Convert video/audio to 500+ formats and devices;
• Trim, crop, rotate, merge, compress, and filter videos;
• Download videos and music from 500+ sites
• Modify video resolution, bitrate, and aspect ratio...
As you can see, both VLC Media Player and Free HD Video Converter can normalize volume easily. If you don’t want to download apps on your computer, you can also try some online tools to normalize the volume.
Above is all I want to share with you. Thanks for your reading! Have a nice day!

WonderFox DVD Ripper Pro
1. Digitize DVDs to MP4, MKV, MP3... in high quality.
2. Remove copy protection from DVD without effort.
3. Make ISO image and DVD folder copies flawlessly.
4. Convert DVD to be compatible with any device.
5. Trim, rotate, merge, add subtitles/ effects & more...
* Please DO NOT use it to rip any copy-protected DVDs for commercial use.
Privacy Policy | Copyright © 2009-2025 WonderFox Soft, Inc.All Rights Reserved