Sometimes, you may want to record the content on Kodi for usage in other applications. But Kodi does not offer a recording feature. How can you record Kodi successfully? This article is right here to help you. Get the easy Kodi recorder to start recording from Kodi instantly: https://www.videoconverterfactory.com/download/hd-video-converter-pro.exehttps://www.videoconverterfactory.com/download/hd-video-converter-pro.exe
Kodi (formerly XBMC) is a technology convergence application developed by the Kodi Foundation for Windows and other platforms. It allows users to play and view videos, music, and other digital media files from local storage, network storage, or the Internet. However, it doesn’t have built-in recording functionality, and you need to install a PVR add-on [1] to record TV with Kodi.
If you don’t want to install a PVR add-on, you can use a powerful third-party recorder [2] to make a recording from Kodi. And the following post demonstrates the two methods to record from Kodi in detail. Please read on.
WonderFox HD Video Converter Factory Pro offers a handy way to record videos on Kodi. You only need several clicks to capture the complete screen of Kodi or just part of it. You can also select the output format, quality, audio, etc. No ad, lag, or watermark. Try it now!
Hot Articles: Record Fire Stick | Record on Paramount Plus | Record on Spectrum TV
PVR (Personal Video Recorder) add-ons allow Kodi to communicate with your TV tuner and schedule recordings. Thus, you can install a PVR add-on to make Kodi record live TV. Some popular options include NextPVR, MediaPortal, and Tvheadend.
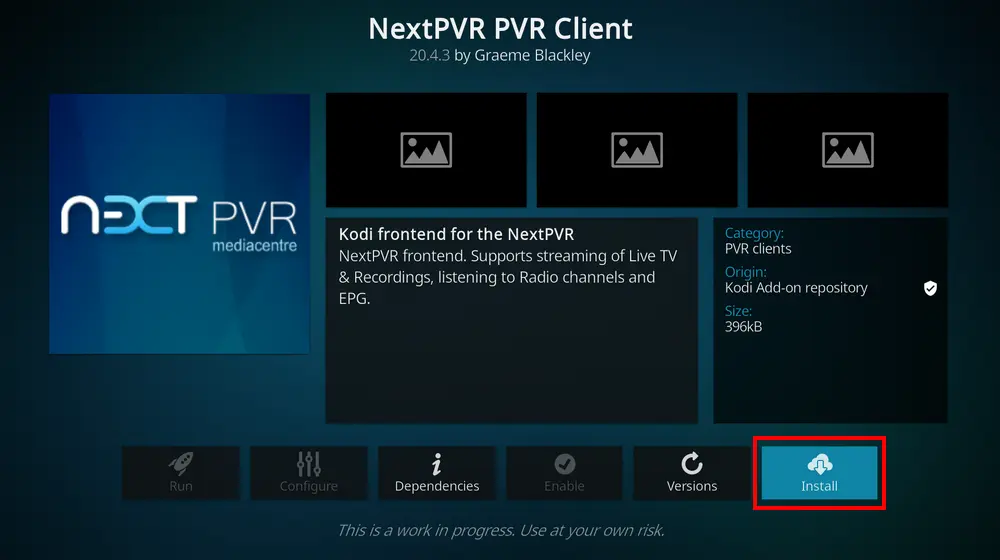
After installing the PVR client, you need to connect and configure it. Here are the instructions:
A Step-by-step Guide on How to Watch IPTV with EPG on Kodi >>
1. Connect a TV tuner
Connect the TV tuner device to your computer using a USB tuner or an internal tuner card (Make sure it is compatible with Kodi). And follow the manufacturer’s instructions to set it up.
2. Configure the PVR add-on
Go to the Kodi settings (by clicking the gear-shaped button on the main interface) and select PVR & Live TV. Then, choose the PVR add-on you installed and click Configure to check the TV tuner device, channel lineup, and other settings.
3. Scan for channels
Go to the PVR add-on settings and select the option to scan for channels. This will populate your channel list and help you schedule recordings.
4. Schedule and record TV shows
Head over to the TV section in Kodi, browse the TV guide, and select the show you want to record. Then, modify the recording options, such as start time, end time, and frequency. At last, save the recording, and you can access it through the PVR add-on or the Kodi library.
A PVR add-on is necessary to record on Kodi. Plus, the PVR client requires EPG and back end. This method of recording TV with Kodi is quite complicated. Is there a simple way to record anything that is playing in Kodi? The answer is yes. Since Kodi is a media player with third-party add-ons to free stream copyrighted content on Windows, an external screen recorder for PC can capture content from this app with ease.
Recommended software: WonderFox HD Video Converter Factory Pro
1. Record anything playing on your computer in HD;
2. Screen record with audio from the system & mic;
3. Edit screen recordings by trimming, cropping, etc.;
4. Achieve more purposes like video conversion, downloading, compression, merging, etc.
Disclaimer: WonderFox does not approve of any copyright infringement. All information provided in this article is presented for personal fair use only. Please do not record/download copyrighted content for commercial use without the copyright holder’s permission.
Recording is one of the features of WonderFox HD Video Converter Factory Pro. With it, you can record any screen activity on a Windows PC, including TV shows, live streams, gameplay, online meetings, and video calls. Once you find and play your favorite movie in Kodi, you can use the screen capture tool to record from the player. The software is also able to screen record some protected videos without a black screen. Video files can be recorded in MP4, MKV, AVI, or MOV format at 10/30/60fps (with audio included). You can easily configure these options on its intuitive user interface.
In addition, the Converter tool can help you convert and edit the screen recording for sharing, uploading, or other purposes. All features in the software are functional and easy to use. Now, installinstall HD Video Converter Factory Pro and follow the simple guide to record from Kodi.
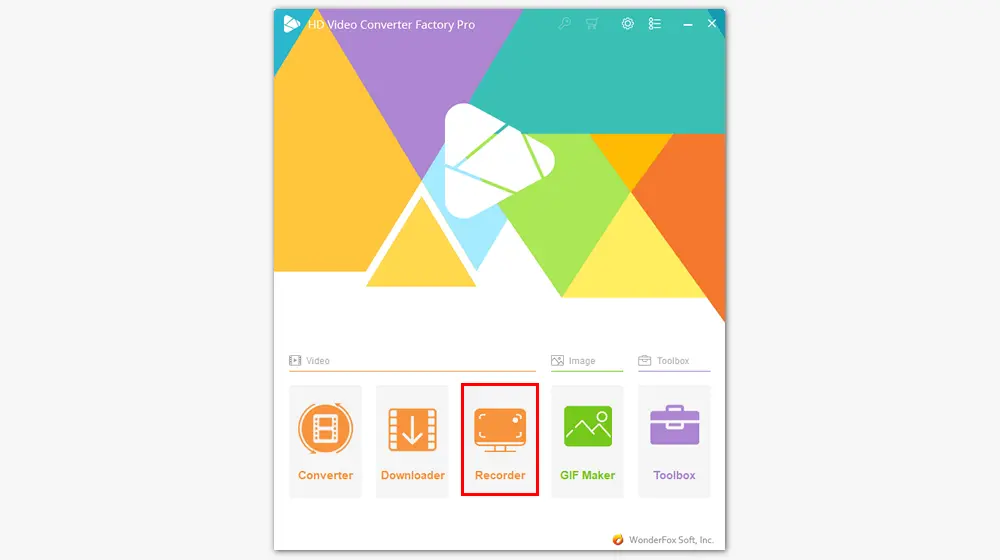
Launch HD Video Converter Factory Pro and select “Recorder” on the main interface. Then, you will enter the Screen Recorder.
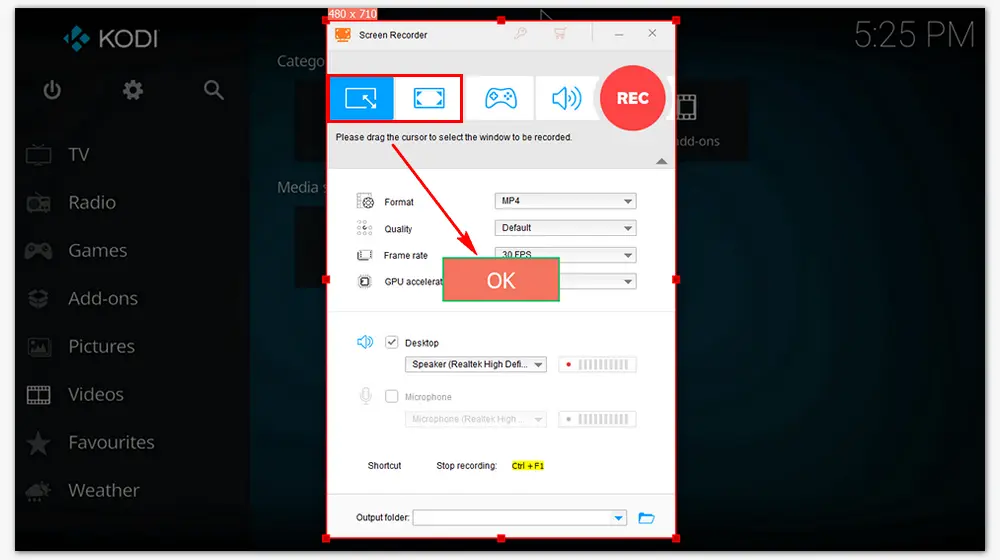
Firstly, choose a recording mode (Custom/Full-screen) at the top of the window. “Full-screen” will capture the entire screen of your computer, while “Custom” allows you to record any portion of the screen.
Tips. Kodi plays videos in the full screen by default. You can record all of your screen or select the desired part by dragging the red borders.
Press "OK" to confirm your recording area.
Open the drop-down options by clicking the inverted triangle button. Here, you can choose the video format, quality, frame rate, and audio source.
Note. The “Desktop” audio is selected by default. If you want to record system audio and mic (external voices), choose the “Microphone”, too. Otherwise, uncheck the option to record Kodi without background noise.
Click the bottom triangle button to change the output folder or leave it as default.

Now, run the Kodi media player and find the video you want to record. Click the red “REC” button in HD Video Converter Factory Pro to begin recording from Kodi after five seconds. During the countdown, you should be ready to play your content in Kodi. Once done, press “Ctrl + F1” to stop the recording, and you will get a recording file named “WonderFox_Video_Recording_001.mp4”.

This post aims to teach a simple method to record Kodi on a PC. Though the Kodi PVR add-ons can help you record IPTV (live TV channels, on-demand movies and shows, international programming, etc.), they are hard to set up for beginners. Luckily, you can turn to WonderFox HD Video Converter Factory Pro, a practical screen recorder that combines multiple features into one yet is still simple to operate.
Have you got an idea of how to record from Kodi after reading? At last, thanks for your reading till the end, and if you encounter any problems, please contact us via Support. We will be glad to help you all the time!

WonderFox DVD Ripper Pro
1. Rip DVDs to 300+ presets with GPU acceleration.
2. Remove all sorts of DRM from DVDs.
3. Compress an 8GB DVD to 1-2 GB digital video file.
4. Digitize the DVD to MPEG-2 MPG in 5 minutes.
5. Make a 1:1 intact digital copy (ISO or VIDEO_TS).
6. Rip a DVD with multiple audio tracks and subs.
7. Support DVD & ISO & Video_TS folder.
* Please DO NOT use it to rip any copy-protected DVDs for commercial use.
Privacy Policy | Copyright © 2009-2026 WonderFox Soft, Inc.All Rights Reserved
