Before we get into the specific fixes for OBS lag issues, let’s look at the possible causes.
When OBS or other programs have issues, the possible causes are mostly in hardware and software. Maybe your hardware is insufficient to support OBS, your settings in OBS are incorrect, or you’re having network issues while streaming.
Furthermore, the cause could be the result of a combination of these factors.
If you want to make OBS less laggy while streaming & recording, just read this part to find the possible fixes.
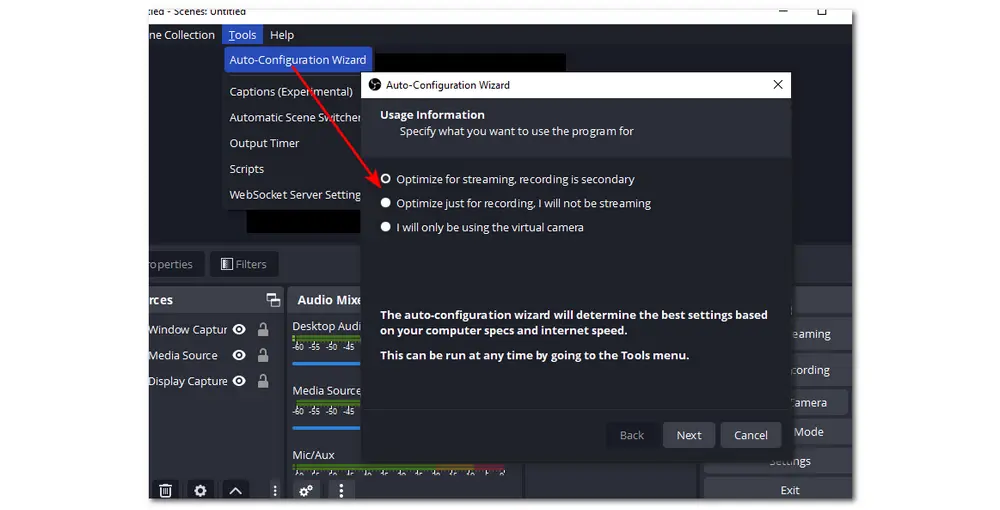
To make OBS run smoothly on your computer, you need to ensure your system (CPU, GPU, and RAM) meets the minimum requirements. Otherwise, you may encounter lagging or other issues when running OBS and other resource-intensive programs.
You can open your OBS and go to "Tools" > "Auto Configuration Wizard" to find the appropriate settings for your hardware according to your needs.
Lagging in OBS streaming sometimes can also be caused by the outdated or corrupt network adapter driver. So users can check if the network card driver is up-to-date.
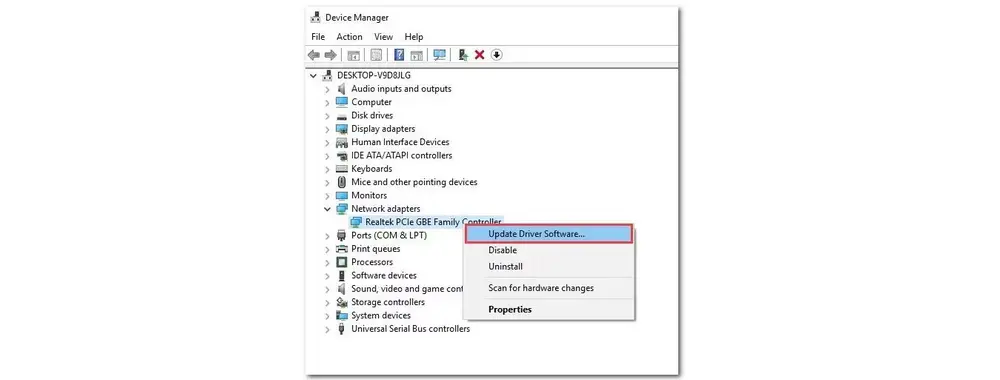
How-to update the network adapter drivers:
Step 1. Type in “Device Manager” in the Windows search box and click to enter the “Device Manager”.
Step 2. Select “Network adapters” and scroll to the network adapter name.
Step 3. Right-click the network adapter and select “Update driver” > “Search automatically for updated driver software”. Follow the steps and finally press “Close”.
Step 4. Restart your system after installing the updated driver.
Applications that consume a lot of bandwidth might slow down your network and cause latency difficulties. So before streaming with OBS, ensure that all other resource-intensive programs are closed.
How to stop other bandwidth-intensive activities:
Step 1. Press “Win + R” to bring up the Run dialog box. Type in “resmon” and press “OK”.
Step 2. In the “Resource Monitor” window, switch to the “Network” tab and take note of the “Total (B/sec)” column.
Step 3. Right-click on the program that is eating up too much bandwidth and select “End Process”. Then press “End process” to confirm the operation.
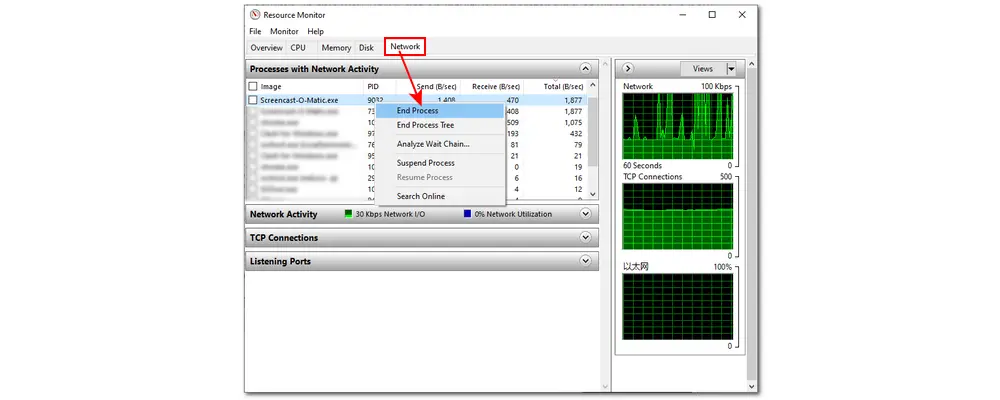
Note: Please make sure you know what sort of applications you’re closing. Do not stop any programs you are not familiar with in case you mistakenly end the crucial one, such as sychost.exe.
The firewall and security software can prevent harmful activities to protect your system but sometimes may interfere with the operation of OBS. You can uninstall the security software temporarily or change the settings of your system firewall if it is interfering with the connection and making OBS lag. However, make sure the original setting is restored once everything is done.
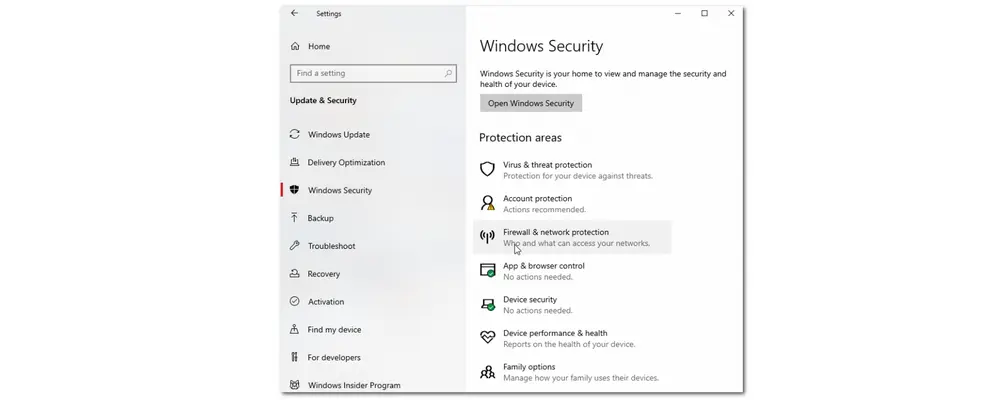
Steps to change the Firewall settingsStep 1. Press the “Windows” icon (Start) and go to the “Settings” > “Update & Security”.
Step 2. Find and open “Windows Security”. Click on “Firewall & network protection”.
Step 3. Select “Allow an app through firewall” and select OBS from the listed apps.
Step 4. Press “OK” to save the change.
You can also directly disable Firewall on your computer to allow OBS:
Just click on “Firewall & network protection” and select a network profile. Under the “Microsoft Defender Firewall”, switch the setting to “OFF”. Then your system and network can access any app that’s being blocked.
But it is still recommended to allow OBS through Firewall, instead of turning off the Firewall.
The OBS recording setting can affect the recording experience and it varies on each different device. So you may need to play around with its settings to find the one that works best with your system to make OBS not lag.
How to adjust the OBS settings:
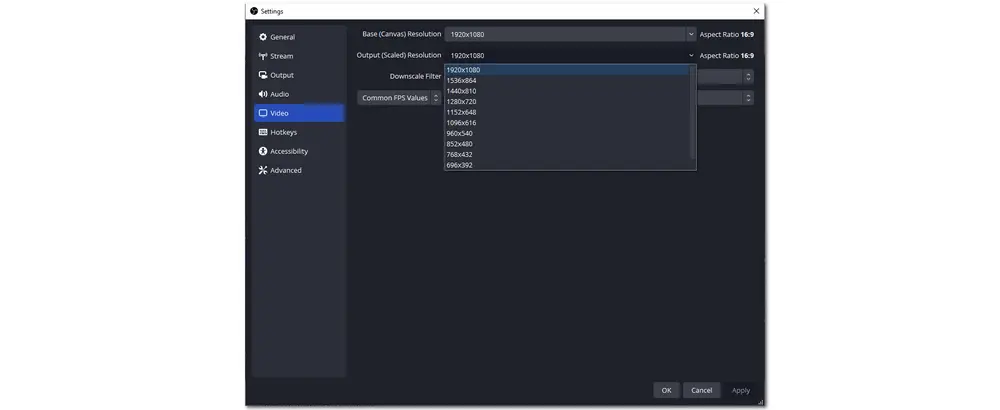
1>. Change Frame rate: Launch OBS and go to “File” > “Settings” > “Video Settings”. Find the “Common FPS Values”, selec your value, and hit “Apply.”
2>. Change Resolution: Also go to the "Video Settings" tab from “File” > “Settings” path. Then select ans alter both "Base (Canvas)" and "Output (Scaled) Resolution".
You can match the Base resolution to your system resolution or downscale the output resolution for a better result.
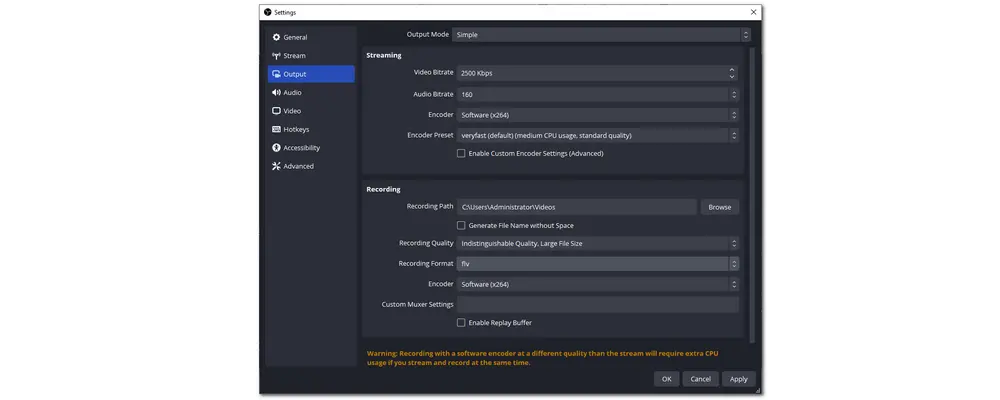
Using a higher bitrate to improve the video quality of the recording & streaming content will lead to dropped frames and produce video lag. So you can lower the bitrate to solve the problem of missing frames and avoid the OBS lagging issue.
Steps to lower the bitrate
Step 1. Launch OBS and go to the “File” > “Settings” > “Output” section.
Step 2. Find “Bitrate” and set the value to your requirements.
OBS Studio uses the GPU to render the game scenes. But note that don’t make the GPU of your system run at more than 90% load since the fully utilized GPU can bring dropped frames to the recording. If the GPU load is over 90%, you can limit your in-game frame rate to make sure your game is running exactly at 30, 60, 90, or 120 fps.
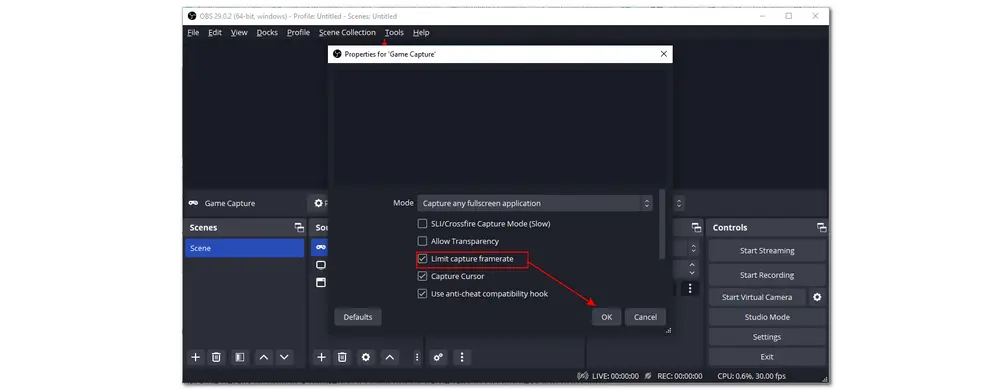
Steps to limit the capture framerate in OBS:Step 1. Launch OBS and click the “+” button under the “Source” tab to add the “Game Capture” source.
Step 2. Follow the workflow to the “Properties” window. Scroll down and select the “Limit capture framerate” checkbox. (If you added the “Game Capture” in advance, you can select the “Game Capture” and click the gear icon to open the “Properties” window.)
Step 3. Press “OK”.
Keep in mind that reducing in-game detail or buying a high-end GPU won't fix the OBS game laggy issue unless you don't limit the fps.
If the video is lagging or freezing in OBS, then you can check the internet connection. A stable and high-speed internet connection is essential to make your OBS perform well. Check your connection speed using any speed test tool. If the connection speed is slow, limit the usage, check your router, and make sure that the connection is stable.
If your computer is connected to Wi-Fi, you may encounter the OBS lagging issue, especially when you are far away from the router since the wireless connections are not always stable or continuous. So stop the connection to Wi-Fi and connect the computer directly to the modem using an Ethernet cable.
Also Read: OBS Not Recording Full Screen | OBS Encoding Overloaded | OBS Recording Black Screen
WonderFox HD Video Converter Factory Pro’s built-in screen recorder is designed with a straightforward interface and simple workflow to offer users the easiest recording process. It is an HD screen recorder that can even record screen in 4K quality according to your monitor’s resolution. With it, users can record gameplay on PC at 60 fps without any lag. Other screen activities can also be recorded in high quality. The recorded video can be saved in MP4, MKV, MOV, and AVI formats to meet your playing, editing, uploading, and other needs.
Just downloaddownload this PC screen recorder and follow the simple guide below to see how to record screen without lag.
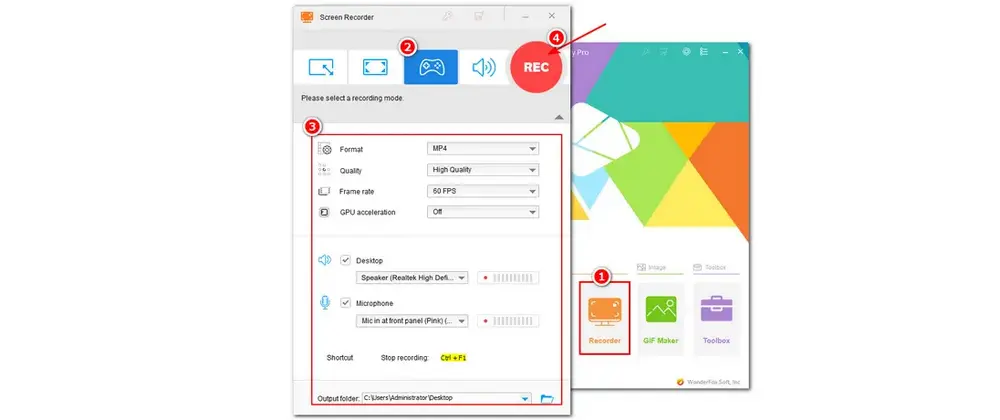
Step 1. Launch HD Video Converter Factory Pro after the installation and then enter the “Recorder” program.
Step 2. Select a recording mode from the top of the interface. If you tend to record gameplay, just select the “Game recording mode” which will start recording at 60 fps by default. Then choose to record the full screen or part of the screen (custom mode) and click “OK” to confirm the recording region.
Step 3. Move down to modify the recording format, quality, and GPU acceleration (if your computer supports hardware acceleration). Then check the audio source you want to record with the screen. Press the bottom ▼ button to specify an output folder for the recorded video.
Step 4. Click the red “REC” button and it will automatically start recording after a five-second countdown. When finished, just press “Ctrl + F1” on the keyboard or tap the square icon on the minimized recording bar to stop recording.
Optional: After finishing recording, you can exit the “Recorder” and enter the “Converter” to edit, convert, and compress the recorded video.
This post shares the possible fixes when the OBS lagging issue occurred during the streaming or recording. If your OBS is lagging when recording or streaming, you can first check your device settings and the network connection. But if you don’t want to test the solutions one by one and have no requirements for the recording and streaming program, you can directly use other OBS alternative programs to live stream or screen record without lag. Thanks for reading till the end. Have a nice day!
There could be various explanations for this, including:
✔ The video bitrate is very high.
✔ The network connection is erratic.
✔ You run multiple bandwidth-intensive processes in addition to OBS.
The problem could be in the network. Your Twitch stream may slow due to network latency, which occurs when a communication delivered between your device and the server is delayed.
1. Check the Hardware
2. Update Network Adapter Drivers
3. Stop Other Bandwidth-intensive Activities
4. Checl the Firewall and Security Software
5. Adjust OBS Settings
6. Lower the Bitrate
7. Reduce GPU Usage by OBS
8. Ensure a Stable Internet Connection
9. Stream on a Wired Connection

WonderFox DVD Ripper Pro
WonderFox DVD Ripper Pro is a professional DVD ripping program that can easily remove any DVD encryptions and rip DVD to all popular formats including MP4, MKV, MP3, WAV, H264, H265, Android, iPhone, etc. without a hitch. It also lets you edit and compress DVD videos at high efficiency. Download it to enjoy the fast and trouble-free DVD ripping experience.
* Please DO NOT use it to rip any copy-protected DVDs for commercial use.
Privacy Policy | Copyright © 2009-2024 WonderFox Soft, Inc.All Rights Reserved
