If you are new to OBS recording, this post would be of great help. Read this article and you’ll get a step-by-step guide on how to let OBS record a part of the screen on Windows.
Tips: Find it not easy to use OBS to record a selected portion? Try this beginner-friendly alternative: https://www.videoconverterfactory.com/download/hd-video-converter-pro.exehttps://www.videoconverterfactory.com/download/hd-video-converter-pro.exe
Yes! OBS Studio, also named Open Broadcaster Software, is an open-source software for video recording and streaming. This free 2-in-1 program is accessible to everyone and can work on various platforms including Windows, macOS, Linux distributions, and BSD.
Using OBS Studio, you can capture the full screen or only a portion of your screen. Besides, it enables you to record directly from your webcam and microphone, capture a specific window or application, or capture multiple sources in one go. Next, we'll detail you how to record a specific part of your screen on Windows using OBS.
Without further ado, let’s get started now!
Follow the steps below to know how to let OBS record a part of the screen:
Step 1. Download and install the latest OBS version. When installing OBS, please make sure that the drive has sufficient memory space for installation.
Step 2. An Auto-configuration wizard window will pop up when you first open OBS. If you use OBS for recording only, tick off “Optimize just for recording, I will not be streaming”. Then it will optimize the settings automatically to make them suitable for recording.
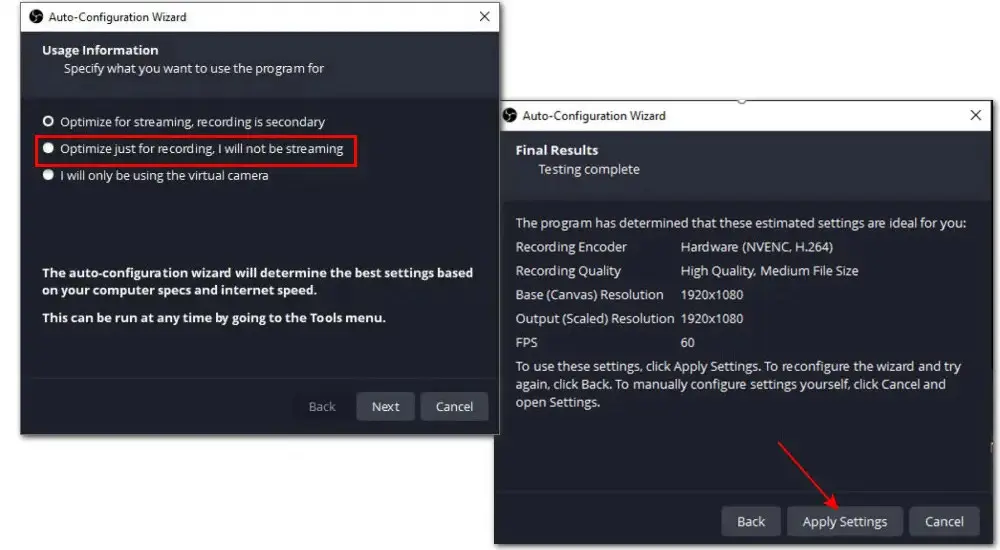
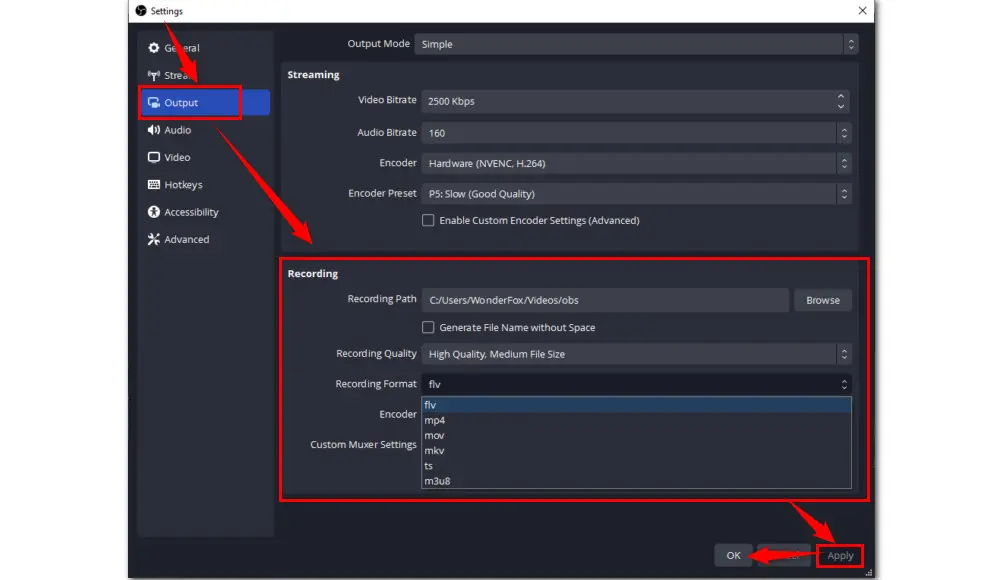
Step 3. Before recording, you can set a favored recording format. Go to File > Settings > Output.
Step 4. In the Recording section on the right side of the interface, select one from any of the 6 preset Recording Format options: FLV, MP4, MOV, MKV, TS, and m3u8.
From here, you’re also allowed to set a folder for outputs, choose a recording quality, and select an encoder based on your graphics card.
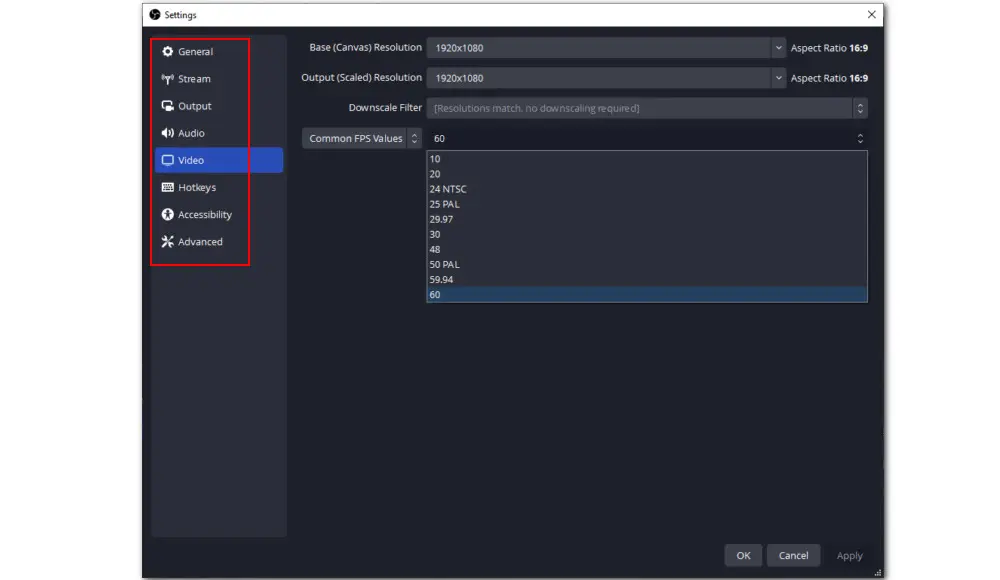
Step 5. To achieve the best output for your video, go to the Video section and check to have full resolution. Set the frame rate to 30fps or 60fps.
You can further customize other settings in Video and Audio to get the smoothest recording with OBS. If you have no clue how to adjust the settings, just leave them by default.
Go to Settings > Hotkeys and create shortcuts for maximizing your productivity.
Then click Apply > OK to save the changes and back to the start-up interface.
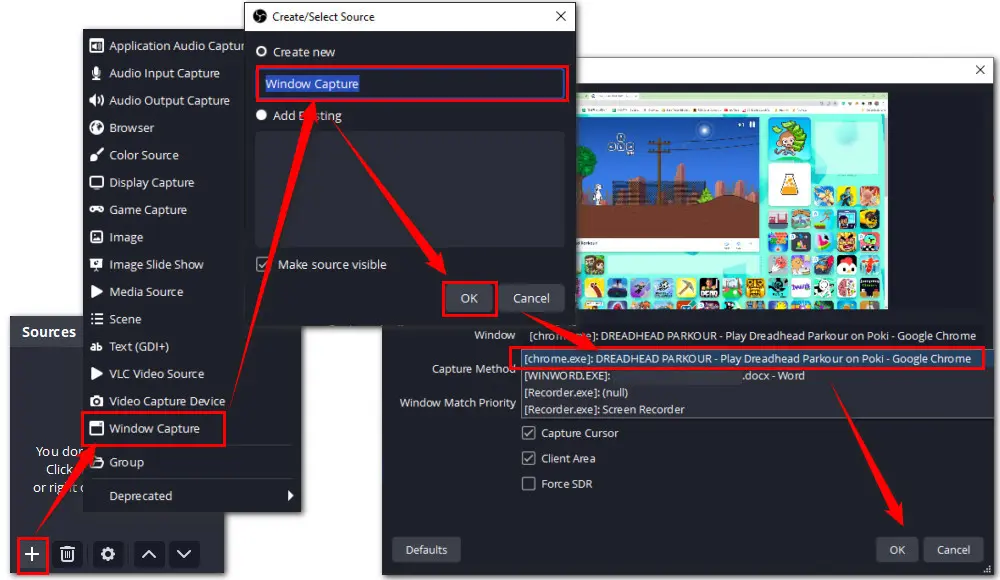
Step 6. Click the plus sign in the Sources panel. Choose Window Capture from the list of options. Then create a name for the capture and click OK.
Step 7. A pop-up box will appear. Expand the Window options and select the window that you are going to record. If you cannot find the window option, check if it is closed or minimized.
Tick off the Capture Cursor box below if you want to record the cursor movement as well. Then hit OK.
Step 8. To make OBS record only part of your screen, there are two ways to go.
Let’s start off with the easier method.
Way 1—Record specific area of the screen with cursor in OBS
Hold down both the Alt key on your keyboard and the left button on your mouse. Drag the red nodes that appear around your source and you will notice that the red lines turn to green dotted lines. (If you don’t see the red box, right-click the preview video and select “Lock Preview”.)
Hover the cursor over the red squares to select the right region that you like to record.
Note that don’t release the keyboard and mouse back until you get the wanted capturing area. Or you just zoom in/out instead of cropping off unwanted parts.
If you want to undo the action, press Alt and left-click simultaneously to drag the red squares in the opposite directions.
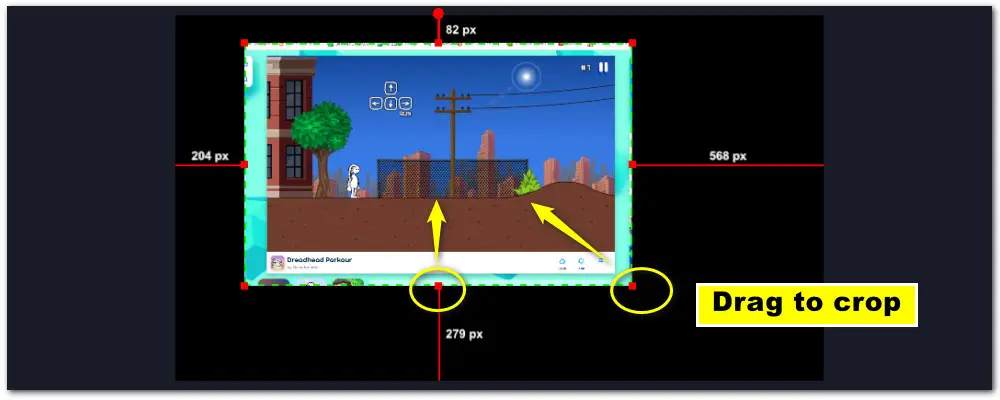
Way 2—Record part of your screen in OBS based on pixel value
With the preview window selected, click on the Filters tab below to bring up a new window “Filters for ‘Windows Capture’”.
Then hit the plus sign icon in the bottom-left corner of the window. Select Crop/Pad. Hit OK. On the right side, you need to enter the pixels values in Left, Top, Right, and Bottom to remove the unnecessary outer pixels.
To quickly define the area to be cropped, you can use a screenshot tool to check the number of pixels which should be eliminated.
After that, hit Close to back to the main interface.

Step 7. Once all settings are ready, click on the Start Recording button to begin. To end the recording, hit the Stop Recording button.

NOTE: After cropping the unnecessary region, you can left-click and drag one of the red dots around the video to resize it so it fills the entire canvas and has no black bars or useless margins around the exported video. But this might lead to a new issue — stretched video. So, it’s up to you to decide which is more acceptable, black bars or distorted appearance.
That’s the complete process of how to record a part of your screen with OBS on Windows. Using OBS to capture a portion of your screen is not a difficult task. But if you are expecting an easier way or encounter some issues when using OBS like " OBS recording black screen" or "OBS not recording audio ", then you can turn to other recording software.
The next part will introduce a reliable OBS recorder alternative and show you how to record a specific part of the screen with just a few clicks.
WonderFox HD Video Converter Factory Pro is a versatile OBS alternative for video recording, converting, editing, downloading... You can record video in full screen or only a part with resolution up to 4K(60fps). Audio-only mode is also included. It is worth a shot!
WonderFox HD Video Converter Factory Pro is highly-recommended recording software for Windows users. Featured with an intuitive interface, even a beginner can use it to capture only a portion of the screen or record the whole screen, along with audio from mic and system separately or simultaneously. Moreover, it provides you with presets to choose desired recording formats, frame rate, and output quality.
No watermark and no time limit. You can record as long as you want with the highest quality possible. Free download Free download the robust recorder here and walk with us to see how to use it.
Run WonderFox HD Video Converter Factory Pro. Select Recorder among the five modules on the startup interface—Converter, Downloader, Recorder, GIF Maker, and Toolbox.

Click the first Custom recording mode button and hold the left button on your mouse to drag the cursor and specify the recording area. Hit the center OK button to confirm.
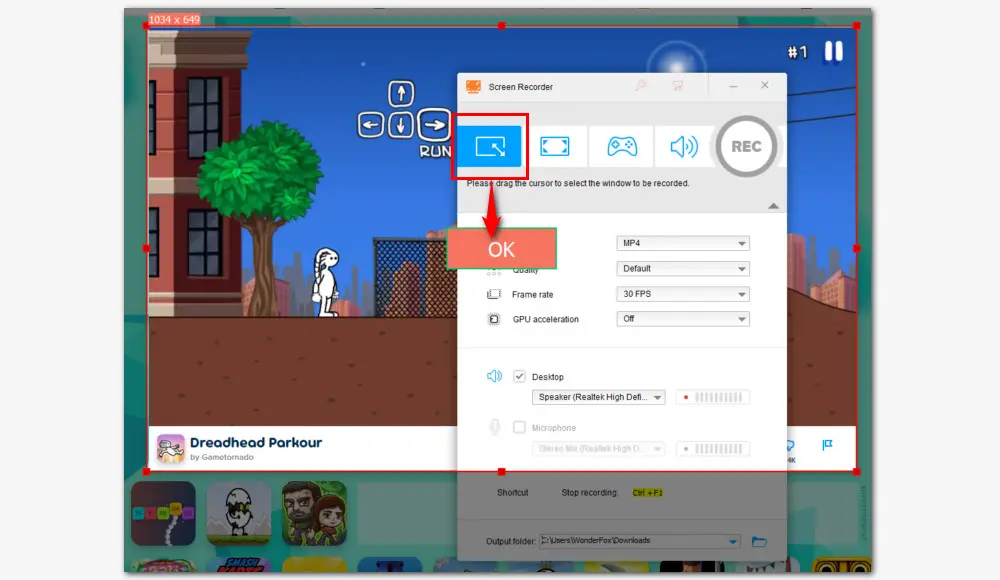
Next, adjust the recording settings below. Here you can choose a recording format, quality, frame rate, and decide whether to turn on GPU acceleration for smoother recording performance.
Then, tick off Desktop if you want to record system sound or Microphone to record external audio.
Hit the button with a downward arrow to set a destination or just leave it as default.

Finally, click the big red REC button and after a five-second countdown, the program will start recording.
When you are done, use hotkey Ctrl + F1 or click the recording icon. Then, find the recordings in the folder you just set.

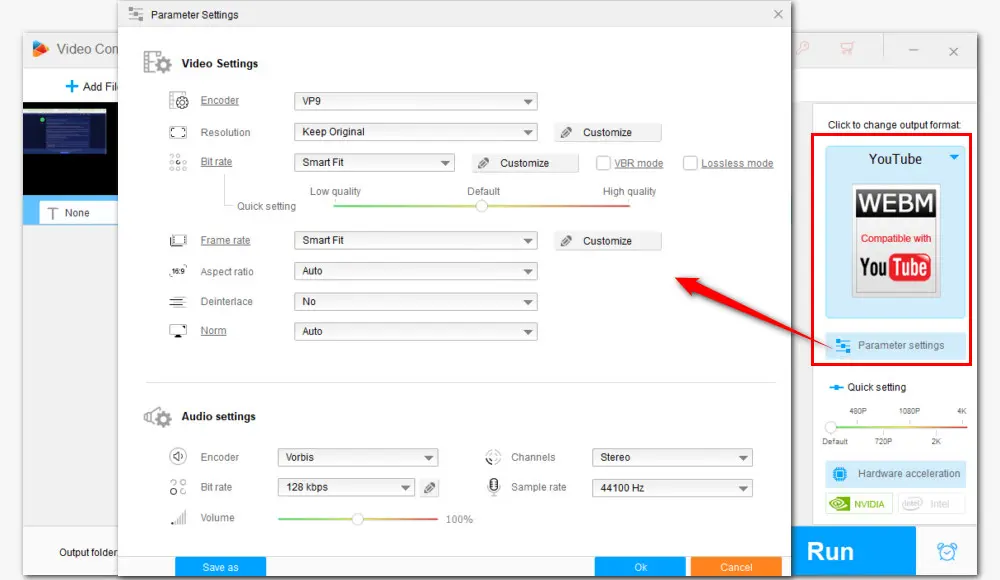
If you want to upload the recorded video to platforms like YouTube or Instagram, you can make full use of the Converter module inside WonderFox HD Video Converter Factory Pro, in which you can convert and edit the video to make it meet the best uploading specs and ensure an error-free posting.
Capture video with full mode or custom mode;
Convert recorded video/audio to 500+ presets;
Trim, merge, crop, rotate, add special effects...
Batch processing and hardware acceleration;
Download movies and music from 1000+ sites...
That's all about how to let OBS record part of the screen. It might take a little while to familiarize yourself with its workflow, so you can try the recommended alternative to take a shot if you don’t want to go through the learning curve. It won’t let you down.
Privacy Policy | Copyright © 2009-2026 WonderFox Soft, Inc.All Rights Reserved
