WonderFox HD Video Converter Factory Pro is just the decent tool you’re looking for. It can open files with the .wtv extension and then edit WTV files handily with the built-in editing toolkit. It allows you to trim, merge, rotate, flip, crop, filter, and watermark WTV videos with ease. You can process multiple WTV files in one go. Apart from being an editor, it comes with 500+ output profiles and enables you to convert WTV to MP4, MKV, MP3, TS, etc. The intuitive interface makes the WTV editing work more straightforward.
Download and install Download and install this trustworthy WTV editor for Windows first. Then follow the step-by-step guide to learn how to edit WTV files.
Launch HD Video Converter Factory Pro, click on the Converter button on the main interface to go into the Video Converter workspace.
Hit the Add Files or Add Video Folder button to load source WTV files into the program. Also, you can execute a drag-and-drop action to import video files.
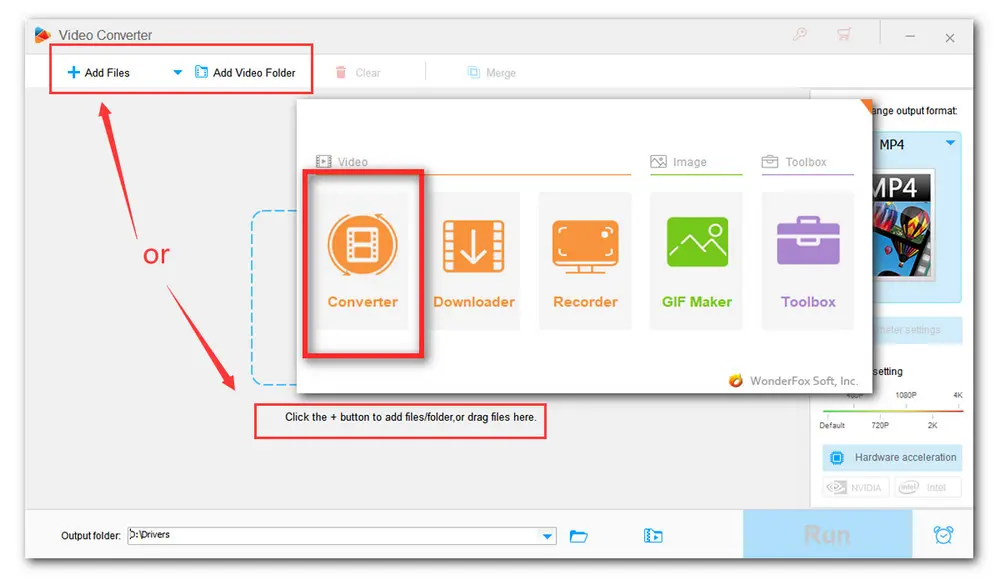
Then just feel free to choose an editing tool or a combination on the toolbar to edit WTV files. Read on to learn the details.
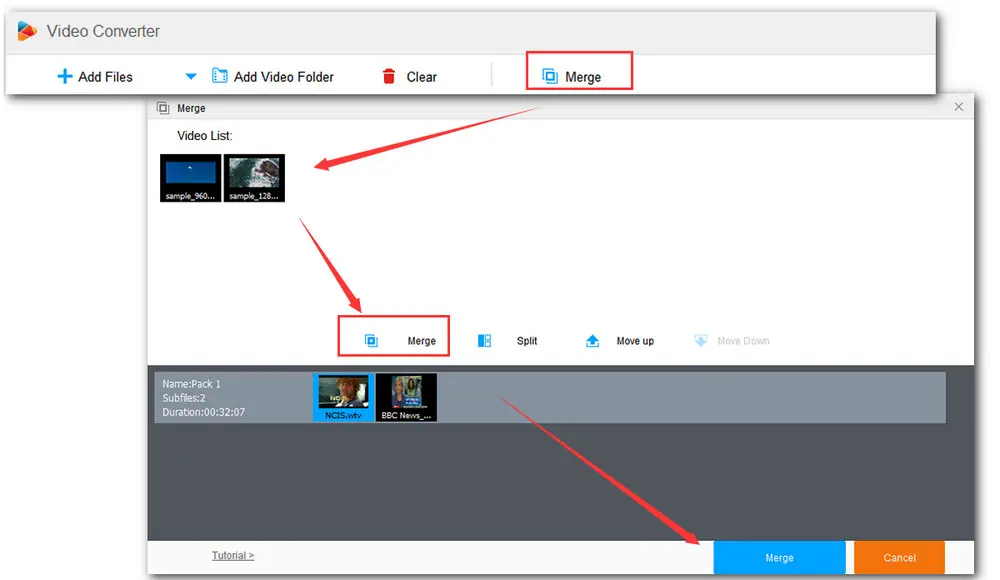
Click the Merge button at the top of the main interface. Then all the video files will be listed in the new window. Press the middle Merge button to create a “Pack 1” track. Then drag the WTV files to the new pack. You can rearrange the order through simple dragging. Finally, click the bottom Merge button and go back to the main workspace.
Note: You are allowed to merge multiple video files with different formats into one other than the WTV format.
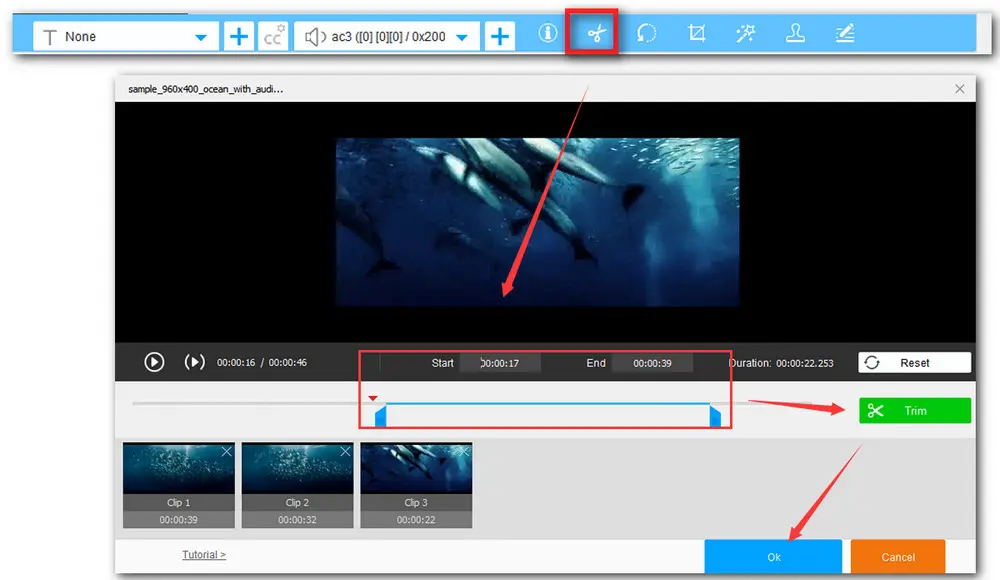
Click on the scissors-shaped icon on the toolbar, move both sliders to select the desired segment, or input the exact Start and End time to cut the videos more accurately. Then hit the green Trim button to cut the WTV file. Repeat the step to get multiple segments. Click OK to go back.
Click on the circle-shaped icon to open Rotate window. Here you can rotate the video 90 degrees clockwise or flip the upside-down video. There are two windows for you to compare and preview the videos. Click OK to save the changes and go back.

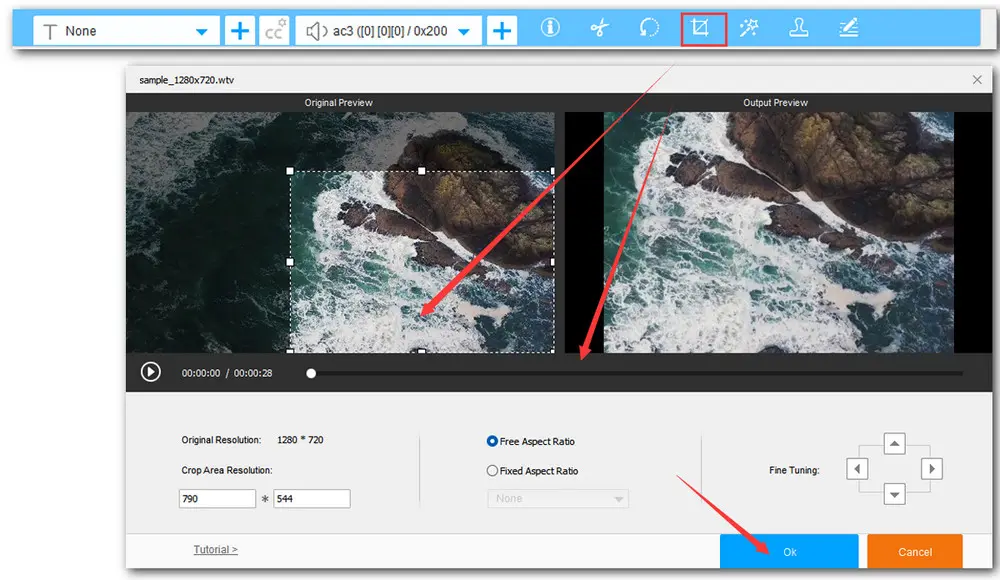
Click on the fourth Crop button. Here are two video cropping modes. The Free Aspect Ratio allows you to freely drag the dotted box or manually input the resolution to get any desired area, while the Fixed Aspect Ratio provides some common fixed ratios. You can also use Fine Tuning to adjust the area more accurately. At last, click OK to save your setting.
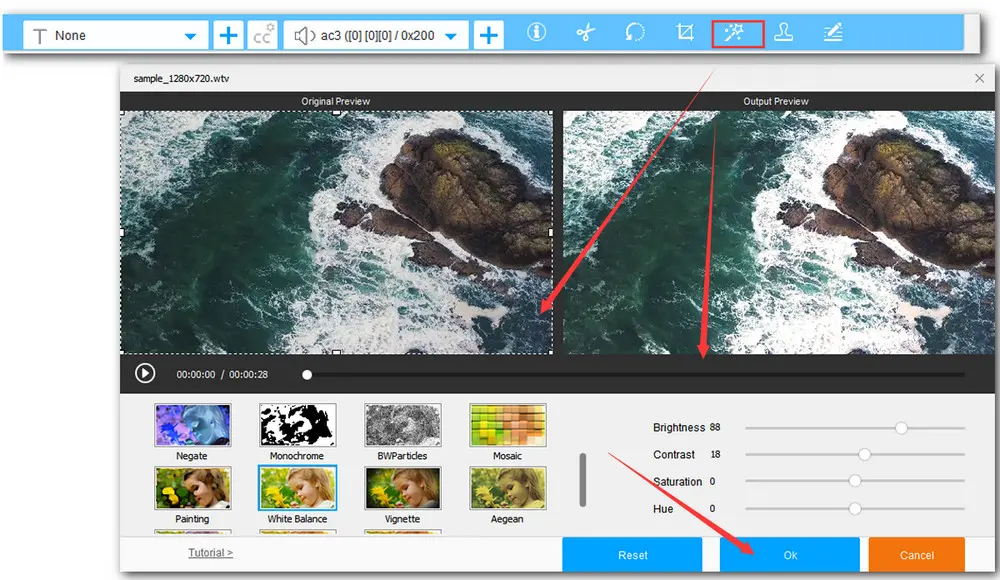
Hit the Magic Wand icon to go into the Effect window. Here are 19 ready-made effects for you: Highlight, Darken, Grayscale, Bright, Pencil drawing, Blur, Sharpen, Emboss, Noise, Mosaic, Old film and so on. Moreover, you can also adjust the Brightness, Contrast, Saturation, and Hue of the video. Choose one style you like and press OK to go back.
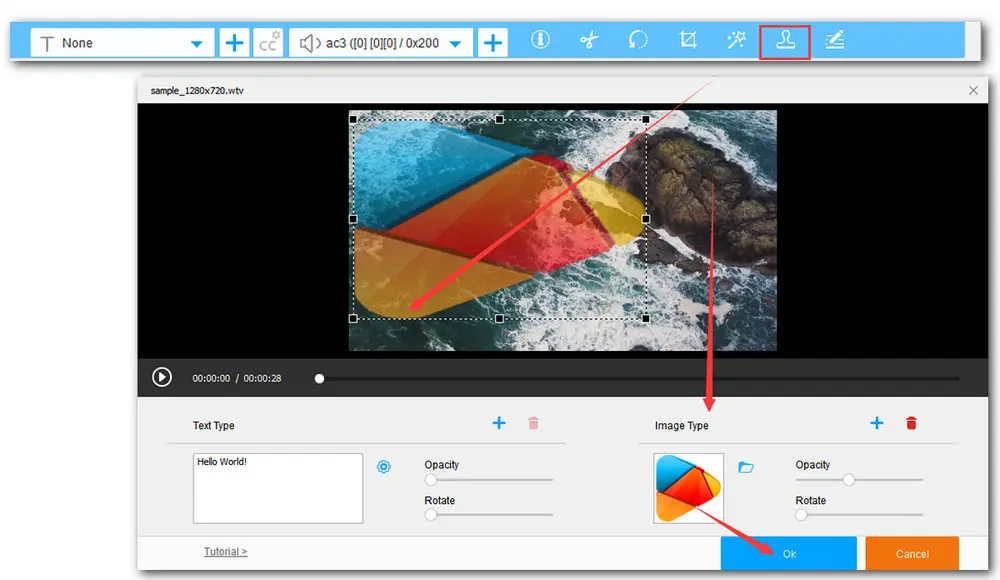
Tap on the Stamper icon to open the Watermark window. At the bottom right of the window, you can either type the text watermark or click the file folder icon to select an image watermark. You’re able to adjust the font, size, shadow, opacity, and location. Click OK to save the changes.
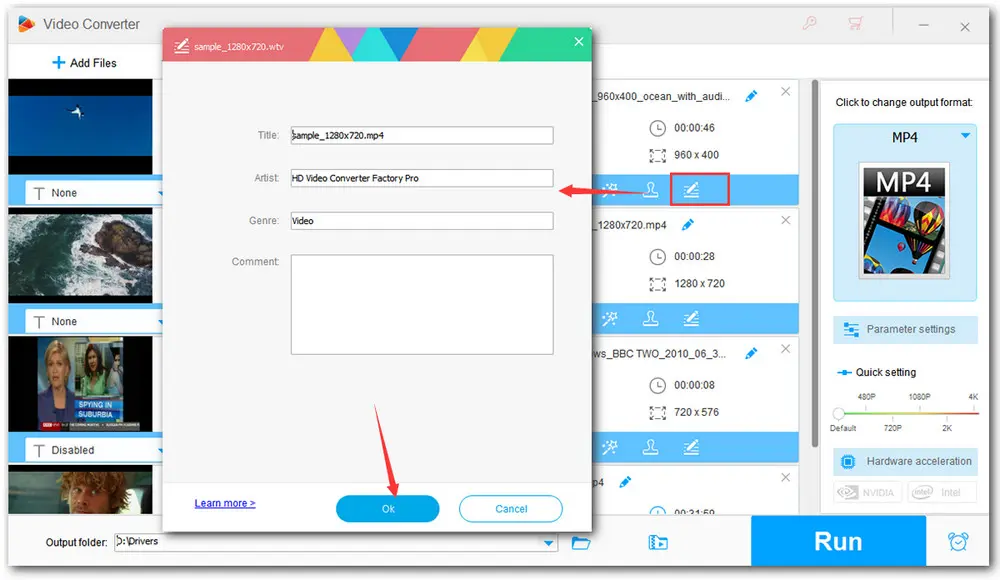
WonderFox HD Video Converter Factory Pro offers three basic metadata editing options – Artist, Genre, and Description. Press the Metadata icon on the toolbar to modify them. Remember to hit OK to save the changes.
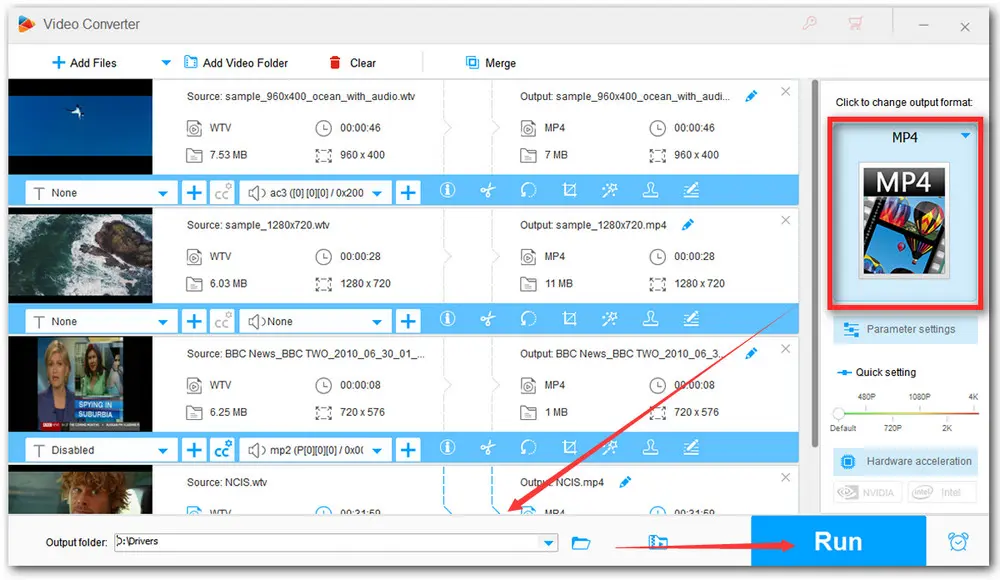
Click the format image on the right side of the software, and choose any required format under the Video tab. Then click the inverted triangle button to set an output destination. Finally, press Run to start the WTV files editing and conversion process at once.

WonderFox HD Video Converter Factory Pro
1. 500+ optimized presets for fast conversion in bulk.
2. Compress large-sized videos with no quality loss.
3. Trim, merge, crop, rotate, flip, watermark video.
4. Download HD/FHD/4K/8K videos from 1000+ sites.
5. Record live streams, gameplay, webcam, video call
6. Make animated GIFs from video or image sequence.
7. Make ringtones, extract subtitles & more...
Privacy Policy | Copyright © 2009-2026 WonderFox Soft, Inc.All Rights Reserved
