


“I just installed Premiere Pro and went to import MP4 files saved from my recordings, but when I try to import them it says the file has an unsupported compression type.”
“When I try to import an MP4 into the Premiere Pro timeline, it doesn't accept it. It only lets me put it in the audio places which is not what I’m trying to do.”
Do you also face similar problems when opening MP4 in Premiere Pro? You are not alone. In fact, Premiere Pro natively supports MP4. But why sometimes I can't import MP4 into Premiere Pro? The reasons vary. In this article, we will explain this error and show you solutions to import MP4 into Premiere Pro correctly. Read on.
Although MP4 is one of the Premiere Pro supported video formats, it may not be successfully imported when the following issues exist:
Having learned the causes why Premiere Pro can’t import MP4, let’s look at the solutions. Below, we give 6 solutions to fix the MP4 import failure so you can import MP4 into Premiere Pro error-free.
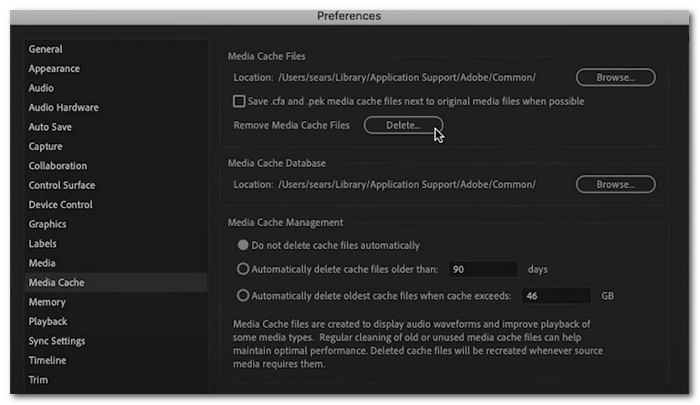
Clearing media cache files in Premiere Pro can help keep the software at optimal performance. Don’t worry. The software will rebuild the cache files when you use the software. Follow along with the instructions to clear the media cache files in your Premiere Pro.
Step 1. Open Premiere Pro.
Step 2. Select Edit > Preferences > Media Cache.
Note: If you want to delete all media cache, make sure that you select File > Close All Projects before you go with Step 2.
Step 3. Click the Delete button next to Remove Media Cache Files.
Step 4. In the dialog that shows up, you can choose to delete unused media cache files or delete all media cache files from the system.
Step 5. Click OK.
Step 6. Restart Premiere Pro and test if you can import MP4 into it this time.
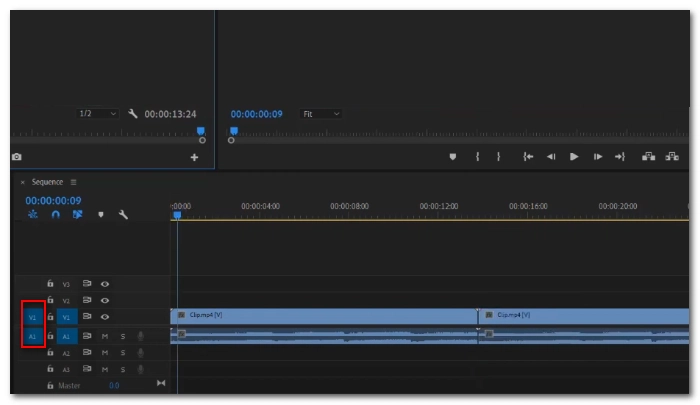
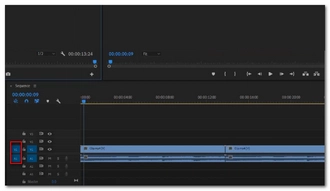
When you import MP4 into the Premiere Pro timeline but only the audio or video is imported, it may be that you forget to turn on the A1 or V1 source patching.
Source patching will show you the video, audio or image to be inserted into the timeline. You need to have both A1 and V1 enabled to see the audio and video tracks. Here's how to enable them in Premiere Pro.
Step 1. Click the V1 and A1 boxes on the far left of the timeline.
Step 2. Drag the MP4 into the timeline and see if it works.
Another way that may fix the MP4 import failure in Premiere Pro is by changing the file extension to what Premiere Pro likes, such as .mov or .mpg. Just right-click on the MP4 file and select Rename, then change the .mp4 file extension.
Note: If you cannot see the file extension, you can open the Windows File Explorer. Next, go to the View tab and check the box before File name extensions. Now, you can see the file extension of all your files.
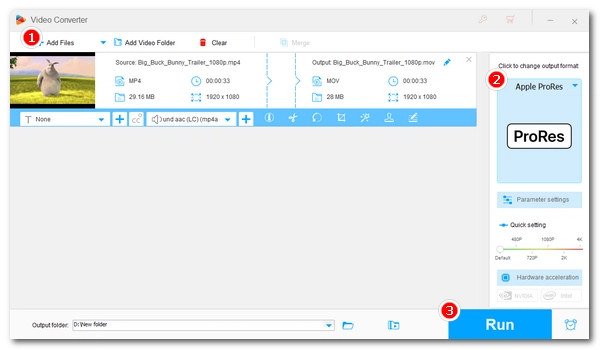
Converting MP4 to a format that is suited for Premiere Pro is a very effective way to solve the “can’t import MP4” problem. We can use a dedicated and easy-to-use video converter like WonderFox HD Video Converter Factory Pro to easily handle the job.
With excellent format and codec support, this software can convert problematic MP4 to Premiere Pro supported format in just a few clicks. At the same time, it can automatically convert VFR to CFR to solve any audio problems in Premiere Pro. It is recommended that you convert MP4 to ProPres (an intermediate codec designed for post-production) for easier import and editing in Premiere Pro. Just download and install download and install the software to get started:
Step 1. Launch the software and open Converter.
Step 2. Click Add Files to add your MP4 or directly drag the file into the converter interface.
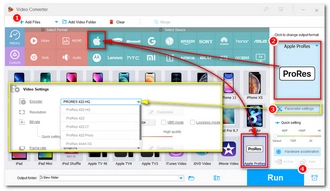
Step 3. Click the right-side format image to expand the output format list. Then click the Apple tab and select ProRes as the output profile. You can also try other Premiere Pro supported formats such as H.264, MOV, and so on.
Step 4. Open the Parameter settings. Then select your preferred ProPres encoder. You can also adjust other settings as you see fit. This step is optional.
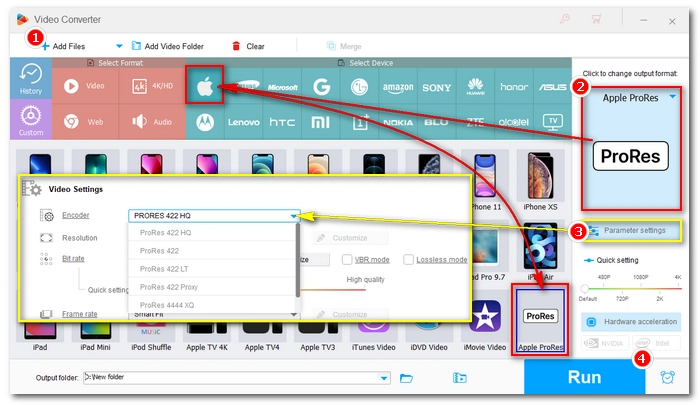
Step 5. Click the ▼ button to choose an output folder. Finally, press Run to start the conversion at once.
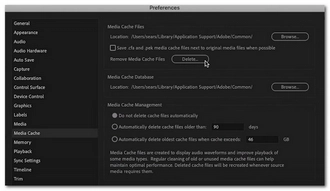
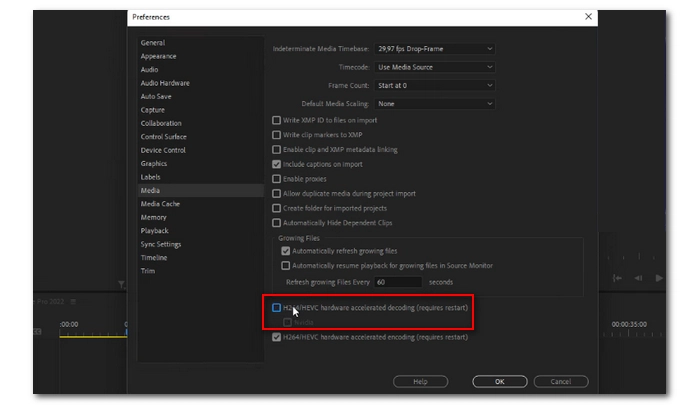
Hardware acceleration can make your rendering faster and higher quality by using the GPU. However, if your GPU is underpowered, it may cause unexpected errors. You can turn off hardware acceleration and see if that fixes Premiere Pro not importing MP4. Here's what to do.
Step 1. Open Premiere Pro.
Step 2. Select Edit > Preferences > Media.
Step 3. Uncheck the box before H264/HEVC hardware accelerated decoding. Then click OK.
Step 4. Restart Premiere Pro and test whether the problem goes away.

Resetting preferences is another way to troubleshoot issues if you don’t know what’s the exact cause. Follow the steps below to reset preferences to the factory defaults.
Note: It is recommended that you back up your preferences before proceeding with the following steps.
Step 1. On your Windows, navigate to the preferences folder. The default location of the preferences folder is C:\Users\username\Documents\Adobe\Premiere Pro\version\Profile-profilename
Tips. On Mac, you can go to /Users/username/Documents/Adobe/Premiere Pro/version
Step 2. Rename the folder or move it to another place.
Step 3. Open Premiere Pro. A new preferences folder with factory default settings will be created automatically.
If none of the solutions above work, it may be that your MP4 file is corrupted. You can test it in VLC media player and see if it plays. If it won’t play, the file is likely broken and you need to re-download the file properly. However, if it plays normally, you can use a screen recorder to record the video as a new MP4 and see if it can be imported into Premiere Pro.
These are all we want to share about why Premiere Pro can’t import MP4 and how to import MP4 into Premiere Pro trouble-free. You can try out each method one by one till the problem gets fixed. I hope this article was useful. Thanks for reading. Have a great day!
Premiere Pro doesn’t support MP4 may due to various reasons, including unsupported MP4 codecs, wrong file type, outdated software, and damaged MP4 file.
You can drag MP4 directly into the Project panel or use File > Import to import MP4 to Premiere Pro.
You can transcode the video compression type to be supported by Premiere Pro. A conversion tool such as WonderFox HD Video Converter Factory Pro is what you’ll need. For more solutions, you can check How to Fix Error “The File Has an Unsupported Compression Type” in Premiere Pro.

WonderFox DVD Ripper Pro
WonderFox DVD Ripper Pro is a professional DVD ripping program that can easily rip any DVD (whether homemade or commercial) to all popular formats including MP4, MKV, MOV, AVI, MP3, WAV, H264, H265, Android, iPhone, and so on. It also lets you edit and compress DVD-Video efficiently. Download it to enjoy a fast and trouble-free DVD ripping experience.
Terms and Conditions | Privacy Policy | License Agreement | Copyright © 2009-2026 WonderFox Soft, Inc.All Rights Reserved