The Easiest Solution to Convert Between Video Formats
![]() Convert Video
Convert Video

![]() by Vita
by Vita
Updated on Jul 28, 2023
Letting Windows Movie Maker reverse videos backward really takes time, but if you are familiar with the steps and follow the proper operation, you will get a great reverse video. In the following article. I will show you how to do it in a proper way.
Recommeded HD video editing software:
Windows Movie Maker is rarely disappointing when it comes to processing basic video editing. People can use this Windows default video editing application to make short films and apply many great and exquisite filters to their videos. However, if you want to add the interesting reverse effect into your video in Windows Movie Maker, you will find that there is no such a “reverse” button. The fact is that Windows Movie Maker doesn’t offer the video reverser function while it enables people to extract each frame from a video clip and merge them into one to create a reverse video, which is an unconventional yet the only workable way to let Movie Maker reverse video on Windows. If you hold fast to Windows Media Player, here is how to reverse videos in it.
Also Read: Windows Movie Maker Rotate Videos l Windows Movie Maker Crop Videos l Add Text in Windows Movie Maker
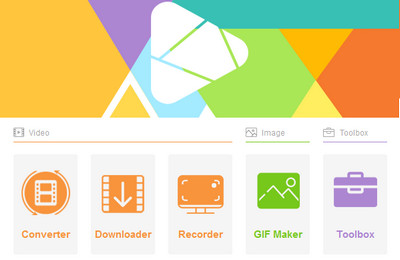
HD Video Converter Factory Pro
The multiple-purpose video converter comes with a line of tools to help you spark your videos:
1. Convert videos to over 500 digital formats and devices.
2. Clip, crop, rotate, flip, add watermark, text, effects to your videos.
3. Download videos from YouTube, Dailymotion, Vimeo, Facebook, etc.
4. Record screen, make phone ringtones, create GIFs, produce photo slideshows, and much more.


If Windows Movie Maker is not preinstalled on your computer, you can follow this instruction to Download Windows Movie Maker for Windows 10>
Then run it for Windows Movie Maker reverse video.
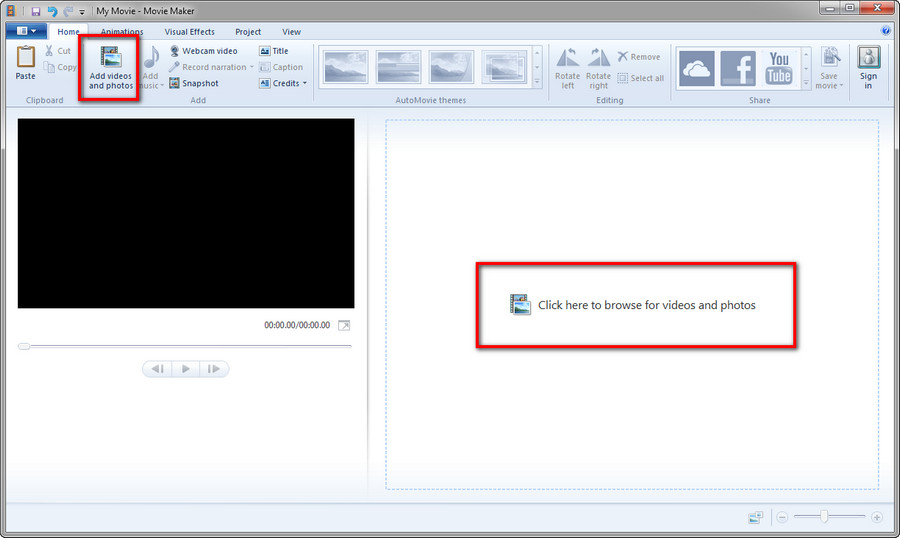
Click Add videos and photos on the home tab or simply click the blank area on the right section of the screen to import the video you want to reverse.
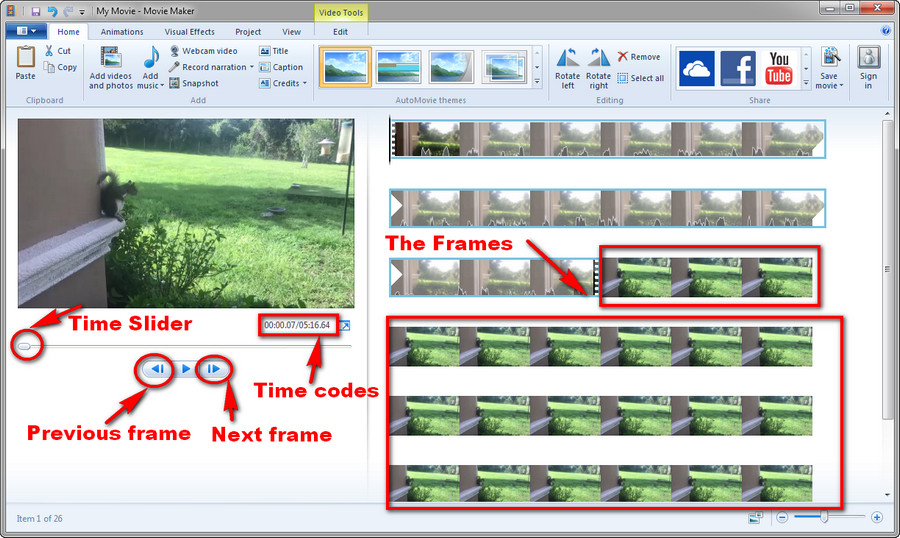
Create a folder on your computer in advance. Then return to this program. There is a video player box on the left side of the window. Drag the time slider below the video player box to the point you want to start to reverse. Two time codes are also located below the video player box. The left time code refers to the location you select (the point you drag the slider to) and the right one is the full length of the video clip. You need to take down the left time code.
After locating the first frame, hit Snapshot under Home tab on the ribbon, rename the output image, and choose the folder you have created before for saving. Then, this frame will be added to the right timeline view behind the video clip. The time slider on the left side will accordingly jump to the position before the frame.
Next, you need to take a snapshot of the second frame: drag the slider to the first frame you choose just now, hit the Next frame button below the timeline, and the slider will jump to the second frame. Click Snapshot under Home tab and save the frame, and it will be added to the timeline view and on the left side of the first frame.
Repeat this step until you have saved and added all frames of the video part that you want to reverse.
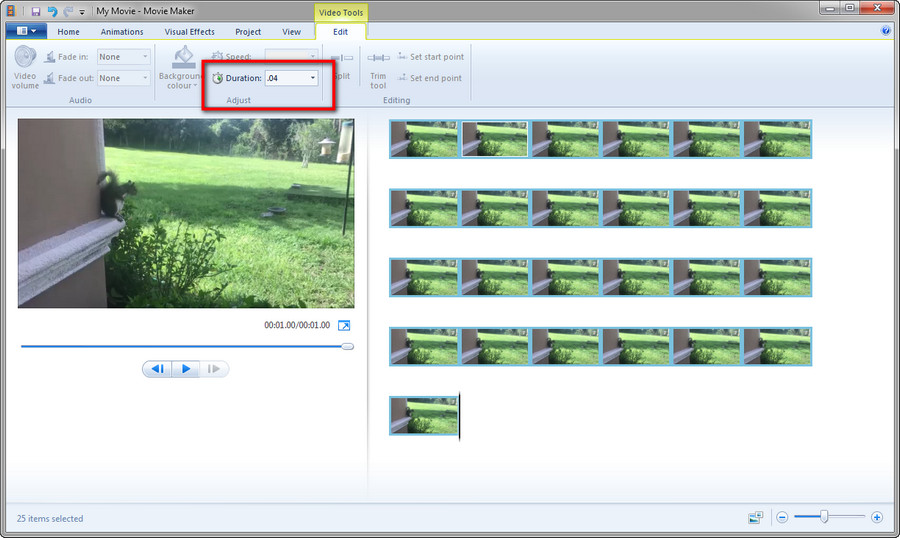
On the left expended timeline view, click on the video clip, then right click and select Remove. Now only the frames are on the timeline. Hover on a frame and hit Select All. Head to Video Tools Edit tab on the top ribbon and fill in the duration. Based on the frame ratio of the original video, we suggest you use 0.08 duration for 12FPS, 0.04 for 24FPS, 0.03 for 30FPS, and 0.01 for 60FPS.
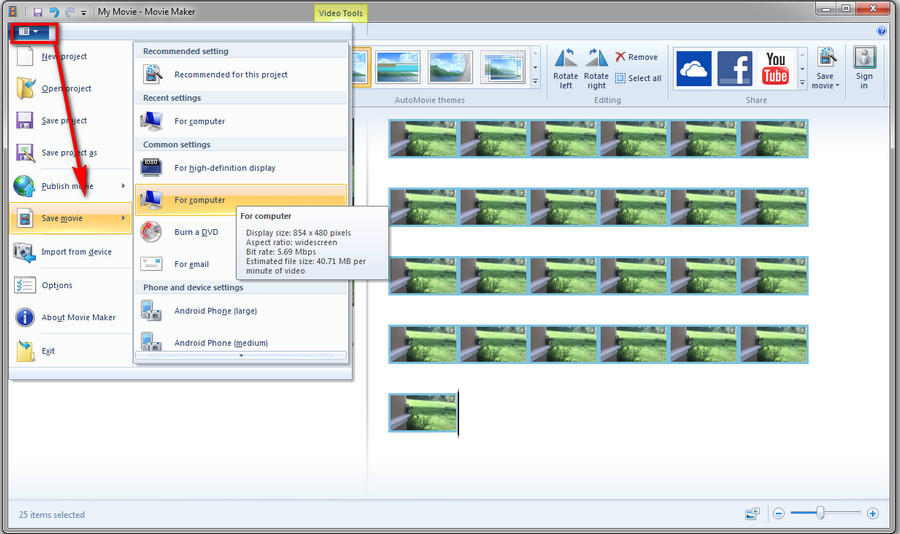
Hit the Movie Maker menu on the top left corner, then hit Save movie and choose a video format based on your demands.
After going through the process, you may have found that it can be a huge task to reverse video in Windows Movie Maker and the most time-consuming part is to extract a video frame by frame. This method is useful for extremely short video clips, yet it isn’t recommended if you want to reverse a long length video. I believe nobody is willing to spend hours or even a whole day before the computer just for reversing a small video. Consequently, we also list other easy video reversers for you.
 Online Video Reverser
 https://www.kapwing.com/tools/reverse
Kapwing is an online video editing platform that provides the overall methods to create and share video stories. Its video reverser can help you make the rewind effect. Just visit the link above, upload your video, modify the reverse speed, trim the video to keep the part you want to add reverse effect, and hit Create to initialize the process. Usually, it will take a while to finish uploading the video. Meanwhile, you need to sign in for watermark free.
 Alternative to Windows Movie Maker reverser
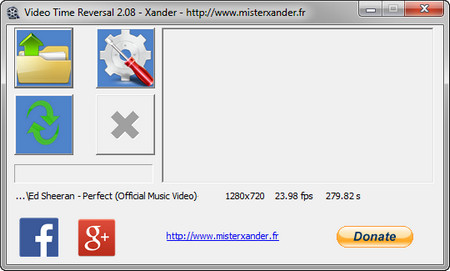
 https://www.videohelp.com/software/Video-Time-Reversal
If you prefer making desktop alternatives to Windows Movie Maker reverse clip, most video editing software on the market like Filmora and Adobe Premiere are quite useful. However, few of them are free of charge. If you only want to reverse videos, here is the totally free and dedicated video reverser software - Video Time Reversal. This software can reverse both video and sound, mix video and sound, or save the sound as a single wave file. It supports all common video formats and offers extra setting options. The only defect is it doesn’t support previewing.
Easy to handle and perform solidly. Visit the link below and install it for a try.
In Summary
It needs a lot of time and steps to make Windows Movie Maker reverse video yet does works. If you’re a loyal fan of Windows Movie Maker, just delve into the process and you will get a good result anyway. On the other hand, a simple video reverser is definitely more effective and time-saving. Choose the preferred method based on your needs.
Get the Windows Video Converter Software in One Simple Click
WonderFox HD Video Converter Factory Pro
Installing the all-in-one video suit means that you get a professional video converter, a simple online video downloader, an easy video editor, a handy video screen and a toolbox including more other tools in hand. It will not let you down.