As a powerful program, VLC isn't only for media file playback but offers more features. If you encounter an out-of-sync audio issue, you can also use VLC Media Player to fix the issue. Let's see how to fix VLC audio delay or audio ahead of video issues.
※ Use Keyboard Shortcut Keys (Temporary Fix)
 Use Keyboard Shortcut Keys
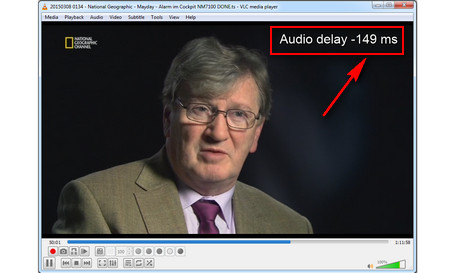
Step 1. Run VLC media player and play the video that is out of sync with audio.
Step 2. For VLC audio sync on Windows, press the "J" hotkey on your keyboard to make the sound go ahead of image. Or if you need to slow down the audio, press the "K" hotkey. To fix VLC audio delay on MAC, "F" is for moving the audio forward; "G" can move the audio backward.
Note. Each time you press the related hotkey, the audio will be speeded up or slowed down by 50 milliseconds. If you press the hotkey continuously, the number of milliseconds will be incremented accordingly.
However, note that using the shortcut keys to fix the out-of-sync audio in VLC Player is just a temporary method. It only fixes the audio problem of the current video playback in VLC.
※ Set Track Synchronization Value
 Set Track Synchronization Value
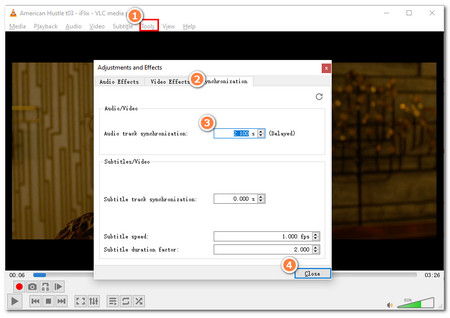
Step 1. Open the problematic video in VLC, and go to the "Tools" > "Effect and Filters" tab.
Step 2. Click on the "Synchronization" tab.
Step 3. Under the "Audio/Video" section, enter a value. (A positive value will delay the audio while a negative value will hasten the audio in the video.)
Step 4. Press "Close" to save your change.
This way can also help you fix the audio-video sync in VLC Player. However, you need to reset the value when you import another video that is audio out-of-synced.
※ Set Audio Desynchronization Compensation (Permanent Fix)
 Set Audio Desynchronization Compensation
Step 1. Run VLC Media Player.
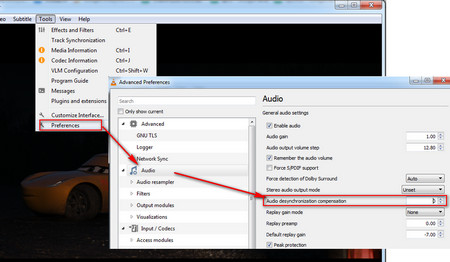
Step 2. Hit the "Tools" button on the toolbar and select "Preferences".
Step 3. Click on the "Audio" tab, then mark "All" in the lower-left corner to extend all options.
Step 4. Press "Audio", and enter a value in milliseconds which can be either positive or negative, e.g. "1000" or "-1000" in the "Audio desynchronisation compensation" box to make VLC adjust audio sync accurately.
Step 5. Finally press the "Save" button. Now you can reopen the video that has the lip-sync issue. If the issue still exists, repeat the steps above until you make the audio and video match up perfectly.
This method can permanently fix the audio-video sync in VLC. Unlike setting the Audio track synchronization value again and again, you can set the Audio desynchronization compensation value just once.
※ Fix Audio Delay Issue in VLC on Android
Encountering the audio out-of-sync issue in VLC on your Android devices? You can also fix it by adjusting the audio speed according to your needs.
Steps to sync audio in VLC on Android:
 Audio Delay Issue in VLC on Android
Step 1. Open a video in VLC Media Player on your Android device.
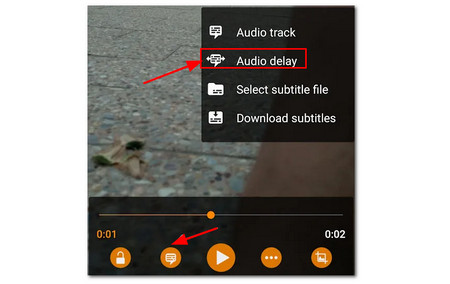
Step 2. Click on the second icon at the bottom of the interface.
Step 3. Select "Audio Delay" from the options.
Step 4. Click on the "+" or "–" button to control the audio speed in your video.
(The + button will delay the sound by 50 milliseconds, whereas the – button will hasten the sound.)
However, the setting in the video is also temporary and will be removed when you close the video. You need to reset the audio delay when you play it the next time.