WonderFox HD Video Converter Factory Pro
Cut and Compress HD/4K Videos with Ease
📍 A built-in editor
📍 Convert any video to 500+ presets
📍 Offer a Batch Compression button
📍 Adjust video resolution and more settings


In this article, we are going to recommend a handy desktop video cutter and compressor and demonstrate how to cut and compress video. First of all, let’s get some details about this efficient toolkit below.
To cut and compress videos effortlessly, WonderFox HD Video Converter Factory Pro can be a decent option. It supports all popular video formats, like MP4, MPG, AVI, MKV and others. It also allows you to do more editing, such as cropping, rotating, adding watermark and special effects, merging, and so on. Besides, it is a powerful a V/A converter, online video downloader, ringtone maker, GIF maker, etc.
Now, downloaddownload the best video cutter and compressor for Windows and go through the steps to compress and cut video easily.
WonderFox HD Video Converter Factory Pro allows you to cut and compress video files effortlessly. In simple clicks, you cut videos into multiple segments and have your video reduced to half size and even smaller with decent quality. Get it now.
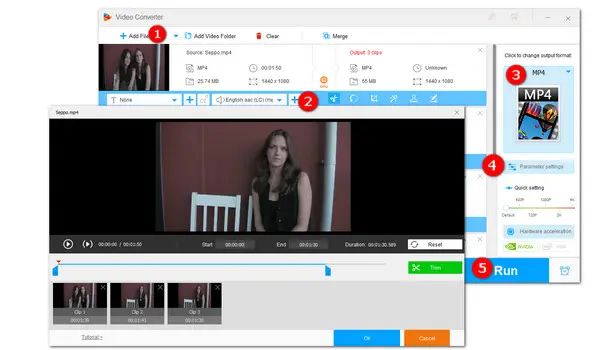
Launch the program on your PC. Navigate to the Converter module. Then add your files by clicking on the + Add Files button or simply doing a drag-and-drop action. Multiple files can be added at a time for batch processing.


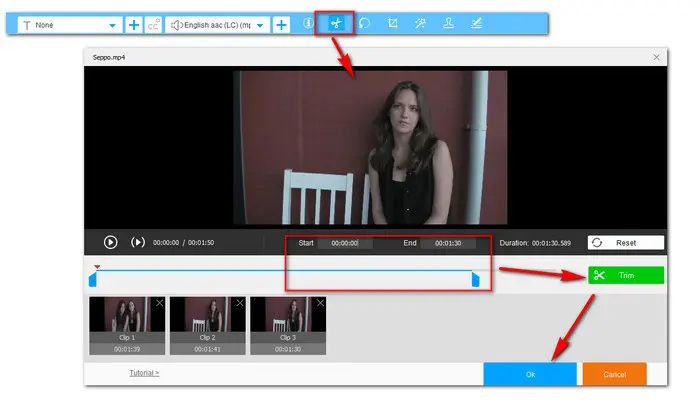
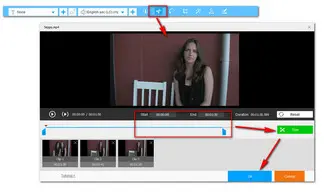
Hit the scissors-shaped Trim button on the toolbar. Move the blue slider bar or input Start and End time to select the part you need. Then click Trim to get the clip. Repeat the steps to get more segments. After all settings are done, click OK to save all changes.
For further editing, you can hit the corresponding icon on the toolbar.
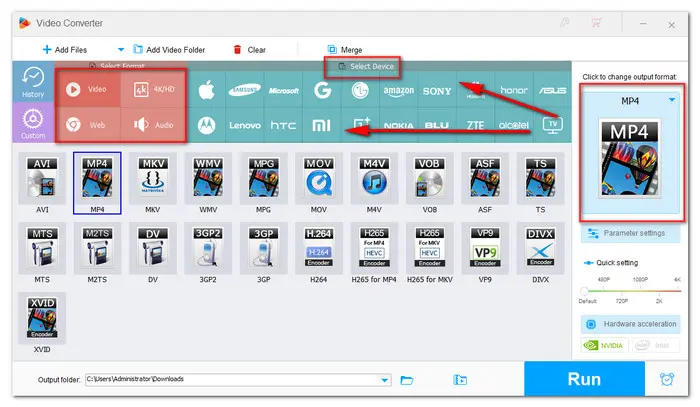
Expand the output format list on the right side. Under the Video category, choose one format based on your need.
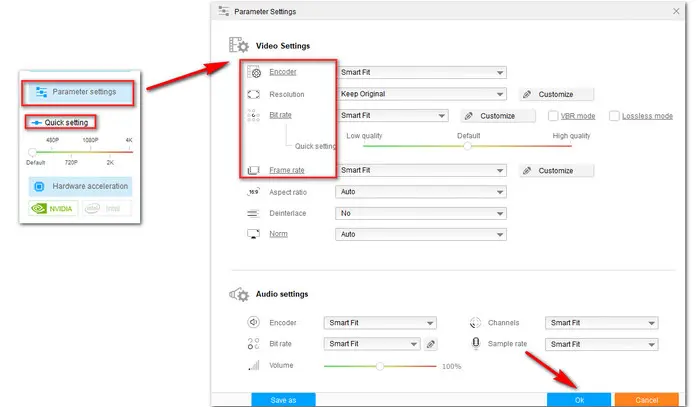
To further reduce your video file size, you can compress the video clips by changing the parameters in Parameter Settings section. Generally, there are five options for you to shrink file size.
Option 1# Select a More Advanced Encoder
The efficiency of advanced encoder compression standard, like H265, VP9, etc., outperforms the H.264/AVC compression standard. Therefore, you can select a more advanced encoder from the drop-down list of Encoder.
Option 2# Downscale Video Resolution
Go to the Quick setting under the Output Format image icon and drag the bar to your preferred resolution. Or customize a lower resolution in the Parameter settings for your video.
Option 3# Lower the Video Bitrate
Select a lower bitrate or switch the CBR (Constant Bitrate) mode to VBR (Variable Bitrate) mode and then move the slider to low quality. Because VBR can achieve a reasonably small file capacity while maintaining decent quality.
Option 4# Reduce Frame Rates
You can either select an optimized frame rate from the drop-down list or customize another frame rate.

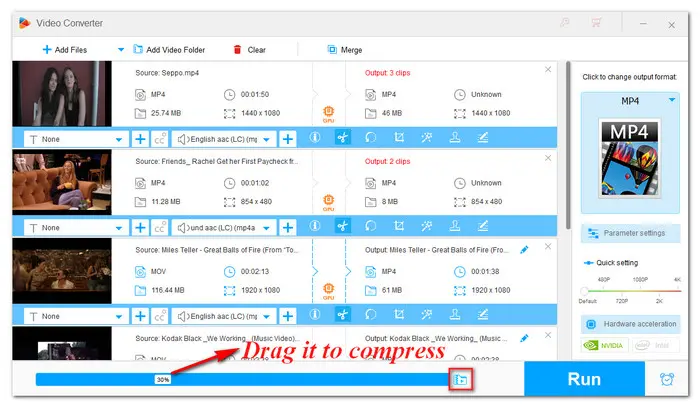
Option 5# Adjust Compression Ratio
The Batch Compression mode is just right for batch processing. Click the bottom Batch Compression button and drag the sliders to the right to increase the compression ratio. The slider goes more right; the video is compressed smaller.

Press the inverted triangle icon to specify the output path. Finally, click on the Run button to start to initiate the process.
Also Read: Compress from GB to MB | Compress Video for Email | Video Clip Editor


How do I compress and cut a video? After reading this post, I hope this question won’t bother you anymore. Of course, you can also cut and compress video online. These online video editors seem to offer more convenience, yet most have limits on maximum file size and can’t batch process files. While the all-in-one V/A processing tool recommended in this post provides better results with high efficiency and have no limits on file size or input format. The intuitive interface makes it accessible to users in all level.
DownloadDownload this effective video compressor and cutter to give it a shot now. Thanks for reading. Have a nice day!

Terms and Conditions | Privacy Policy | License Agreement | Copyright © 2009-2026 WonderFox Soft, Inc.All Rights Reserved