It’s very common to have a meeting online when people are in different places. And recording can help participants keep the key points of a webinar. So this article shares a comprehensive guide to show you how to record a webinar (with audio) easily on any device, including Windows, Mac, Android, and iPhone devices. Follow this post to choose the suitable method to record your webinar.
A webinar is an online meeting hosted in real-time. It’s a kind of interactive meeting that connects the meeting host with audiences from anywhere. Users can create conferences online using web conferencing software like GoToWebinar, WebinarJam, and Livestorm, and then invite others to attend the conference. But once the webinar ends, viewers can’t access it anymore. Therefore, many people want to record the webinar for review or later viewing. To achieve this, good webinar recording software is necessary. This post shares detailed methods and powerful meeting recorders on all devices to help you record live webinars on Windows, Mac, Android, and iOS devices effortlessly.
HD Video Converter Factory Pro is a practical screen recorder for PC. It can help you record webinars, capture streaming videos, and save gameplay highlights easily. High quality, no lag & no watermark. Get it now!
WonderFox HD Video Converter Factory Pro is one of the best solutions for recording a webinar on Windows 11/10/8/7... It offers the most straightforward way to capture screen on computers and export high-quality recordings in four compatible formats (MP4, MKV, AVI, and MOV). The recording frame rate can be up to 60fps, higher than most common recording tools. Besides, it enables you to record system audio and mic at the same time. After the recording, you can use the software to change the file format and do further editing like trimming, cropping, merging, adding subtitles, etc. All can be done with several simple clicks.
Free downloadFree download the best webinar recording software, and let’s get started!
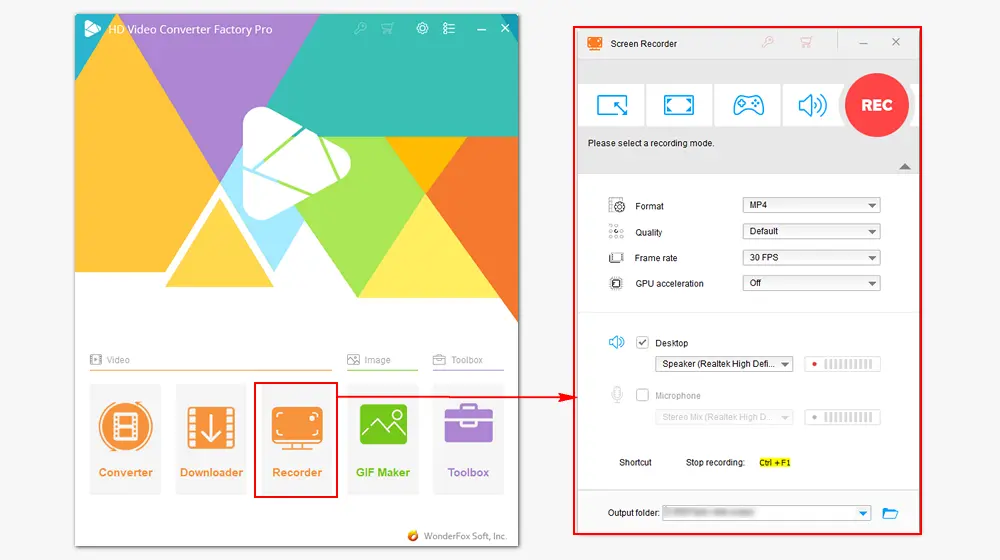
Launch HD Video Converter Factory Pro. Click Recorder on the home interface.
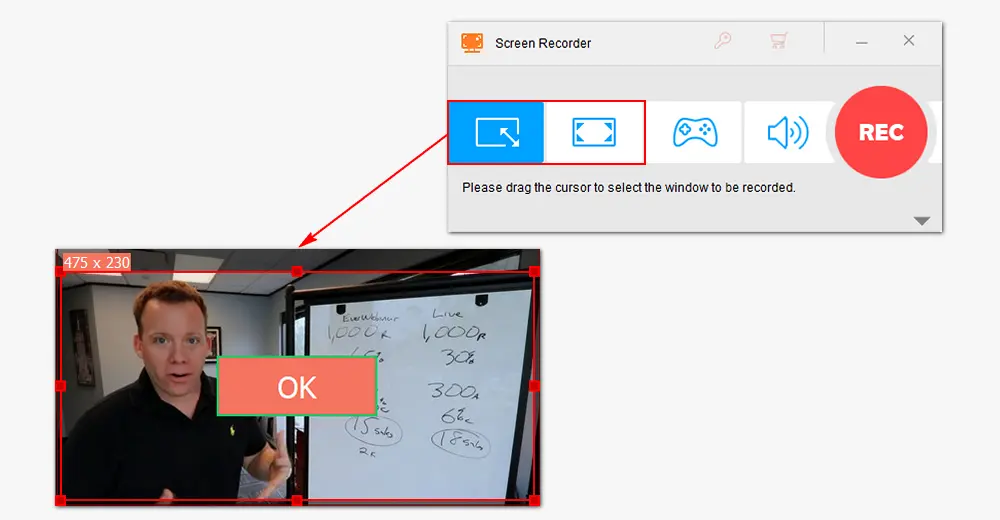
At the top of the Screen Recorder, choose a recording mode from the first two options. The former is to record a specific part of your screen, and the latter is to record the entire screen. You can drag the four border lines and adjust the recording region to the webinar window. Then click OK to confirm the recording area.
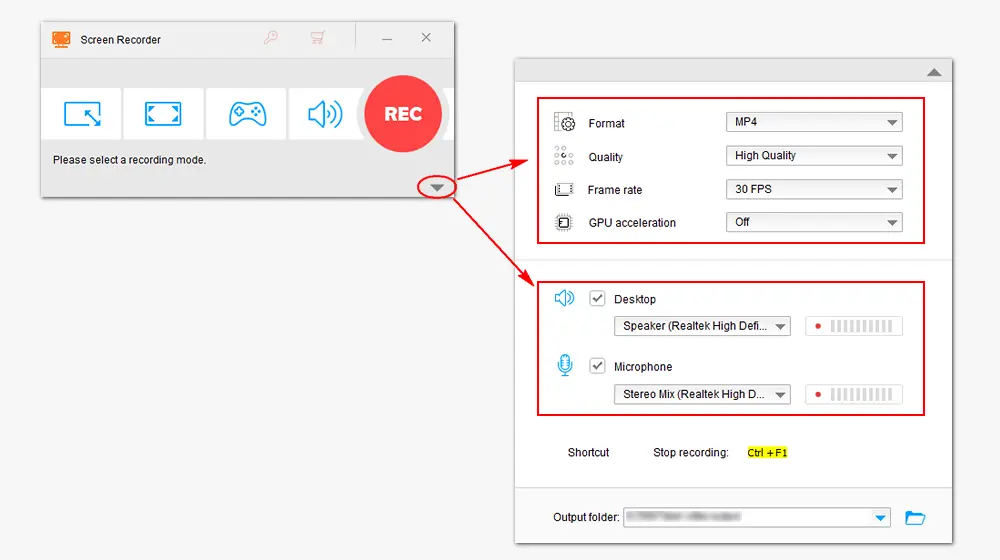
If you can’t see the setting options, click the gray triangle button to show them below. Select a format, quality, and frame rate from the drop-down list. MP4 is recommended in most cases, but you can still choose AVI/MOV/MKV for different purposes. High Quality is recommended and a frame rate of 30fps is enough in normal conditions.
The Desktop and Microphone audio sources are enabled by default to capture the audio from the webinar and your mic voice. You can also customize the audio sources to capture the needed audio.
Click the bottom triangle button to specify a destination for the webinar recording. Finally, press the red REC button to start recording after a five-second countdown. The software will minimize the edge of the screen. When you need to stop recording, click the stop button or press the hotkeys Ctrl + F1. The window containing the recorded file will pop up on your PC.

To capture the seminar on Mac, you can try the Mac built-in QuickTime Player. It’s not only a popular multimedia player but also features a free screen recorder that can help you do a screen recording easily. However, it only allows you to capture the external voice that comes from your microphone by default, to capture the sound from the system, you need to install a sound plugin like Soundflower.
Follow this post to learn how to install the Soundflower plugin to QuickTime Player: QuickTime Player Screen Recording with Audio on Mac [Full Guide]
Step 1. Attend a webinar and run QuickTime Player on Mac.
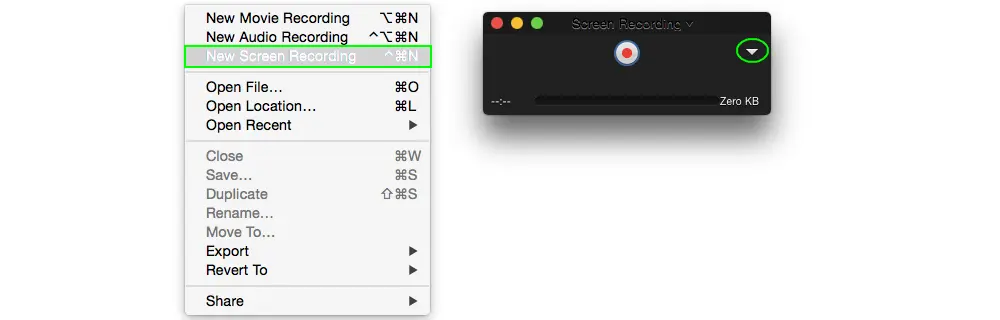
Step 2. On the top toolbar, click File > New Screen Recording.
Step 3. Adjust the audio settings by clicking the small downside button.
Step 4. When the webinar begins, click the red button Record to start capturing. It's optional to record the full screen or a customized zone of your Mac.
Step 5. Once finished recording, click the Stop button on the menu bar to end the recording.
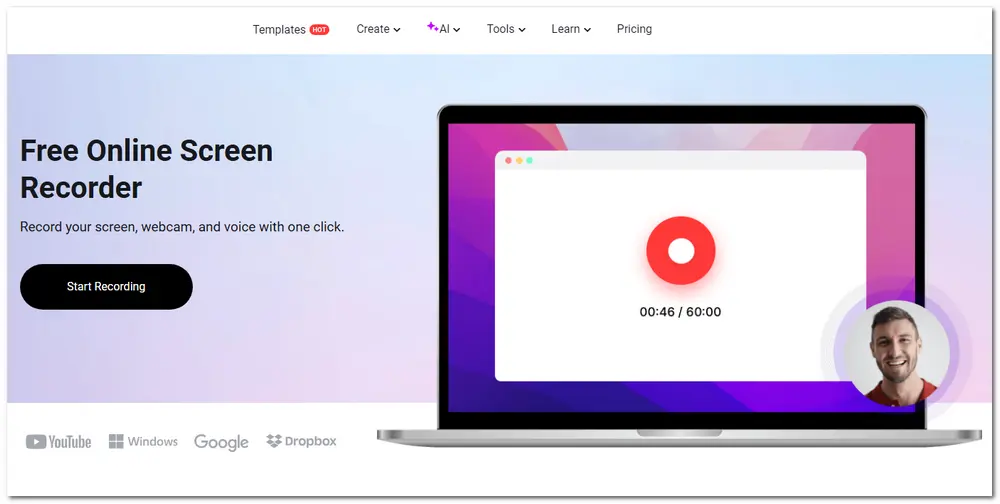
Sometimes, you may want to record a short webinar with a free online screen recording tool. In this case, you can search and use a reliable online screen recorder like FlexClip. It is simple to use and also offers editing features after screen recording. The free unregistered version allows you to record for up to 60 minutes. But it will save the recording in WebM format that may need a conversion to smooth playback on your device.
Step 1. Open the FlexClip recorder (https://www.flexclip.com/tools/screen-recorder/).
Step 2. Click Start Recording and choose a recording mode. Then click Next Step.
Step 3. Choose an audio recording option and click Start Recording.
Step 4. Choose to record a browser tab, Window, or Entire Screenand click Share to start recording.
Step 5. After finishing recording, click Stop sharing to end the recording.
Step 6. Click Download and Edit to save the recording to your device and you can edit the recording with FlexClip.
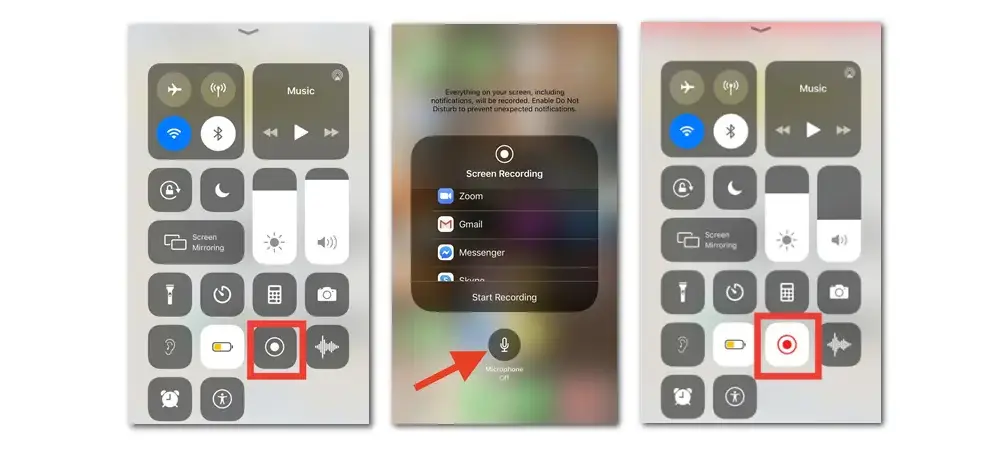
The iOS built-in screen recorder is the best tool to record webinars on iPhone and iPad. It can easily capture the screen activities on your iOS devices and save the recording to your Photos app.
Step 1. Swipe down your iPhone screen and press the record button. If there is no screen recording feature, go to Settings > Control Center > Customize Controls to add the Screen Recording feature to the control center. Then click the record button.
Step 2. Start the webinar you want to record and click Start Recording.
Step 3. Click the record recording status bar and click Stop to finish the recording.
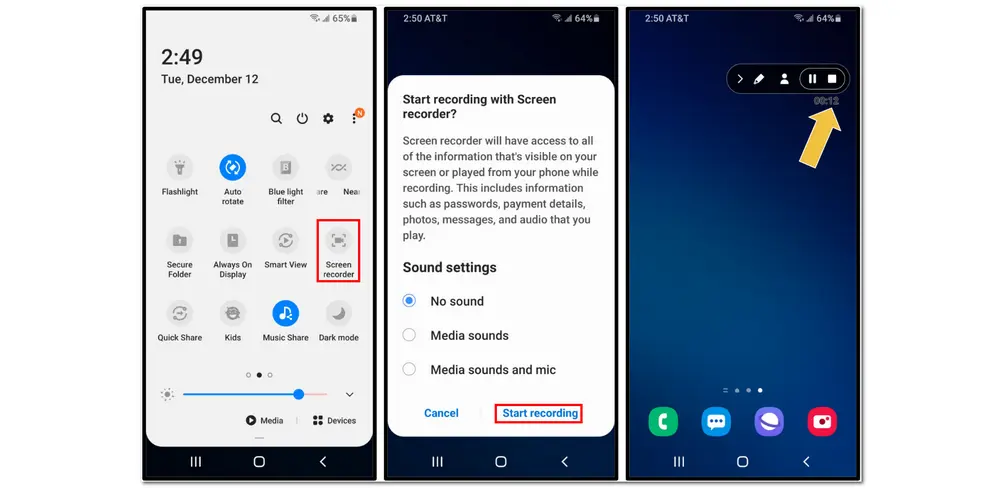
Like iOS devices, most Android devices also offer a built-in screen recording feature. It is added to the control center.
Step 1. Scroll down the screen to access the control center. Then choose the screen recording icon.
Step 2. Prepare the webinar you want to record and customize the recording settings.
Step 3. Click the red record button to start recording.
Step 4. After finishing the webinar, click the stop icon to stop the recording.
It will save the screen recording to your Gallery app.
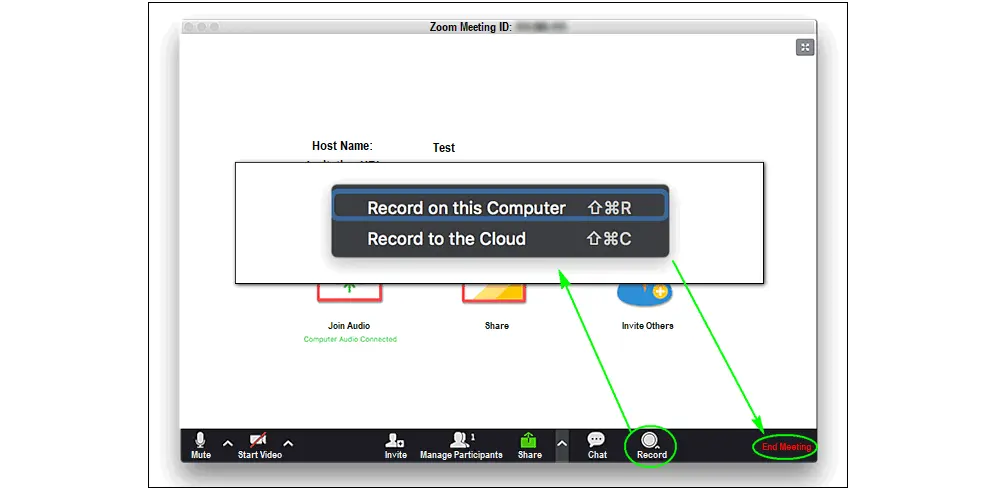
Zoom is a popular communicating application that enables users to organize webinars. Only paid plans with a monthly or annual subscription allow the host to invite (different numbers of) participants. And by default, only the host can initiate a local recording of the Zoom webinar. If you are an attendee, you can use HD Video Converter Factory Pro to record Zoom meetings without permission. If you are the host, you can record the webinar on Zoom easily as follows:
Step 1: Open Zoom and start your live meeting as a host.
Step 2: From the bottom toolbar, click the "Record" button to start your job.
Step 3: Choose "Record on this Computer" (locally) or "Record to the Cloud".
Step 4: When you finish, press "Stop" or click the "End Meeting" button. Then the video file will be stored in the folder you set.
That’s all I want to share with you about how to record a webinar on Windows, Mac, iPhone, and Android as an attendee. Wonderfox HD Video Converter Factory Pro is a powerful screen recorder that can easily capture webinars with audio in high quality on your Windows PC. If you want to record a webinar on other devices, the built-in screen recording tools can also offer basic recording features. Hope this post can be helpful to your condition. Thanks for reading till the end. Have a nice day!
You have to download a third-party screen recorder, which is capable of recording both video and audio. Then join a live meeting and let the recorder capture what you’re watching from the webinar. A good screen recorder should also provide additional editing features like HD Video Converter Factory Pro.
GoToWebinar provides users with a platform to engage with their audiences through virtual conferences and events. To record a GoToWebinar meeting, beneficial screen recording software is needed. Besides the live meeting recorder introduced above, you can use other available programs to complete this task.
Hot Search: How to Record GoToMeeting | Convert G2M to MP4
Find a practical screen recorder and launch it to capture the webinar you want to save. There are many useful recorders, such as HD Video Converter Factory Pro and OBS Studio. They can help you record activities on your screen and export recordings in a proper format to your computer with ease. Refer to >> Top 7 Screen Recorder No Watermark for Windows PC

WonderFox DVD Ripper Pro
1. Rip digital files from DVD and keep good quality;
2. Remove/bypass DVD copy protection;
3. Support 600+ formats and presets for devices;
4. Make 1:1 ISO image and DVD folder copies;
5. Cut video clips and add subtitles to DVD movies.
* Please refer to the DVD copyright laws in your country before ripping a DVD.
Privacy Policy | Copyright © 2009-2026 WonderFox Soft, Inc.All Rights Reserved
