


As you may know, Windows 10 has a built-in screen recorder called Xbox Game Bar. It is designed to capture PC games and applications using shortcuts. You can press Windows logo key + Alt + R to quickly start recording. However, you may notice that the recording screen is fixed and you cannot select a random area to record.
In this case, if you want to record any portion of the screen, you need a third-party screen recorder.
Below, I would like to share a powerful and easy-to-use screen recorder that provides the best way to record part of the screen on Windows 10 and 11. Please read on.
WonderFox HD Video Converter Factory Pro is an all-in-one video program with a simple screen recorder that can help you record part of your screen on Windows easily. Just select your desired area and start recording. In addition, it also supports full-screen recording as well as audio recording. Video recordings will be saved in MP4, MKV, MOV or AVI format. At the same time, you can also choose the recording quality you want.
Now, you can download download the software and follow the tutorial below to start the recording.
WonderFox HD Video Converter Factory Pro is an easy program to record selected area of the screen in high quality without watermark. It is simple, fast, and efficient. Try it now.
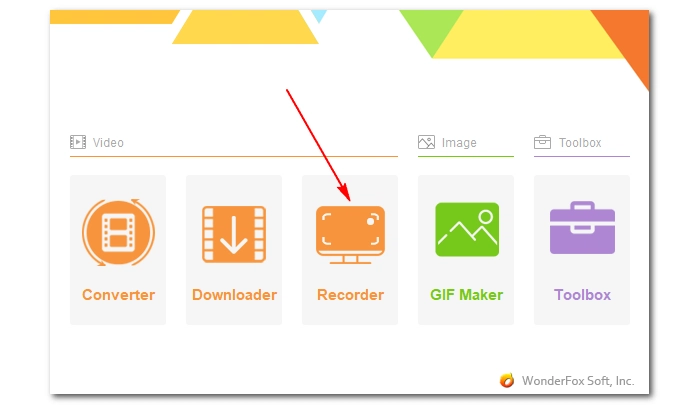
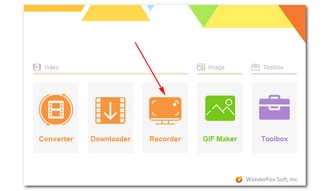
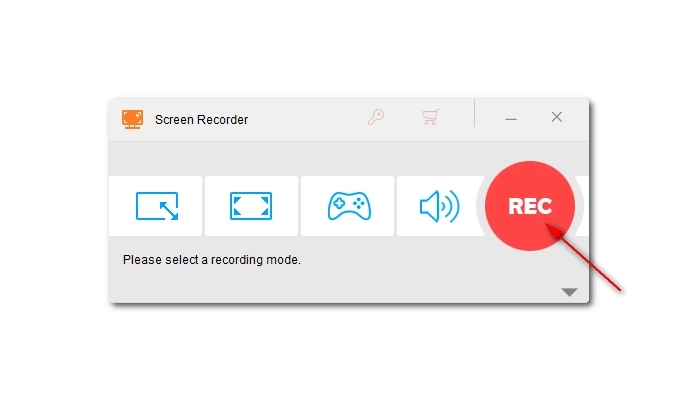
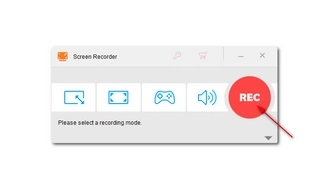
Run the software and enter the Recorder module.
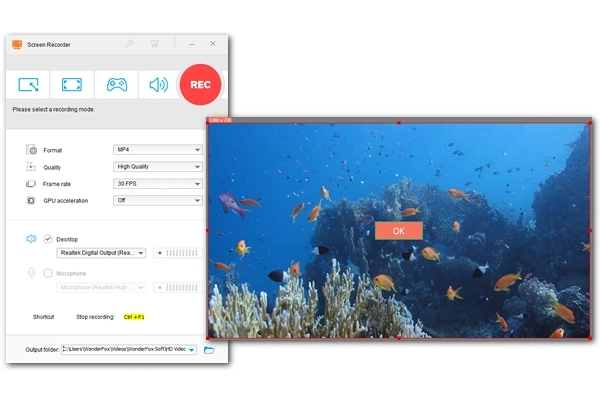
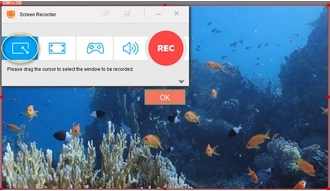
Click the Custom recording mode and select a specific part of screen you want to record. Then click the OK button to confirm the section.

Choose the recording format, quality, frame rate, and turn on/off GPU acceleration according to your needs.
Then, check the audio source. Select Desktop if you want to record system sound or Microphone to record external audio.
Next, click the ▼ button at the bottom to set the output folder.
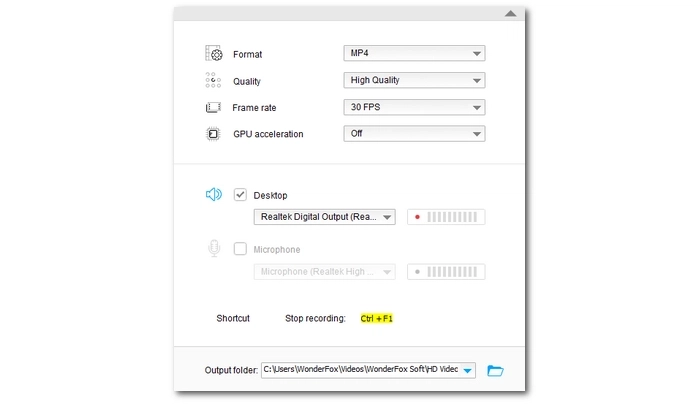
Finally, click the REC button and a five-second countdown will appear before recording begins. After recording, press the hotkey "Ctrl + F1" to stop recording.
Tip: After recording, you can also crop, trim, merge, add effects, compress and convert the recorded files using its internal video editor.
WonderFox HD Video Converter Factory Pro is a useful program for recording a specific section of your computer screen. With the above steps, you can now easily record part of your screen in Windows 10/11. But this is not your only option. There are other ways to record part of screen using screen recording utilities like OBS, Bandicam, ScreenRec, Camtasia, etc. But if you are a beginner, WonderFox is most recommended.
That's all I want to share in this article. Thanks for reading. Have a great day!
1. How do I record a certain part of my screen?
2. How do I record a specific part of my screen online?
Unfortunately, there is no online screen recorder that can help you record a part of your screen directly. But you can use Loom to record full screen and then use other tools to crop the video.
3. How do you capture a portion of the screen in Windows 10?
In Windows 10, you will need an external program to capture part of the screen. Such programs include WonderFox HD Video Converter Factory Pro, OBS, Bandicam, ScreenRec, Camtasia, and more.
Terms and Conditions | Privacy Policy | License Agreement | Copyright © 2009-2026 WonderFox Soft, Inc.All Rights Reserved