Screen recording is a good way to save important moments from online meetings/courses, capture gameplay highlights, make how-to guide videos, etc. Do you know that PowerPoint features a built-in screen recorder that can help you make screen recordings and directly insert them into your slides?
That's what comes in this post. You will learn a full guide on how to capture and edit screen recordings with PowerPoint. If you need more advanced features, we also share a better alternative.
Yes.
Microsoft PowerPoint offers a built-in screen recording feature to capture the computer screen and add it to the presentation or save it to your local drive conveniently. You can use it to capture various screen activities. However, it's not suitable for capturing gameplay or other high-quality required recording tasks. Otherwise, you may get a choppy or unwatchable video.
Anyway, in the following, you will learn:
1️⃣ How to create a PowerPoint screen recording;
2️⃣ How to stop and save screen recording in PowerPoint as a video file;
3️⃣ How to edit screen-recorded video in PowerPoint;
4️⃣ A better way to capture screen in high-quality.
Without further ado, let's see how to start a PowerPoint screen recording.
Step 1. Launch the Microsoft PowerPoint app, open your presentation, or create a blank presentation.
Step 2. Click the “Insert” option on the top banner and then you can see the "Screen Recording" function at the top-right side of the interface.
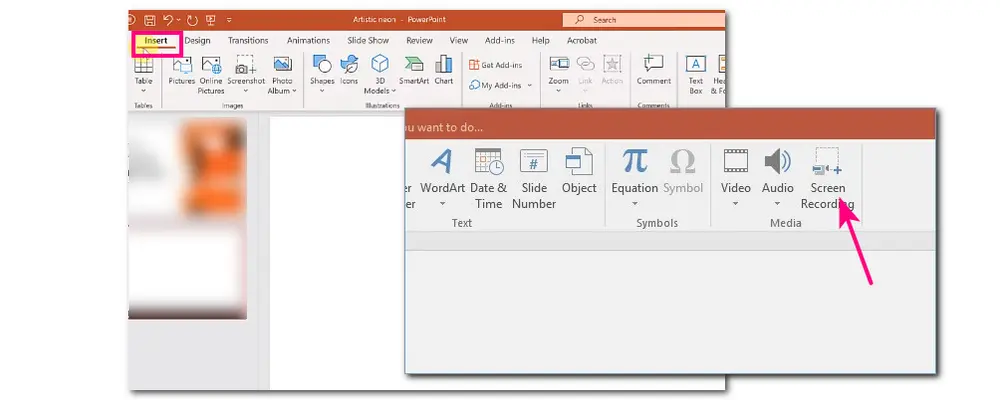
Step 3. Press it, and open the window you want to record. Then you can select the recording region. If you want to change the recording region, click "Select Area" to re-select a recording region.
Step 4. Click the "Record Pointer" and "Audio" options if you don't want to capture audio and the mouse point.
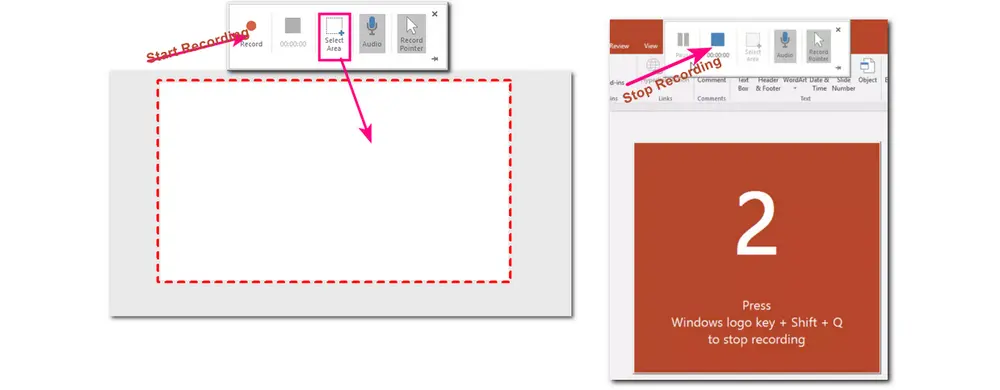
Step 5. Now, you can click the "Record" button, and it will start recording after a 3-second countdown.
Step 6. Once finished recording, you can press "Win + Shift + Q" to stop recording. Or you can move your mouse to the top-middle of the interface to bring up the hidden panel and click the square icon to stop recording. You can also pause the recording and then resume it.
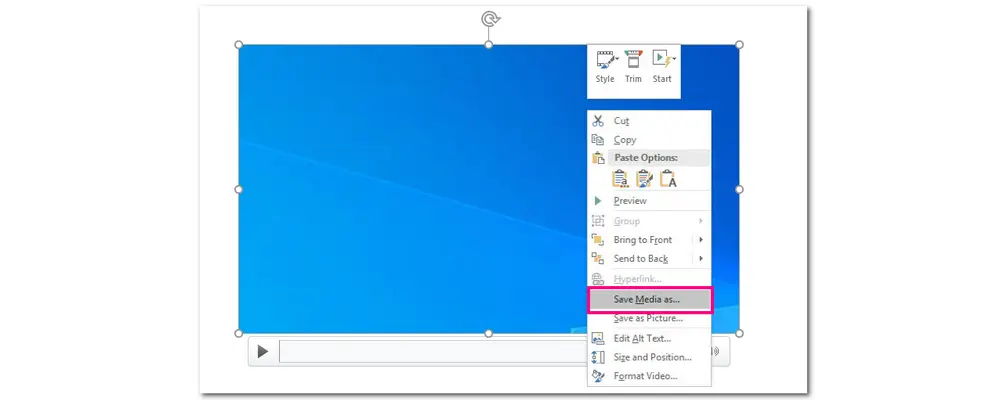
The recorded video will be automatically inserted into the PowerPoint presentation. You can play it to have a preview.
Step 7. To save the recording to your computer, right-click on the recorded video and choose "Save Media As" from the drop-down menu. Then name the video and select a desired output path.
If you need to trim off the start or end of the screen recording, you can also directly do it within the PowerPoint app.
PowerPoint offers simple video editing features that can help you trim the video, control volume, apply fade in/out effects, etc.
Follow the step below to trim the recorded video in PowerPoint.
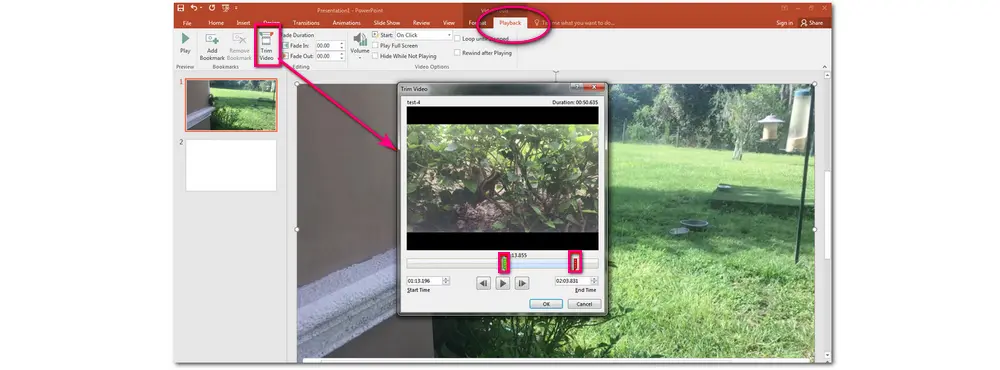
Step 1. Click on the recorded video and choose "Playback" at the top of the interface.
Step 2. Press "Trim Video" to open the video trimming window, and drag the green and red handles to select the part you want to trim. Then, click "OK" to save the change.
Apart from trimming video, you can also adjust other video playback settings like volume, fade in/out, etc.
🎯 Though PowerPoint is convenient for screen recording and inserting recordings into slides, it is not a professional screen recorder. You may encounter issues like screen recording or audio recording not working during the recording. Moreover, it cannot record gameplay well. The built-in editing features are also limited.
Therefore, if you’re unsatisfied with PowerPoint’s screen recording feature after trying it, here is a great alternative for you. Keep reading for more information.
✔ Record any part of the screen
✔ High-quality screen recording up to 1080p/4K 60FPS
✔ Various popular output formats
✔ Support further conversion, compression, and editing
WonderFox HD Video Converter Factory Pro is an all-in-one video & audio processing tool designed for Windows.
It offers an HD screen recorder that can help you record any part of the PC screen. The recording quality is high up to 1080p/4K 60FPS.
Besides capturing screen videos, it can also record music, voice-over, and other audio activities.
With it, you can capture streaming videos, online meetings, video calls, gameplay, and more.
It also allows you to edit screen recordings by trimming, combining, watermarking, adding audio, etc. without losing quality. If needed, you can also adjust the video format, compress the video, and more.
Step 1. DownloadDownload WonderFox HD Video Converter Factory Pro and launch it.
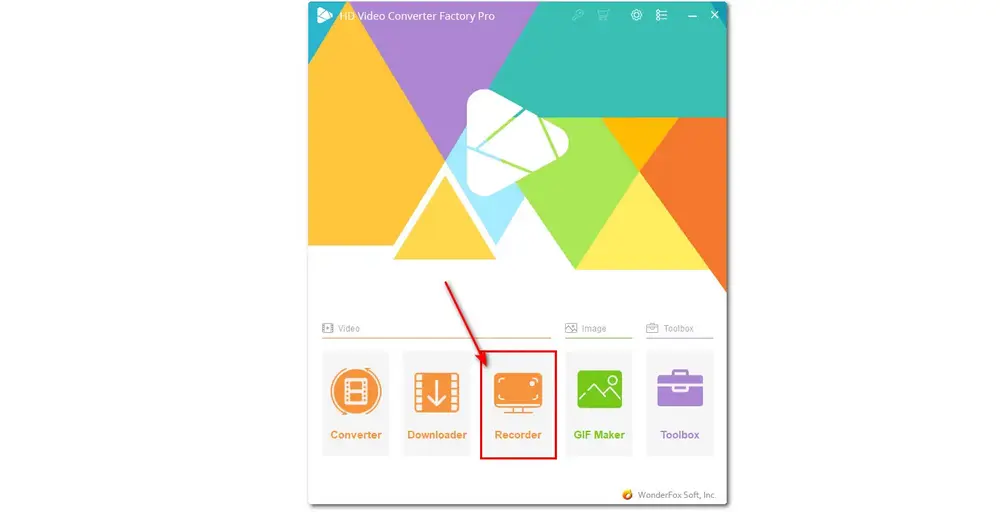
Step 2. Open the "Recorder" module from the main interface.
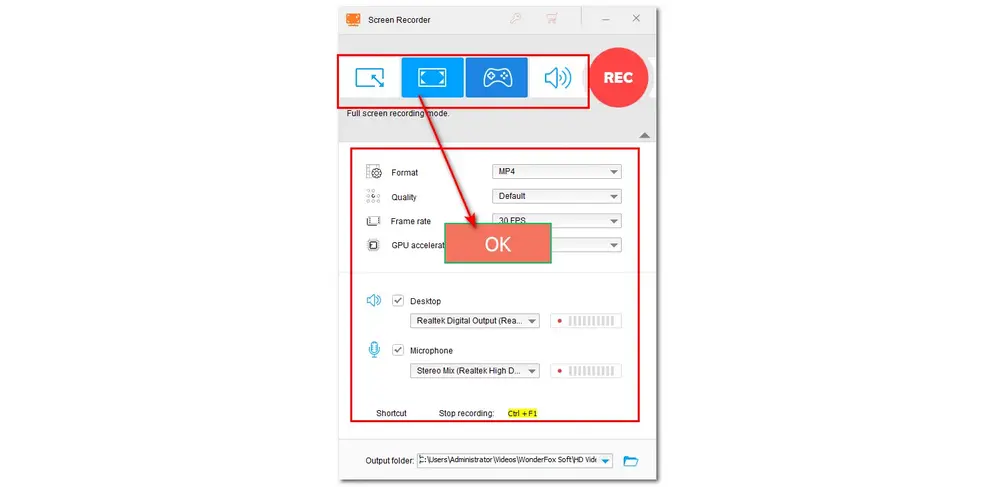
Step 3. Select a recording mode (Custom, Full-screen, Game, or Audio). Then drag the cursor to select the recording region and press "OK" to confirm it.
Step 4. Adjust the recording format, quality, and frame rate.
For recording gameplay, you can set the quality to high and turn on the GPU acceleration (if your graphics supports hardware acceleration) to enjoy a smoother recording experience.
Step 5. The "Desktop" and "Microphone" are enabled by default. If you don't want to record the system or external sound, remember to uncheck them. Then click the bottom ▼ button to specify an output path.
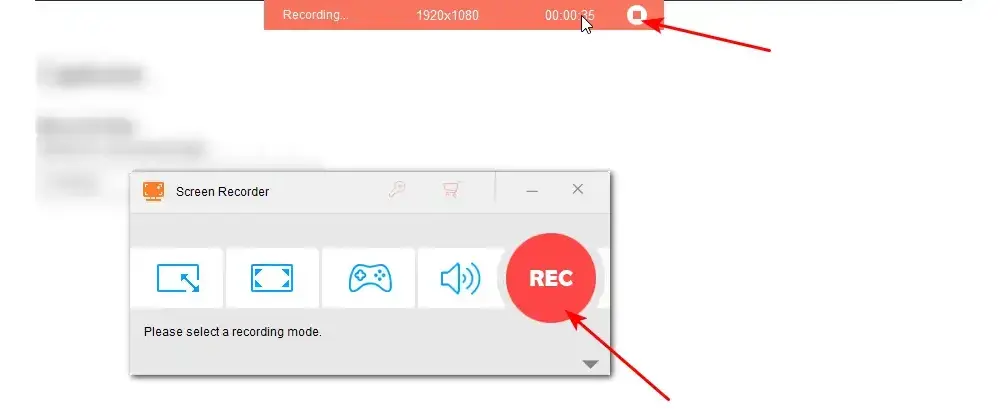
Step 6. Tap the "REC" button to start recording. Once finished, press "Ctrl + F1" to stop recording.
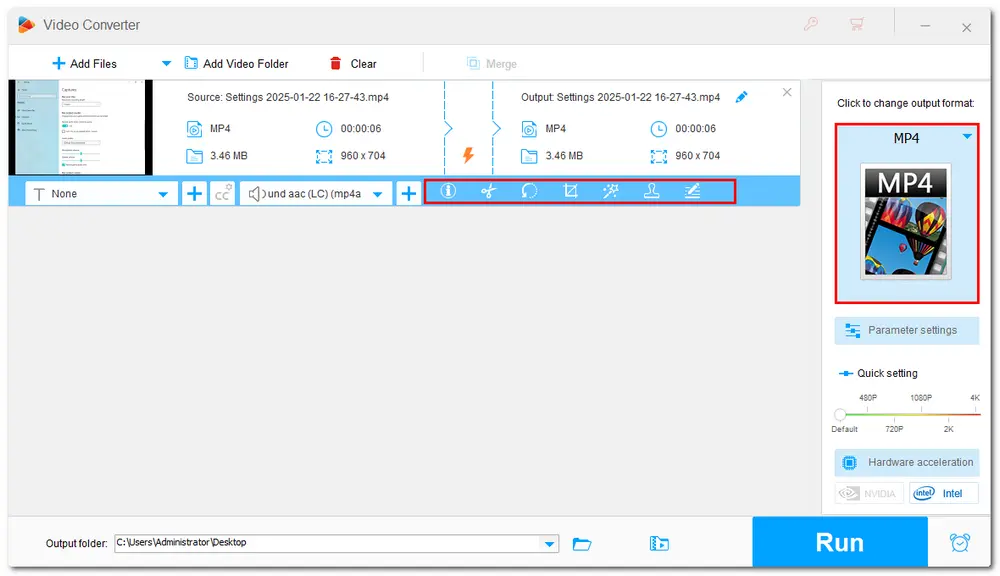
💭 Optional. If you want to further edit the recorded video, just open the "Converter" module from the home screen and import the recorded video, then you can convert, edit, and compress the video.
PowerPoint screen recording is easy to access for everyone. It also offers you some simple editing features. However, there are also some limitations to the PowerPoint screen recording. If you find PowerPoint cannot satisfy your recording or editing requirements, just give WonderFox HD Video Converter Factory Pro a try. It offers more flexible recording and editing features for you.
Above is all I want to share with you. I hope this post can be helpful for your condition. Thanks for reading till the end. Have a nice day!
Yes. PowerPoint has a built-in screen recorder that allows you to capture video on your PC screen. You can easily access it by clicking "Insert" > "Screen Recording".
PowePoint won't limit the recording time. You can record the screen as long as you want with PowerPoint.
The PowePoint screen recording not working can be caused due to various reasons, like software bugs, outdated app versions, or issues with your computer.
If you encounter such an issue, you can try to restart PowerPoint, reboot your computer, run PowerPoint in safe mode, and reinstall and update PowerPoint to solve the issue.
If the issue still exists, try an alternative screen recorder tool like WonderFox HD Video Converter Factory Pro.

WonderFox HD Video Converter Factory Pro
WonderFox HD Video Converter Factory Pro is an all-in-one video & audio processing tool that can easily convert any video and audio files to 600+ profiles with high-quality preserved. Video editing, compressing, recording, downloading, GIF & ringtone making, and more features are also provided.
Simple, full-featured, batch conversion and hardware acceleration support. Get it here to have a try now!
Privacy Policy | Copyright © 2009-2026 WonderFox Soft, Inc.All Rights Reserved
