Final Cut Pro is video editing software for fast post-production on Mac. When you finish a project in Final Cut Pro and want to save it, it saves your project as a QuickTime movie by default. If you want to use other video formats, such as MP4, you need one more step. This article will show you how to export MP4 from Final Cut Pro in detail. Read on to learn more!
Exporting MP4 from Final Cut Pro is easy. If you don't know how to export yet, just follow the steps below. Let's start!
>> In Final Cut Pro, select the project, clip, or range you want to export in Browser or the timeline.
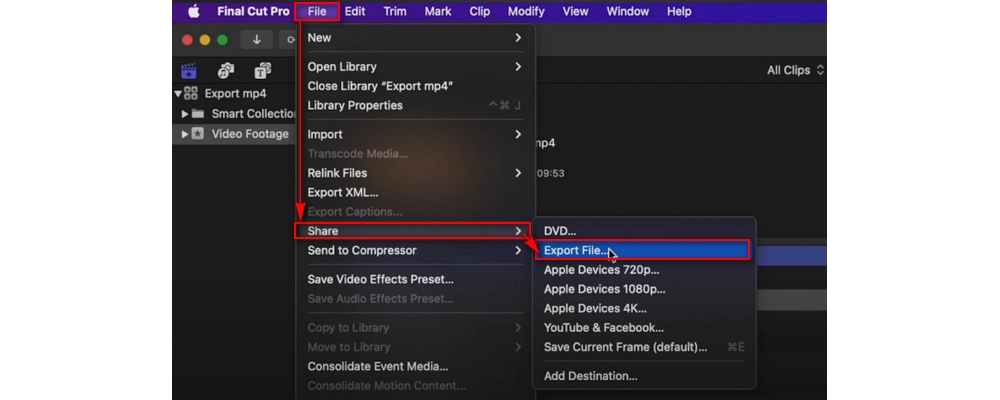
>> On the top menu bar, click File > Share > Export File, or click the Share button in the upper right corner and select Export File.
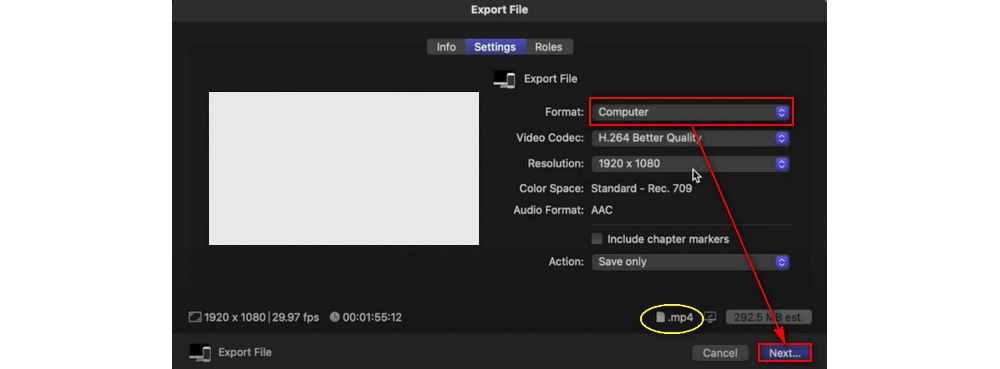
>> In the Export File window, switch to the Settings tab. Then select Computer from the Format drop-down box. Now you can see that the video extension has changed from .mov to .mp4. Just click Next.
Tip: You can also adjust the Video Codec and Resolution to your liking.
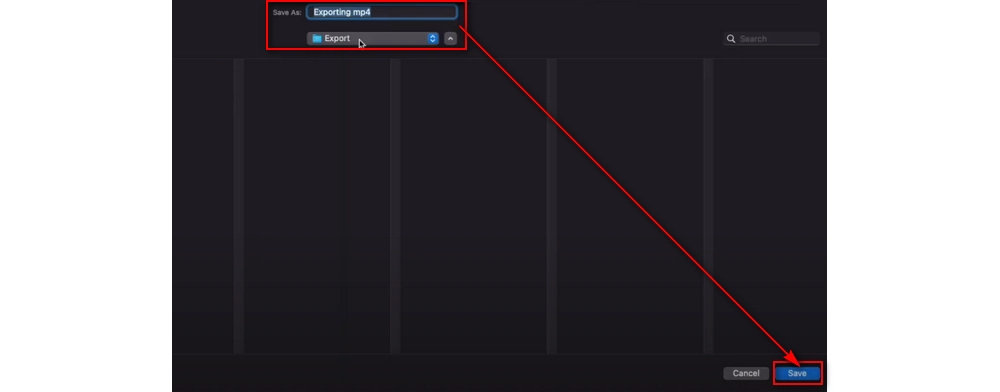
>> Finally, rename the file and select the output path. Then click Save. The project will be exported to MP4 immediately.

WonderFox HD Video Converter Factory Pro
1. Convert all mainstream video and audio files.
2. Cut, join, crop, compress, and add effects to videos.
3. Download videos and music from 1000+ sites.
4. Record high-quality video and audio on PC.
5. Batch processing and GPU acceleration.
Privacy Policy | Copyright © 2009-2024 WonderFox Soft, Inc.All Rights Reserved
