With the new Snipping Tool app on Windows 11, you can capture images, record video with audio, and use a mouse, touch, or pen to edit screenshots and share them anywhere. But sometimes, you may meet problems with the Snipping Tool, such as not showing a preview, not saving, or the shortcut not working. Given that, this post shares the 9 best solutions to fix the Snipping Tool not working issue in Windows 11.
Snipping Tool is a Microsoft Windows screenshot utility included in Windows Vista and later. With this app, you can
• Capture a screenshot or snip of any object on your screen
• Edit and annotate screenshots
• Crop images and mark them up with highlights
• Save or copy screenshots to share them anywhere
• Record your screen with audio (with the release of version 11.2211.35.0 for Windows 11)
Note: The new Snipping Tool can capture videos in MP4 format, but this feature is only available in Windows 11 version 22000.0 or higher.
There are situations in which your Snipping Tool stops working on Windows 11. The following post will focus on this issue and give workable solutions. Just keep reading to get it fixed.
Press the power icon in the Start menu, then select Restart.
A fresh start will clear any temporary issue or bug interfering with the Snipping Tool.
To fix your Snipping Tool shortcut not working issue,
1. delete the current shortcut from your desktop or toolbar.
2. Then, go to the Start menu and scroll down to find Snipping Tool.
3. Right-click on it and choose Pin to Start or Pin to Taskbar to create a new shortcut.
Also, disable any keyboard toggles (if your computer has one) that might interfere, such as the Function key.
You cannot use the Snipping Tool when Focus assist is enabled. To turn off this feature, please follow the steps:
1. Go to the Start menu and choose Settings.
2. Navigate to System > Focus assist and select Off to get all notifications from your apps and contacts.
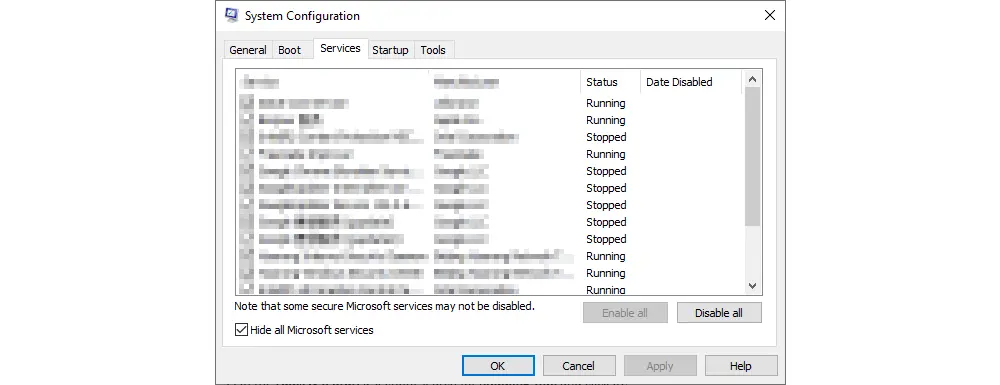
The Snipping Tool not working issue may be due to interference from third-party apps. To find out and end the conflicting software for using the Snipping Tool on Windows 11, follow these instructions:
1. Type system configuration in the Windows search bar and press Enter to bring up the System Configuration window.
2. Switch to the Services tab and tick the checkbox for Hide all Microsoft services.
3. Select the service you think might be interfering with the Snipping Tool. Then, click Disable all.
4. After that, restart the Snipping Tool to check if it works properly.
The Snipping Tool might not work once it lacks the necessary permission to run in the background. You can authorize this app to run in the background by following these steps:
1. Go to the Start menu and select Settings.
2. Click Privacy and scroll down to locate Background apps on the left panel.
3. Find the Snipping Tool app from the list and ensure the option is On.
If your Snipping Tool doesn't pop up after screenshot or has other problems, you can try to reset the app. Here is how-to:
1. Go to Windows Settings and select Apps.
2. In the Apps & features section, search for Snipping Tool and click it.
3. Open Advanced options and select Reset.
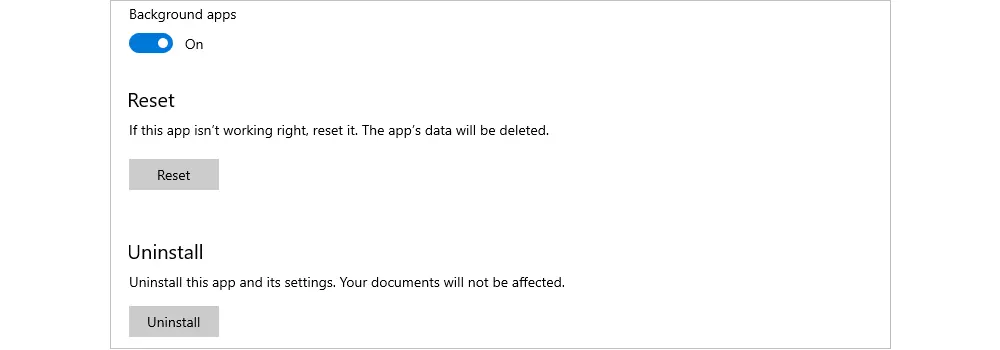
Resetting the Snipping Tool will not delete the app’s data. Yet, uninstalling will clear all documents about the app. If you select Uninstall, you can reinstall the app on Windows 11. Please move to the next solution for reinstalling the Snipping Tool.
1. Download the Snipping Tool to your Windows 11 computer on Microsoft Apps.
2. Run the Snipping Tool installer to install it on your PC.
3. Open the Snipping Tool to see whether it is working.
Note: The new Snipping Tool is available only on Windows 11. If you’re using Windows 10, you will download Snip & Sketch to your PC instead.
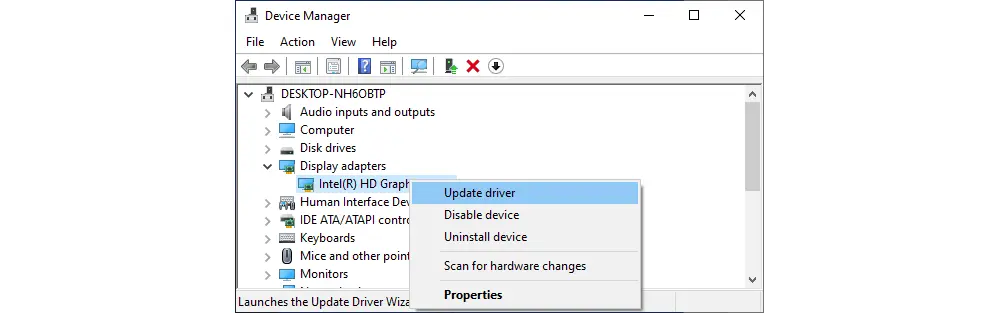
Outdated or corrupt graphic drivers might also lead to the Snipping Tool not working error. To update the graphics driver,
1. Right-click the Start icon and choose Device Manager from the list.
2. Navigate to Display adapters, expand it, and right-click on the available graphics.
3. Then, select Update driver > Search automatically for drivers. The system will quickly scan doe any available drivers and install them.
4. Restart your computer and check if the issue is solved.
What if the Snipping Tool is still not working after you try all the solutions above? Well, you may try a Snipping Tool alternative for screen capture or recording. Here, I will provide you with three popular options: FastStone Capture, Windows Xbox Game Bar, and WonderFox HD Screen Recorder.
Option 1 - FastStone Capture

FastStone Capture is a powerful and full-featured screen capture tool for Windows PCs. It allows you to capture and annotate anything on the screen with ease. It also offers plenty of editing tools, including cropping, resizing, sharpening, texts, arrowed lines, edge effects, and many more. Image files can be saved in various formats or sent directly to other Windows apps.
Official website: https://www.faststone.org/FSCaptureDetail.htm
Option 2 - Xbox Game Bar

Game Bar is built into Windows 11 for users to capture videos and screenshots. When you want to record your gameplay or something else on your PC, press the Windows logo key + G on your keyboard to open Game Bar. Next, click the camera icon to open the Capture window. Then, you can take a screenshot with hotkeys Win + Alt + Prtscrn (Print Screen) or start recording with Win + Alt + R.
Windows Game Bar can record videos for up to 4 hours and saves recordings as MP4 in 1080P with a frame rate lower than 60 FPS. If you want to screen record without these limits, try another option below.
Option 3 - WonderFox HD Video Converter Factory Pro (Recommend)
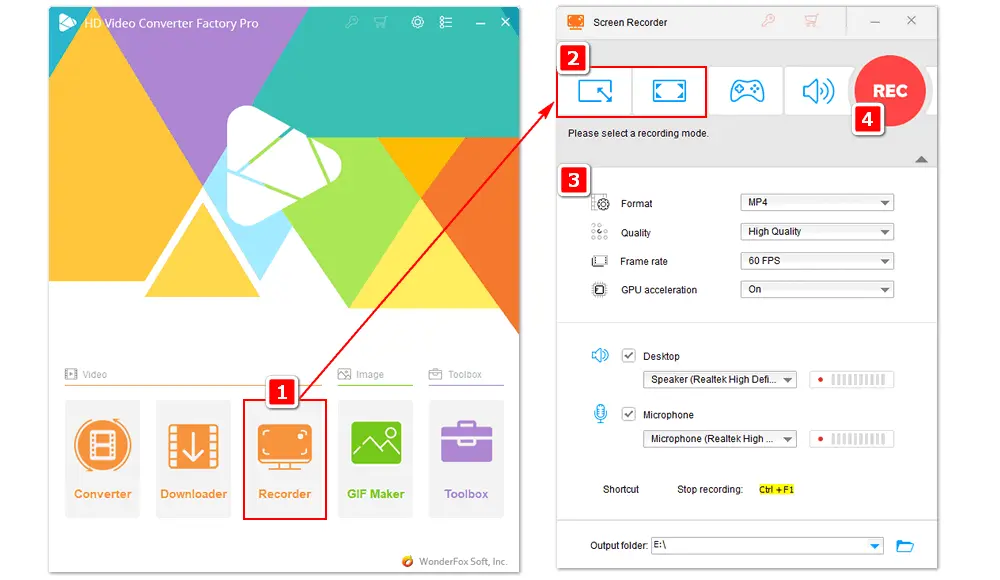
WonderFox HD Video Converter Factory Pro comes with a high-definition screen recorder for all Windows PCs. With the software, you can record videos in 4K resolution at a full 60 FPS and save them as MP4, MKV, MOV, or other video files. You can capture all or a specific region on the screen with the system and mic audio included (or not). After recording, you can further edit the video by trimming, merging, etc. Get the powerful and versatile screen recorder for PC now!
How to screen record on Windows 11 when the Snipping Tool is not working?
1. Install and launchInstall and launch HD Video Converter Factory Pro on your desktop. Then, choose Recorder.
2. Select a recording mode and region.
3. Adjust recording settings (format, quality, frame rate, audio, and output folder).
4. Click REC to start recording and press Ctrl + F1 to end it.
5. Edit your screen recording at will.
Q1. How to snip on Windows?
Shortcut keys for a static image snip: Win + Shift + S or Print Screen (PrtSc)
Shortcut keys for a video snip: Win + Shift + R

Q2. Why is my Snipping Tool not working?
Possible causes of Snipping Tool not working in Windows 11 include:
• The Snipping Tool is improperly or not installed
• You are using the wrong keyboard shortcut to open the Snipping Tool
• The Snipping Tool is blocked by a focus session or a third-party application
• Wrong date and time on your computer
• An outdated or buggy Windows installation
• Out-of-date hardware drivers
Q3. How do I get my Snipping Tool to work?
Try upgrading your operating system and graphics drivers, rebooting the computer, reinstalling and resetting the Snipping Tool application, using alternative software, or other methods mentioned in this post.
Q4. Why is my snipping tool only showing half screen?
If you are using Windows 11 with two monitors, the Snipping Tool only covers part of the screen due to the different scaling settings of each monitor. To solve this problem, go to Windows Settings > System > Display > Scale and Layout > Scale and select a percentage you want for both displays. Then, restart your PC.
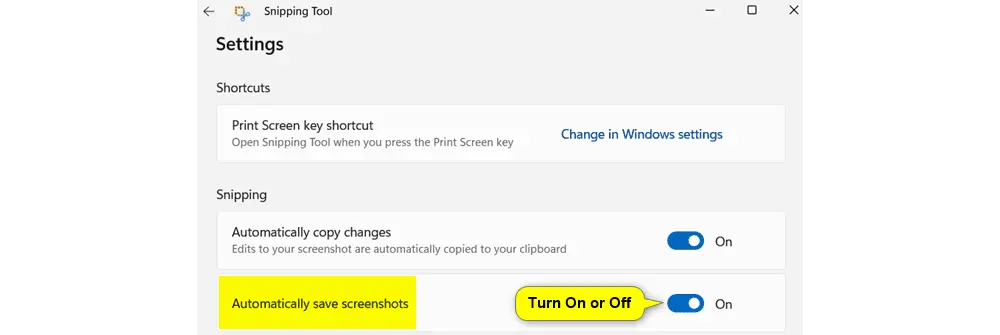
Q5. Why is Snipping Tool not saving?
If “Automatically save screenshots” is toggled on, Snipping Tool files will be saved in your Pictures folder by default, with the name “Snip” followed by a number. If not, go to the app’s Settings to turn on the auto-save feature.
Now, you have several methods to resolve issues with the Snipping Tool in Windows 11. You can try updating the app or using one of the other methods outlined in this article. However, if you find these solutions difficult to implement, consider using a different screenshot application instead.
That's all. Thanks for reading till the end!

WonderFox HD Video Converter Factory Pro
1. Record live streams, shows, gameplay, webinar, etc.
2. 500+ built-in presets for fast media conversion.
3. Download video/music from YouTube & 1000+ sites.
4. Trim, merge, rotate, and watermark video at will.
5. Make animated GIFs from video or image sequences.
6. Make ringtones, extract subtitles, and plenty more!
Privacy Policy | Copyright © 2009-2026 WonderFox Soft, Inc.All Rights Reserved
