Some streaming services don’t provide users with download options. If that’s the case, you can use a recorder to capture the streaming content like music, podcasts, or interviews for offline enjoyment.
Next, let’s walk through how to record streaming music on Windows with Audacity.
Step 1. Download the install Audacity on your Windows PC first.
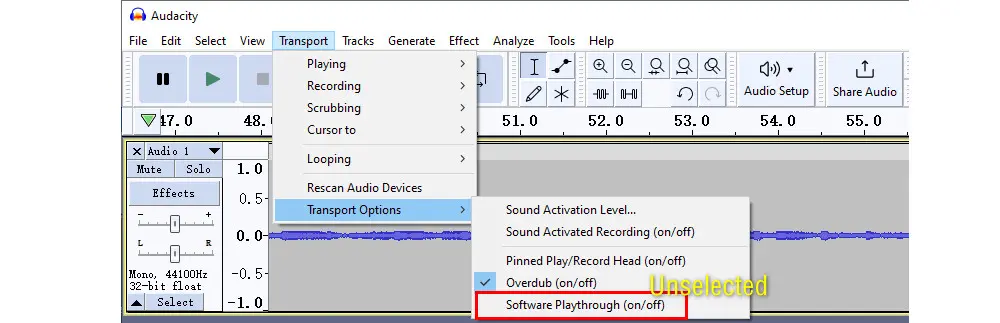
Step 2. After the installation, launch Audacity. To avoid recording audio with echoes or distorted sound, go to Transport > Transport Options. Make sure the Software Playthrough (on/off) is unselected.
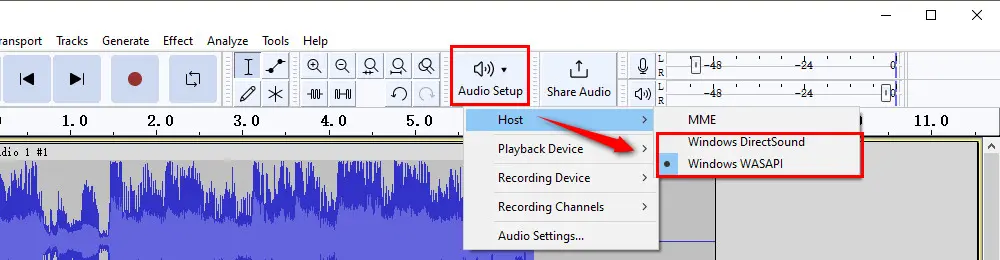
Step 3. Click Audio Setup and select a host interface. You can choose Windows DirectSound or Windows WASPI. But if there is no Stereo Mix option on your device or it is disabled, the Windows WASPI option is highly recommended.
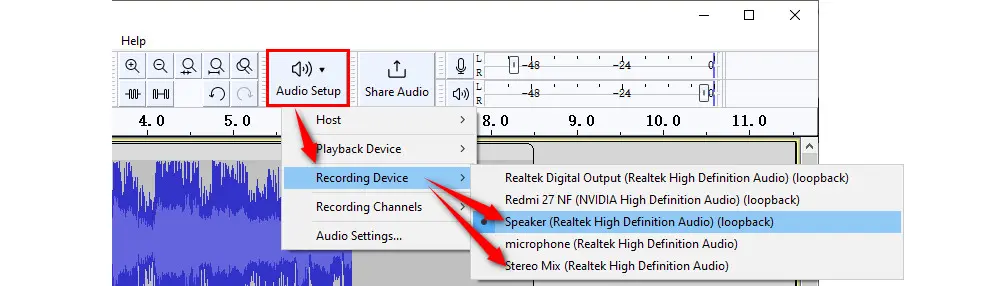
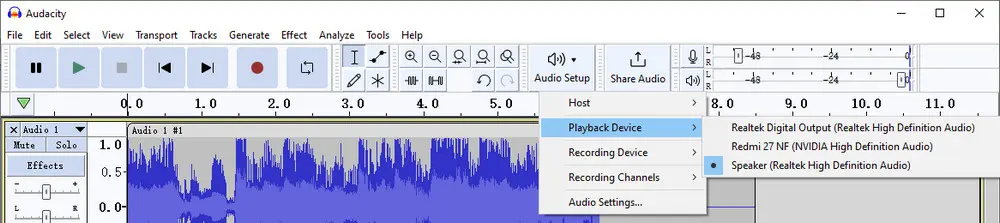
Step 4. Now, to record the streaming audio you’re hearing, you need to choose the right input device. Go to Audio Setup Toolbar and select Recording Device. Then choose an appropriate loopback device, such as Speaker(loopback) or Stereo Mix(loopback).
Step 5. Now, open the streaming service you want to record and hit the red Record button in the transport toolbar to initiate the Audacity stream recording. Hit the black square button to finish recording streaming audio with Audacity.
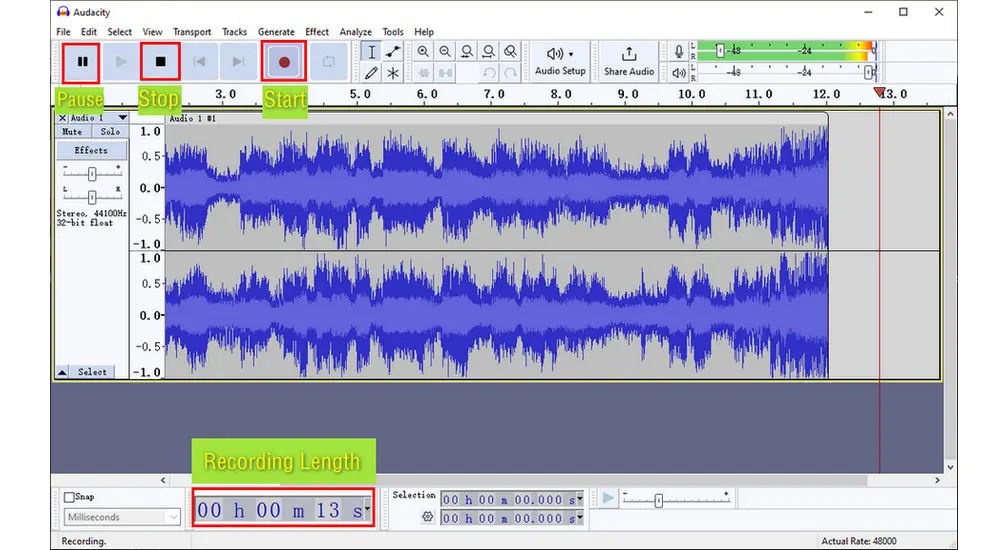
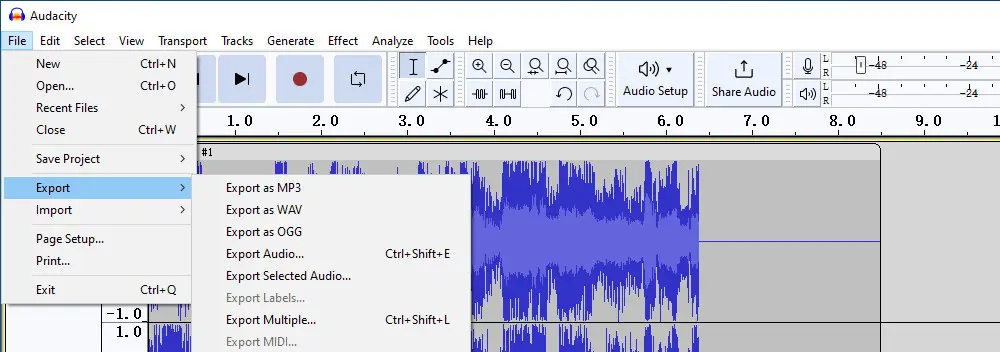
Step 6. You can click the Play button to check the recorded audio. Then navigate to File > Export. Choose a preferred output format such as MP3, WAV, or OGG, or choose to export it as an Audacity project file.
Note: If you cannot hear anything when playing the recorded audio in Audacity, you may choose the wrong playback device. You can adjust it by hitting Audio Setup > Playback Device.
There is no denying that Audacity is a great software for audio recording and editing. But sometimes, you may encounter some bugs like Audacity cannot record, not picking the device, or its inability to enable Windows WASPI. Besides, it can only be used to deal with audio-related tasks. But if you also want to record videos and want more extensive features as well, we suggest you try some Audacity alternatives.
WonderFox HD Video Converter Factory Pro is one of the best recording applications for Windows. With it, you can not only record audio from the mic and system simultaneously or separately but also can screen record video with audio with a resolution up to 4K. Options to set frame rate, quality, formats, and GPU acceleration allow you to create quality outputs.
Besides, it includes a converter for format conversion, an editor for basic editing, a downloader for online video and music downloading, as well as many other impressive features.
Now, download download the versatile software on your PC and start recording streaming audio from your PC with the following steps.
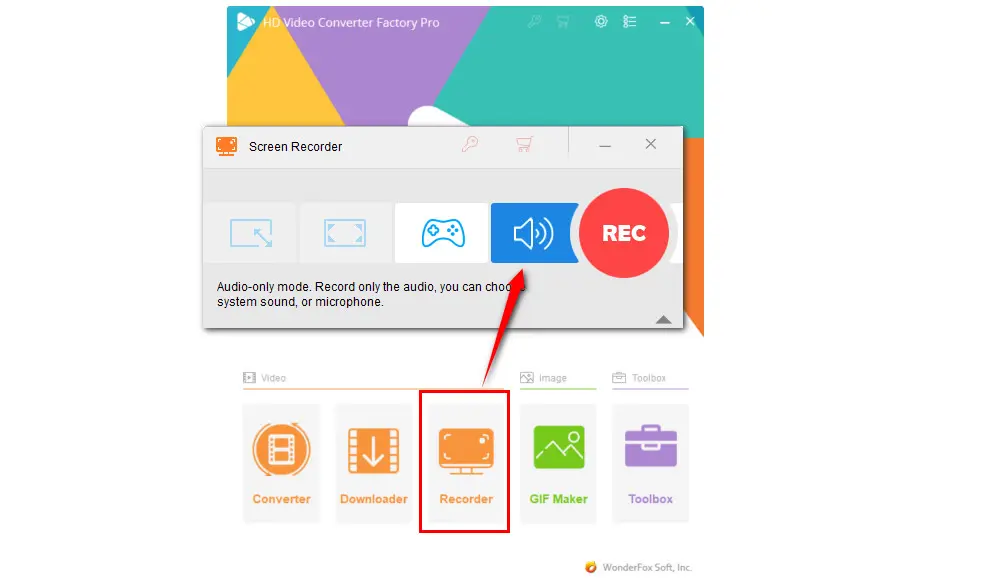
Run WonderFox HD Video Converter Factory Pro and then select Recorder. Click the audio-shaped icon to enable the “Audio-only” mode.
Select an audio recording format from the “Format” drop-down list. Here you can choose between MP3, AC3, AAC, and WAV.
Then check the “Desktop” box to record system audio. If you want to record your own voice, tick off “Microphone” too.

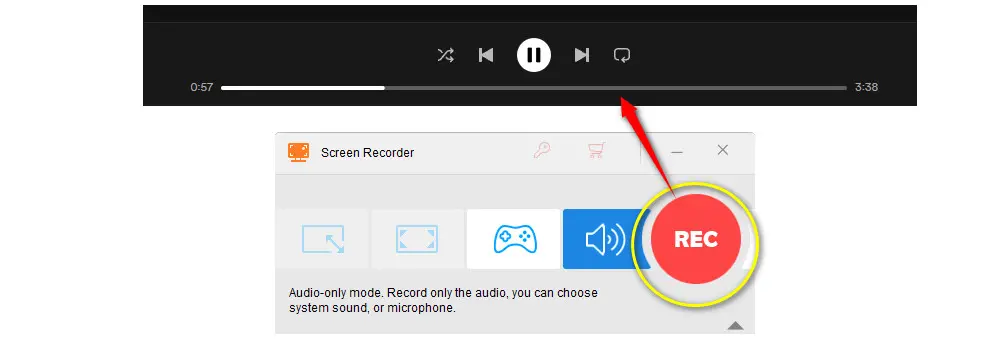
Finally, click the down arrow button at the bottom to set an output folder, and then hit the red “REC” button to start recording after a five-second countdown. Press “Ctrl + F1” to finish the recording.
To get a complete recording, open the recording software before starting the streaming content.
Disclaimer: WonderFox does not approve of copyright infringement in any way. All information provided in this article is presented for general informational purposes and personal fair use only.
Now, you have learned how to record streaming audio with Audacity. If you run into any recording issues when using Audacity to record streaming audio or expect an easier way to record, you can resort to WonderFox HD Video Converter Factory Pro for an easy and all-in-one solution.
Privacy Policy | Copyright © 2009-2026 WonderFox Soft, Inc.All Rights Reserved
