The Sims 4 is a popular simulation-based game that users can download and play on their computers for free. Given that many players want to record the gameplay for sharing on social media, this post teaches four methods to record Sims 4 gameplay on a PC. Get the best recording software (No lag or time limits):
https://www.videoconverterfactory.com/download/hd-video-converter-pro.exehd-video-converter-pro.exe
The Sims 4 is the fourth major title in the Sims series. It’s a social simulation game, available on Windows, Xbox, PlayStation, and other platforms for free now. In The Sims 4, you can create and dress characters called "Sims", build and furnish houses for "Sims", and simulate their everyday lives. It’s decompressing for some people, and many players share the funny or copy moments with their friends.
To save special moments from the Sims 4 gameplay, good game recording software is necessary. Since there’s a built-in recorder in the game software, the first method to record Sims 4 is using this feature. Other three ways will be introduced next. Please read on.
The built-in recording feature offers an easy way to record the Sims 4 for players. But it only allows a certain amount of time. Screen recording with or without audio is optional. Here is how to use the Sims 4's inbuilt camera:
Step 1: Run the Sims 4 on your computer. Confirm the recording option from "Game Option/Video Capture".
Step 2: Select the video quality as "High" or "Not Compressed". If you want to record Sims 4 without audio, you can disable "UI Sound" before recording.
Step 3: Press "Tab" on your keyboard to activate the camera mode. You can tap "W", "A", "S", or "D" to move the camera.
Then, press "Ctrl" and "5/6/7/8/9" to memorize the desired scene.
You can also press "Z" and "X" to zoom in or out, "Q" and "E" to up and down the camera.
Step 4: Click on "V" to start recording on your Sims 4. To stop the recording, press "V" again.
Now, you have recorded the gameplay video on Sims 4, and you can find it in Documents\Electronic Arts\The Sims 4\Recorded videos.
HD Video Converter Factory Pro is the best solution for screen capture on Windows. It can record PC games with audio included (system and microphone). High-quality, no time limit, no lag, and watermark. Get it now!
As mentioned above, the camera built in the Sims 4 cannot record the game continuously for hours. It also needs many keys to adjust the recording direction, region, speed, etc. Why not try a simpler way to record your Sims 4 gameplay videos? You are recommended to use WonderFox HD Video Converter Factory Pro. It’s considered one of the best gameplay recorders for Windows PCs, letting you specify the recording area, format, quality, frame rate, and other settings without any effort. Furthermore, it has no time limit, frame drops, watermarks, and notifications!
Now, free downloadfree download the software and follow the simple guide below.
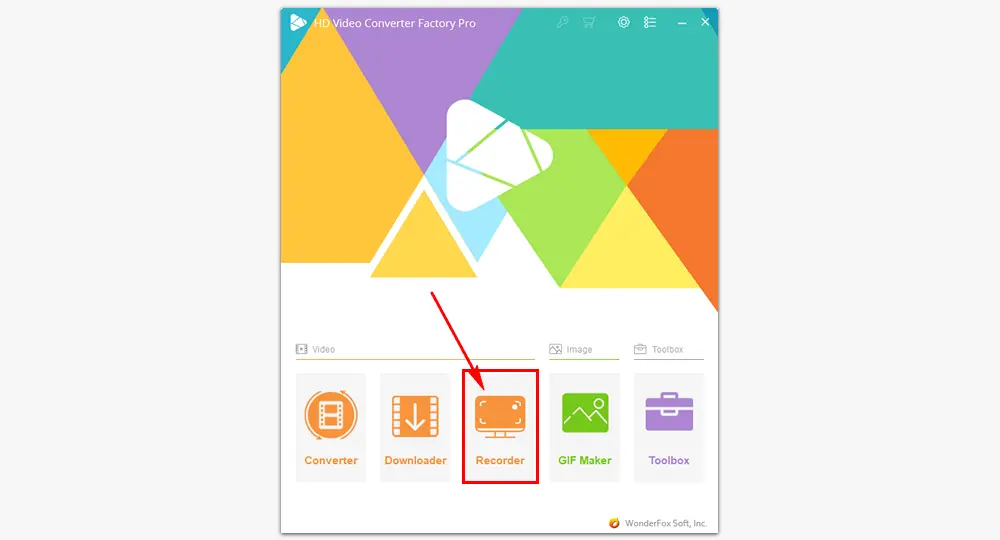
Run HD Video Converter Factory Pro. Click "Recorder" on the home interface to initiate the Screen Recorder.
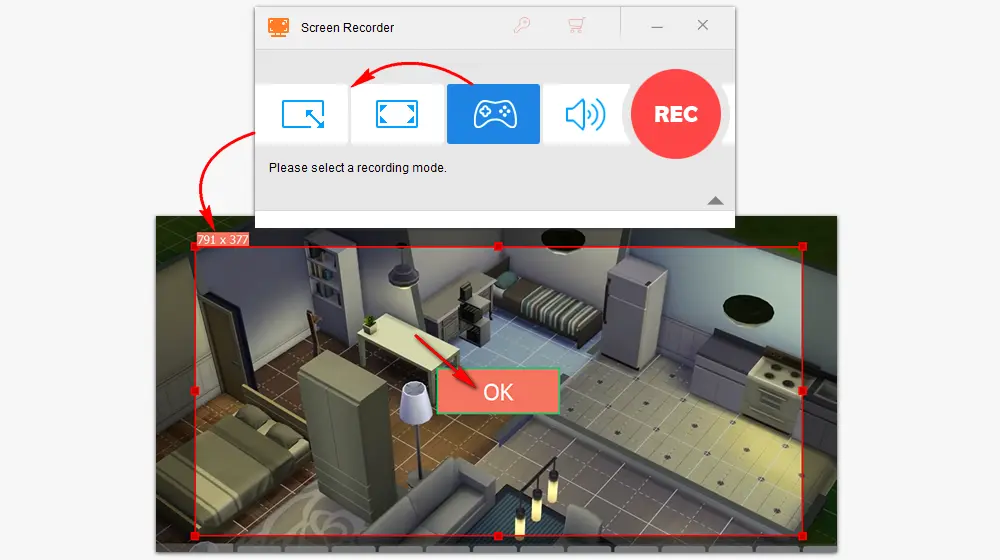
There are four recording modes on the top of the interface. Choose the "game recording" mode. Then, select part-screen or full-screen and drag the box to the part you want to record. Press "OK" to confirm the recording area.
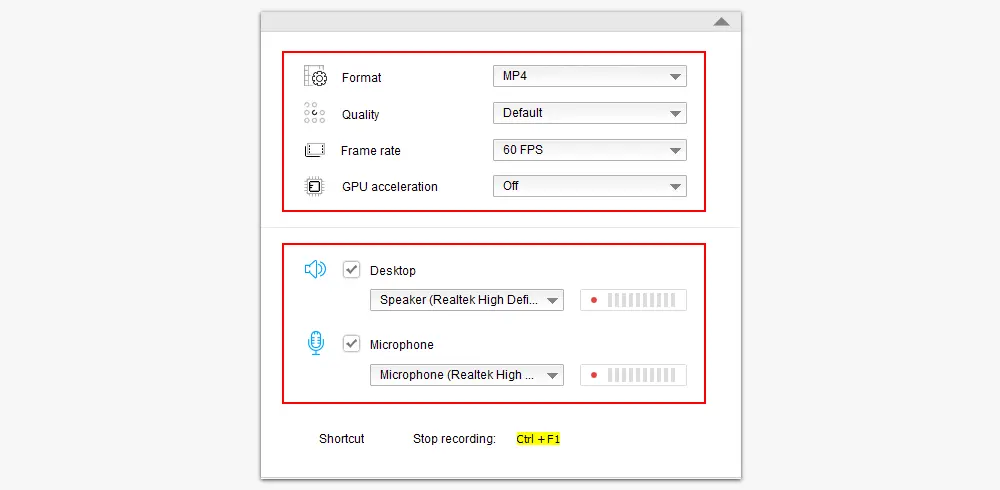
You can open the drop-down list of each setting to choose a recording format and quality, and turn on/off the GPU acceleration. MP4, AVI, MKV, and MOV are available here. ("MP4" and "High Quality" are recommended. In the game recording mode, the frame rate will be set at "60fps" automatically.)
If you need to record the gameplay with sound, check the audio source from the "Desktop" or "Microphone", or both.
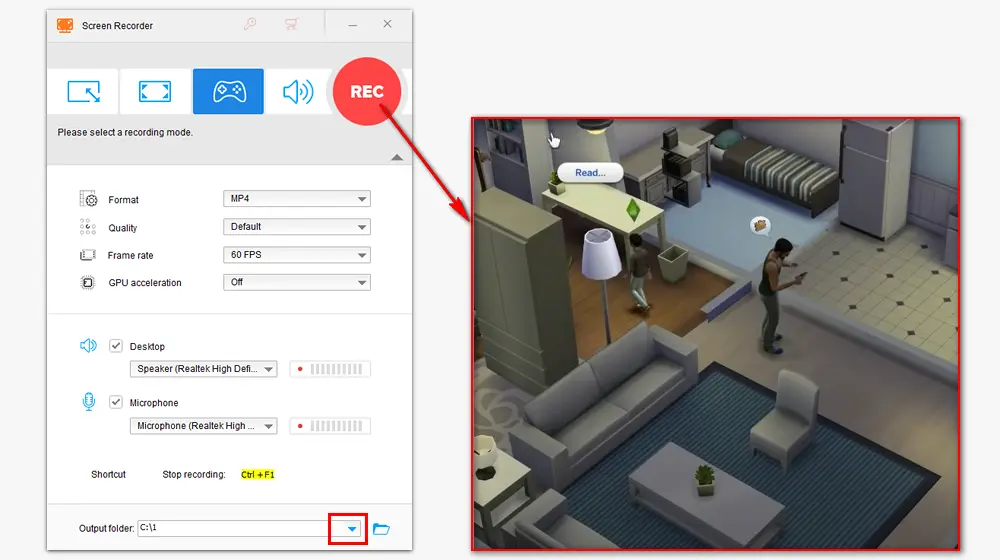
At the bottom of the Screen Recorder, click the inverted triangle button to "set an output folder" for your gameplay video. Then press "REC" to start recording after five seconds countdown. The software will minimize at the edge of the screen. When you finish, click the "stop" button or press "Ctrl + F1" to stop recording.
1. Record gameplay, meeting, music, etc. without limit.
2. Trim/crop/merge/compress screen recordings.
3. Change file format, bitrate, resolution, etc.
4. Download movies and songs online using URLs.
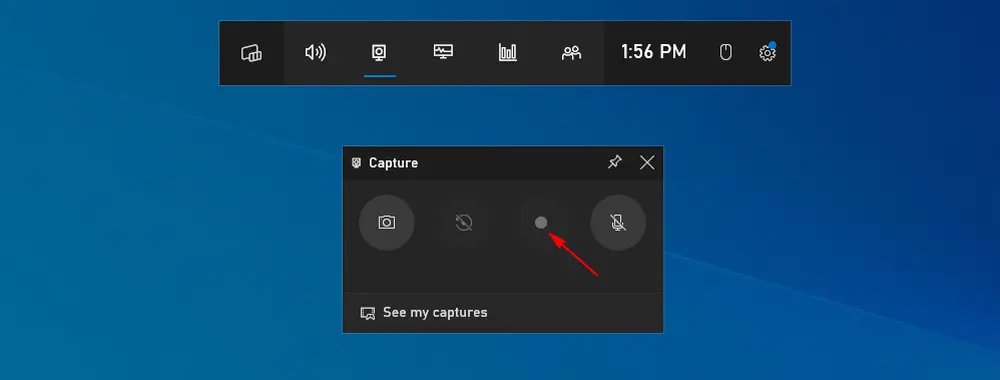
Windows 10 comes with a pre-installed recording program called Xbox Game Bar. If you don’t want to download any external recording software, The Game Bar can serve as a good alternative to Sims 4’s built-in camera. It allows you to capture any gameplay and take screenshots on your Windows 10 or above with ease. Here's how to use the Xbox Game Bar:
Step 1: Press "Windows + G" keys to open Windows Game Bar.
Step 2: Open Sims 4, and press "Windows + Alt + R" or click the "Record" button to start recording.
Step 3: Press "Windows + Alt + R" again to stop recording.
Step 4: Go to the "See my capture" to check out the recorded video.
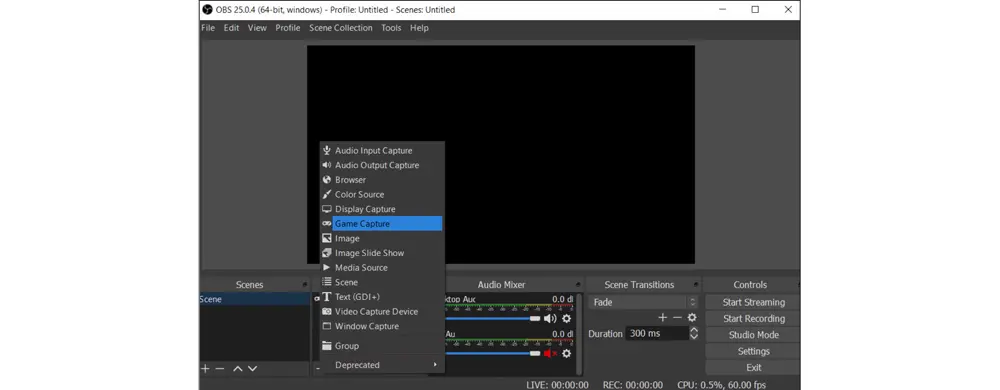
OBS is a free and open-source application for video recording on multiple platforms. It can capture several scenes and sources at the same time. Besides recording Sims 4 with your voice and webcam, OBS can live stream your gameplay on media websites like Twitch, YouTube, and Facebook. However, novices may be confused by its sophisticated interface. If you are familiar with the software, follow the steps to record your Sims 4 gameplay in OBS:
Step 1: Launch OBS on your computer. From the "Sources" tab, click the “+” button and select “Game Capture”.
Step 2: Enter a label and click "OK".
Step 3: Select "Capture Any Fullscreen Application" from the "Mode" drop-down list.
Step 4: Click "OK" and open Sims 4 on full screen. You will see Sims 4 gameplay on the OBS window.
Step 5: Click the "Start Recording" button and go back to Sims 4 to start playing. The recording will be there in the background.
Step 6: Once done, click the "Stop Recording" button in OBS.
That’s all about the top four ways to record Sims 4 on a PC. Of course, there are other solutions for this recording. Just select the proper program according to your actual needs. If you want to record and edit videos in only one tool, WonderFox HD Video Converter Factory Pro shoudl be the best option.
Finally, I hope this article could be helpful to you. Thanks for reading!

WonderFox DVD Ripper Pro
1. Convert DVD to MP4, MKV, MPG, MP3, WAV, FLAC, and other video/audio files for smooth playback.
2. Copy DVD to ISO image or DVD folder flawlessly.
3. Remove/bypass DVD copy protection with ease.
4. Cut video clips, add subtitles to DVD, and more.
5. Rip a full-length DVD movie in only 5-20 minutes.
* This DVD ripper can be used for personal fair use only.
Privacy Policy | Copyright © 2009-2026 WonderFox Soft, Inc.All Rights Reserved
