WonderFox HD Video Converter Factory Pro lets you compress Zoom recordings on Windows by changing the format, bitrate, resolution or aspect ratio. You can also trim away unwanted segments to reduce file size. In addition, it features a batch compression button that enables you to compress files in batches with a simple slider move.
Free download the program and then follow the steps shared below to learn how to compress Zoom recordings on Windows.
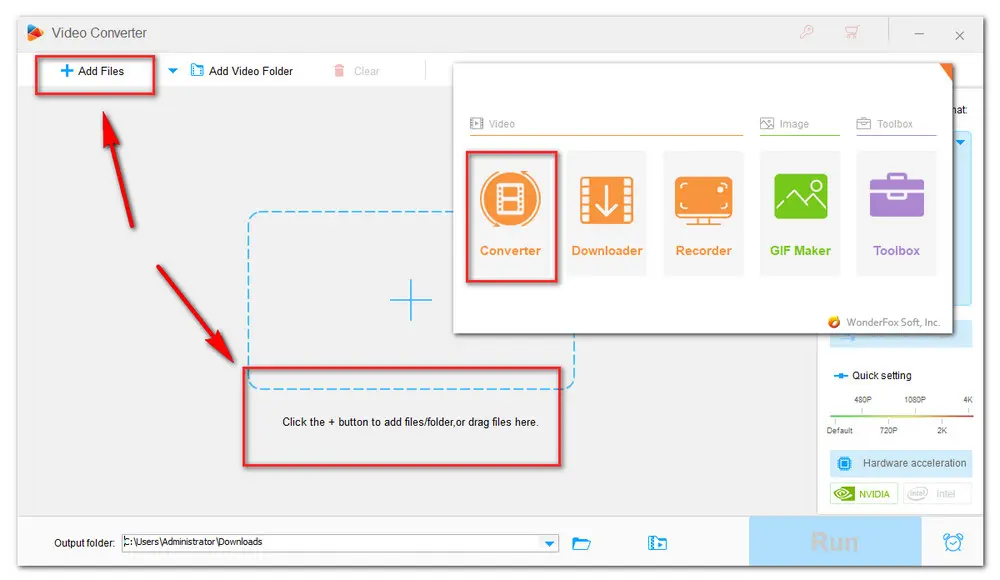
Launch HD Video Converter Factory Pro on your Windows PC and go to the Converter module. Next, you can either hit the center + button or drag the local files into the program directly.
Note: By default, local Zoom recordings on Windows will be placed in C:\Users\[Username]\Documents\Zoom
Codec, resolution, bitrate, frame rate, and duration are considered the main factors that affect video file size. So modifying these settings can be a good way to produce a smaller file.
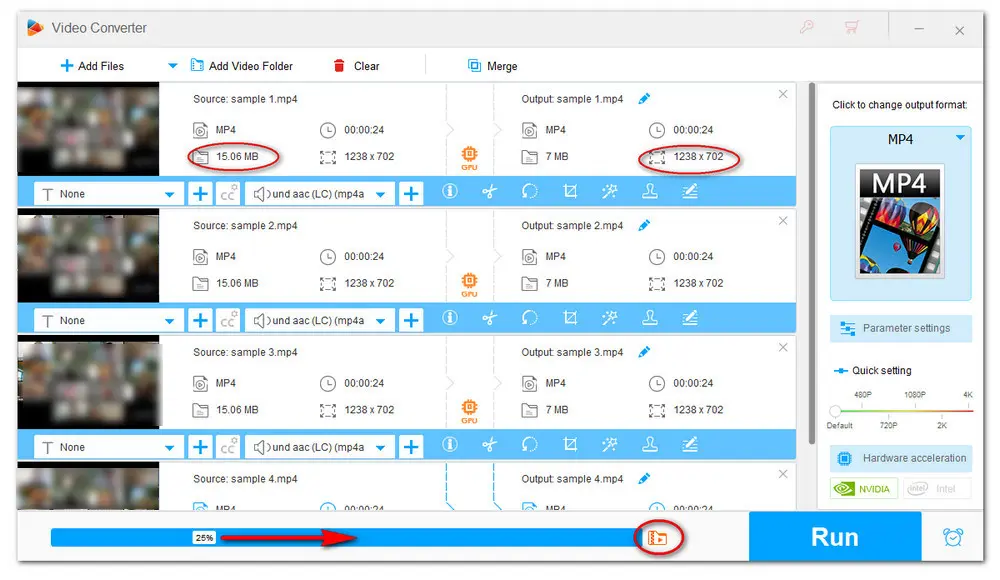
When the meeting ends, Zoom will process the recording to an MP4 file. You can change the format by clicking on the format image on the right side. You’re provided with over 500 presets. Head over to the Video category and select H265 for MP4, H265 for MKV, or VP9 profile, which will compress the Zoom recordings to half the original size while not compromising the original quality.

After you select a needed export profile, then hit the Batch compression icon on the bottom. Drag the slider towards the right side to increase the compression ratio to compress Zoom recordings in bulk.
It’s worth noting that a higher compression ratio can degrade video quality. You have to find a balance between the right size and acceptable quality.
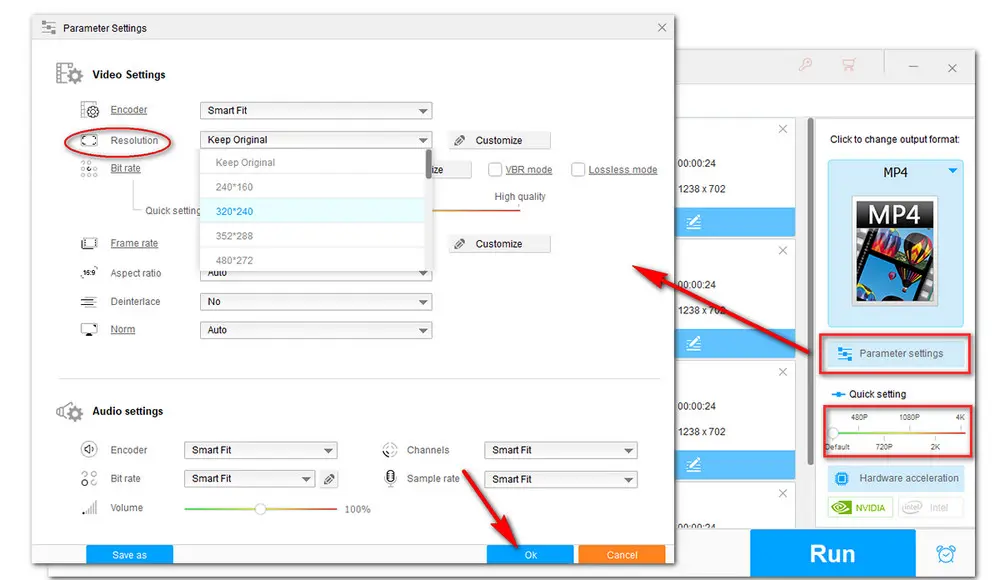
You can open the Parameter settings to downscale the resolution from 1080p to 720p or 720p to 360p. Alternatively, you can move the slider along the Quick setting bar underneath the Format Profile section.
Note: If the resolution of your Zoom recordings is lower to 640x360, you can skip this step. It’s the least basic resolution in which the video does not blur out.
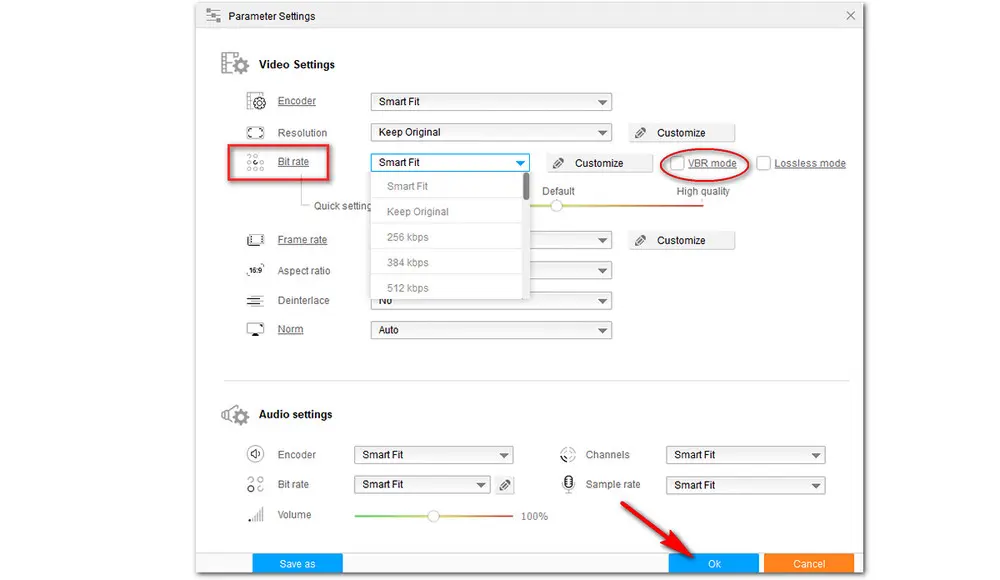
After you choose an output format, go to Parameter settings. Here you can switch CBR to VBR or select a video bit rate from the drop-down list.
Note: VBR can adjust the rate depending on the complexity of video content, which will save storage space.
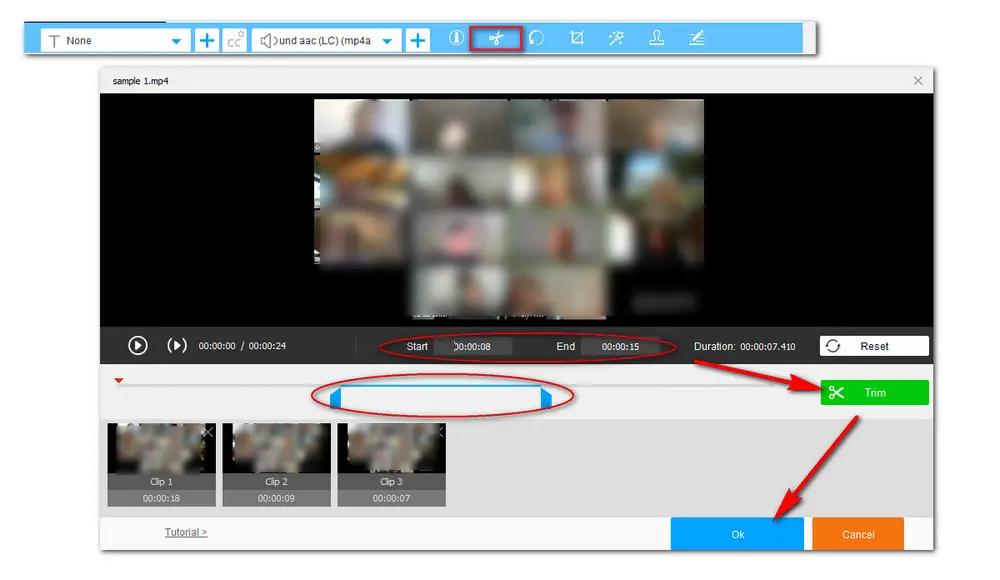
Another effective solution is to trim out the unwanted parts from the Zoom recordings. In the video taskbar, select the scissor-shaped icon to enter the Trimmer window. Then drag the two sliders to cut the video, or input Start time and End time for fine-tuning. Then click on the Trim > OK button to save the clips.
If needed, you can cut out the middle part and then merge the wanted clips into one.
You are free to choose one or make a combination of those options. Then specify an output folder by clicking on the bottom inverted triangle icon. Finally, hit the Run button to compress these recordings at a lightning-fast speed.

There are some online services that allow you to compress Zoom meeting recordings without installing any software. One of the most popular online video compressors is FreeConvert. Free users can upload files up to 1GB for video compression. Here are the steps:
Step 1. Visit FreeConvert: https://www.freeconvert.com/video-compressor
Step 2. Click Choose Files to upload your recorded Zoom video to the website. It also accepts online videos from Dropbox, Google Drive and URLs.
Step 3. Click Compress Now! to start video compression with the default options, which can reduce file size by 40%. Alternatively, hit Advanced settings (gear icon) and change the video codec and compression method according to your needs. Then click Apply settings.
Step 4. Wait for the compression to complete and then download the compressed recordings.

Zoom recording functionality makes it possible to review more details discussed during a video meeting or share with people who weren’t able to attend. Especially when we’re working from home, many work tasks are being done at virtual conferences. Many Zoom recordings are saved locally or to the cloud consuming much space. So learning how to compress Zoom recordings can help save the storage and upload them via email or WhatsApp easily. Before that, knowing the default setting for Zoom recording video is of great help when we pursue a smaller size with acceptable quality.
Format: MP4 for Audio/Video file; M4A for Audio-only recording.
Resolution: The recording resolution defaults to 640 x 360 for most users. But you can also record meetings in 1280 x 720 or 1920 x 1080, but file sizes will increase accordingly.
According to Zoom, factors that can affect resolution are various, including the version, the recording settings, devices, and the number of participants. You can visit its official site to learn more: https://support.zoom.us/hc/en-us/articles/4409490756749-Resolution-of-recorded-video
Frame rate: 25fps
The difference between 25fps and 24fps is unnoticeable, except for the fact that 25fps is the standard frame rate in the United Kingdom and any country that operates off 50Hz power. And 24fps is believed to offer a smooth viewing experience. If you play a video with a lower frame rate, your video will be lagging.
That’s all for how to compress zoom videos with the best video compressor. Free download Free download the desktop program to have a try now!

WonderFox DVD Ripper Pro
WonderFox DVD Ripper Pro can bypass all DVD protection and convert DVD videos to 300+ digital video formats and devices. It enables you to trim, rotate, crop, and add effects to DVD videos with simple clicks. You can also use it to compress DVDs to small sizes with high-quality preserved. Just download it now to digitize and edit your DVD videos now!
Note: Please do not use the DVD ripper to rip any copy-protected DVDs for commercial use.
Privacy Policy | Copyright © 2009-2026 WonderFox Soft, Inc.All Rights Reserved
