Solution 2: Change the DVD Drive Region Code
If you receive a region error while playing DVD movies on a computer, you can change the region setting of the physical DVD drive to match the disc. For example, choose the United States or Canada for a Region 1 DVD, and choose the United Kingdom for many Region 2 DVDs.
However, this is not a flexible long-term fix. Most DVD drives can only change region a limited number of times, commonly five times including the original setting. Once the limit is used up, the drive may stay locked to the last selected region. So do not switch regions casually if you collect discs from several countries.
On Windows 11/10:
Step 1. Insert the DVD and open “This PC” or “File Explorer”.
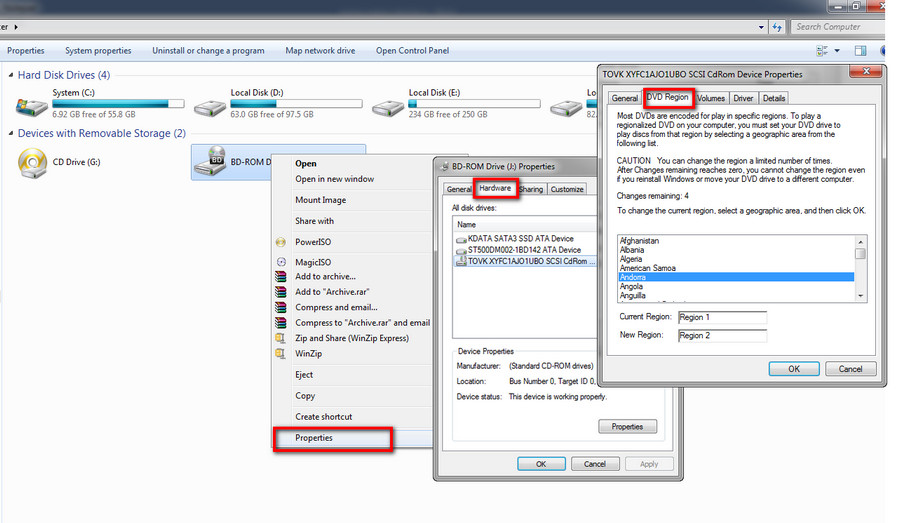
Step 2. Right-click the target DVD drive and select “Properties”.
Step 3. Go to “Hardware”, select the DVD drive you want to change, then hit “Properties”. You can also open Device Manager, expand “DVD/CD-ROM drives”, right-click your drive, and choose “Properties”.
Step 4. Click “DVD Region”. Here you can see the current region and the remaining number of changes. Choose the country/region that matches the DVD movie, and Windows will show the corresponding DVD region code.
Step 5. Hit OK to save the modification and play the DVD again.
Tips. If you are not sure which region code the DVD has, check the back of the DVD package or the disc label. USA and Canada DVDs are usually Region 1; many UK and European DVDs are Region 2; Australia and New Zealand are commonly Region 4.
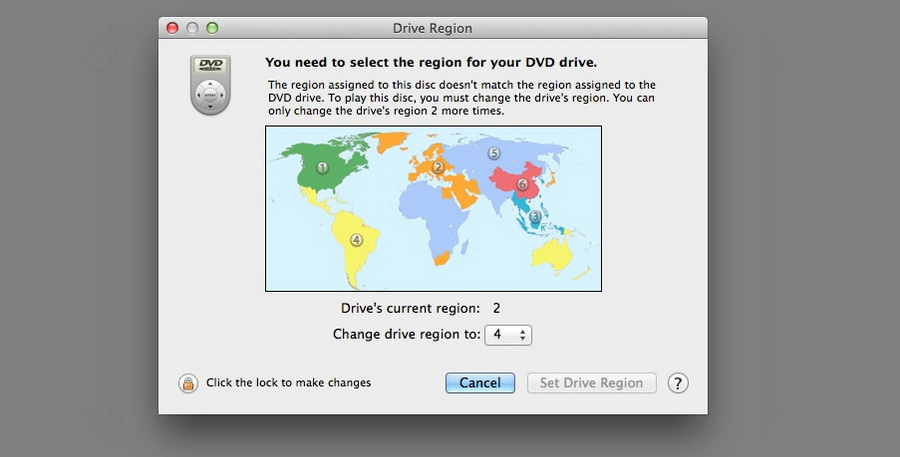
On Mac:
Step 1. Insert the DVD into an internal or external DVD drive connected to your Mac. A dialog may appear asking you to choose a region code.
Step 2. Choose the region code that matches the DVD.
Step 3. Click “Set DVD Region” and “Lock” to save the change. As with Windows DVD drives, the number of changes is limited, so use this option carefully.