Want to share videos on Twitch to get a wider audience and increase the reach but don’t know how? Look no further! This article will help you out. Here, you’ll get a step-by-step tutorial on how to upload a video to Twitch. Continue reading for the details.
In the following sections, we’re going to explore two common methods of video sharing on Twitch: one is uploading the edited videos from your PC, and the other is enabling Twitch’s VOD (Video on Demand) feature to publish your past broadcasts, which allows for a repeated viewing on your account.
Now, walk with us to upload your polished videos from your PC and get more viewers on Twitch.
To upload a video on Twitch, you’ll first need to be an Affiliate or Partner after signing up. Note that, though both Affiliate and Partner programs have some requirements to fulfill before applying, joining an Affiliate is more accessible. Check their minimum requirements respectively below:
For being an Affiliate:
• Reach 50 followers
• Stream for 8 hours
• Stream on 7 different days
• Reach an average of 3 viewers (concurrent viewership including raids)
• All the achievements above must be completed within a 30-day period
For being a Partner:
• Stream for 25 hours
• Stream on 12 different days
• Average of 75 viewers (concurrent viewership excluding views from suggested, raids and embeds)
• Complete all three achievements within 30-day period
Once you pass the threshold, you will get an invitation from Twitch to become an Affiliate or Partner. New users may take a while to fulfill these requirements.
After reaching the Affiliate or Partner status, you can now start to upload videos to Twitch. But it’s worth noting that not all video types are supported by Twitch. Therefore, in order to get a smooth, high-quality upload, your video should fit the upload video specifications for Twitch.
Here are the recommendations:
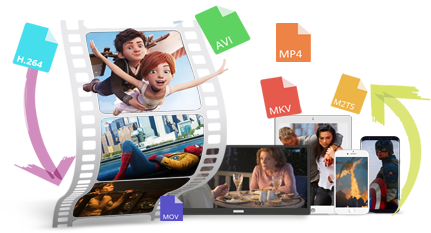
Video format: MP4, MOV, AVI, FLV
Video Codec: H.264
Audio Codec: AAC
Resolution: 1080p
Frame rate: up to 60fps
If the format of your prepared video is not on the list or it doesn’t meet the required specs, you can use a video converter to change the format as well as adjust the settings to make it fully supported by Twitch. Here we’d like to recommend WonderFox HD Video Converter Factory Pro. This program offers a simple, one-stop solution to transcode video and modify parameters including audio/video, resolution, fps, bitrate, sample rate, etc. It is easy to run with even non-tech savvy. Here is a simple how-to guide:
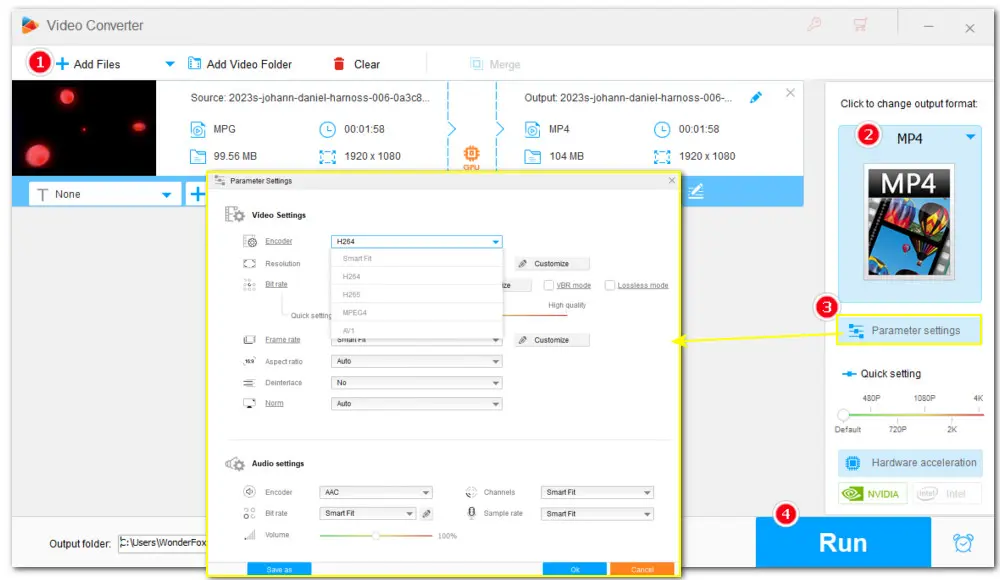
• Launch Launch HD Video Converter Factory Pro and enter Converter. Select all your target videos and then drag them into the program for a batch conversion to save time.
• Click on the right-side format image to open the format library for exporting. Go to the Video section and select a Twitch-supported format. MP4 is highly recommended here for its great compatibility.
• Then enter Parameter settings to tweak the video and audio settings based on the above video upload guideline for Twitch. Hit OK to save the changes.
• Specify a destination for your exported Twitch video and then press the big Run button to activate the batch video converter at once.
After all preparation work gets done, visit Twitch’s official homepage on your browser. Then log in to your Twitch account.
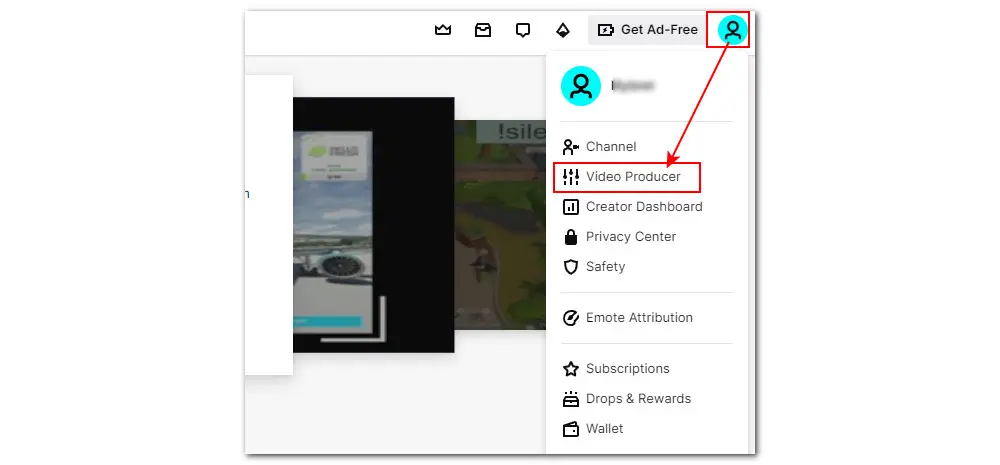
Click your profile on the upper right corner of the screen and select Video Producer from the drop-down menu.
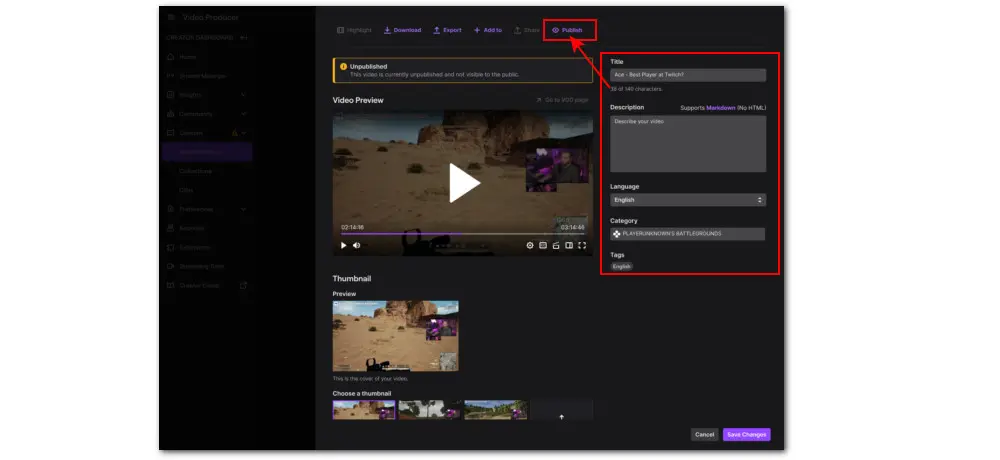
You’ll be redirected to a new dashboard where you can see a purple Upload button. Simply click it to browse the video you made on your PC and select it. Also, you can straightly drag and drop the video to start an upload.
Before publishing, here is the last step: add details to your video, including Title, Description, Language, Category, Tags, and Thumbnail.
Finally, hit the Publish button to post the video on your Twitch channel.
VOD, short for Video on Demand, is a practical feature for many Twitch broadcasters. With VOD enabled, your past broadcasts will be saved to your Twitch account for on-demand viewing. In other words, your audience can view the Twitch VODs whenever they want, even if they miss your live-stream.
Here is how you can publish VOD streams on Twitch:
Step 1. Log in to your Twitch account. Click on your profile and select Creator Dashboard.
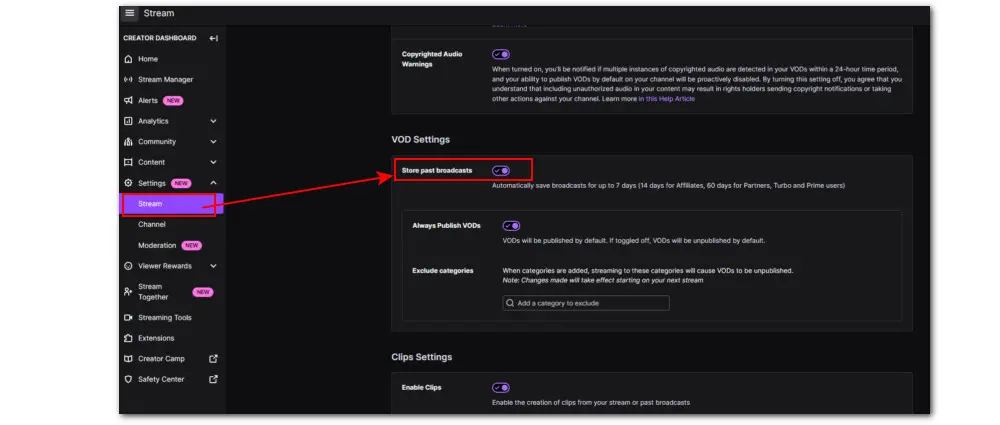
Step 2. Expand the Settings options and select Stream.
Step 3. Move down to the VOD Settings section. Toggle the Store past broadcast option to enable it.
With the above detailed guide on how to upload video to Twitch, you should now have no trouble starting the Twitch journey. Sincerely hope this post could be helpful. Thanks for reading till the end. Have a nice day!
1. Convert all mainstream audio and video files;
2. Download movies and music from 1000+ websites;
3. Compress video while keeping high quality;
4. Record meetings, gameplay, streaming content…;
5. Trim, merge, crop, rotate, add special effects.
6. Batch processing and hardware acceleration;
Privacy Policy | Copyright © 2009-2026 WonderFox Soft, Inc.All Rights Reserved
