Xtasy D addon is now housed and can be downloaded and installed from the Where The Monsters Live Repository.
 How to & Tips
![]() Convert Video
Convert Video

![]() Convert Video
Convert Video
![]() by Oswald
by Oswald
Last Updated on July 20, 2023
On this page, you will learn from the detailed guide on how to install the latest working Xtasy D addon on Kodi to enjoy high-quality music and videos, mainly from YouTube.
I'll demonstrate the installation on Windows PC, with Kodi Matrix 19.5. This installation guide applies to Amazon Firestick, Fire TV, Android & iOS, Mac, Android TV, Android Boxes, etc. as well.
Xtasy D addon is now housed and can be downloaded and installed from the Where The Monsters Live Repository.
 Kodi XTASY D Addon
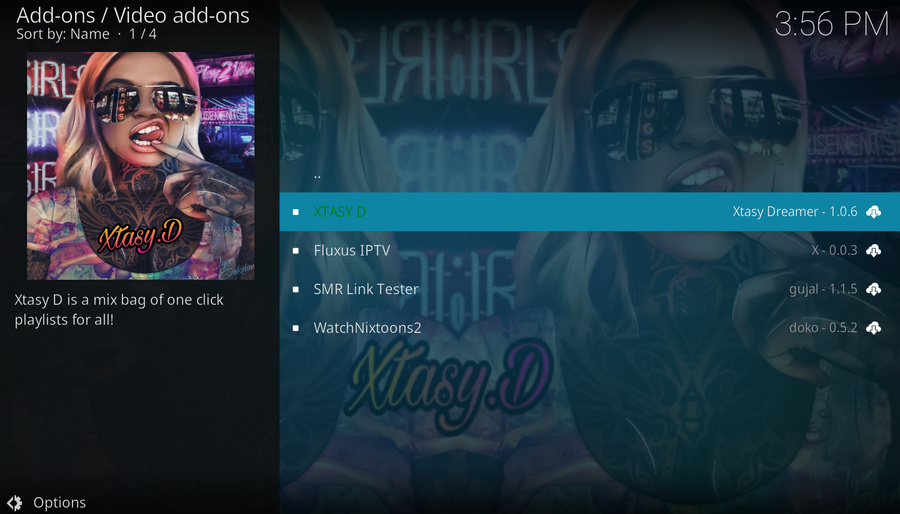
Xtasy D is a mix bag of one click playlists for all!
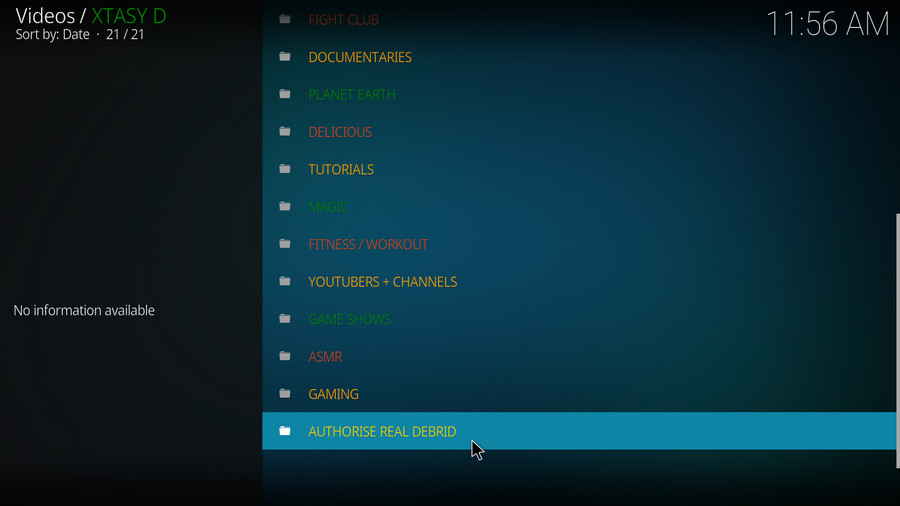
XTASY D is one of the best video & music addons on Kodi, it serves mainly as a set of detailed categories to YouTube featured videos of many kinds of genres: Paranomal, TV shows, Mysterious, Extreme sports, History lesson, Retro kids, Fight club, YouTube documentaries, Planet earth, Delicious, Tutorials, Magic, Fitness/workout, YouTubers + Channels, Game shows, YouTube ASMRs, Gaming. Apart from that, XTASY D presents also as a great music addon featuring weekly updated list of high-quality trending playlist, Artists compilations, Music channels, Kodi radio, and Concerts.
Addon name: XTASY D
Repo name: Where The Monsters Live Repository
The latest working source URL: https://www.midian.appboxes.co/repo/
Media source naming: midian
Before starting,
· For new users, install Kodi on your device to get started.
· Since Kodi prohibits the installation of third-party addon/repos by default for security issues, we need to set Kodi to allow installation from unknown sources to go on.
· Update Kodi to the latest version to avoid potential issues. .
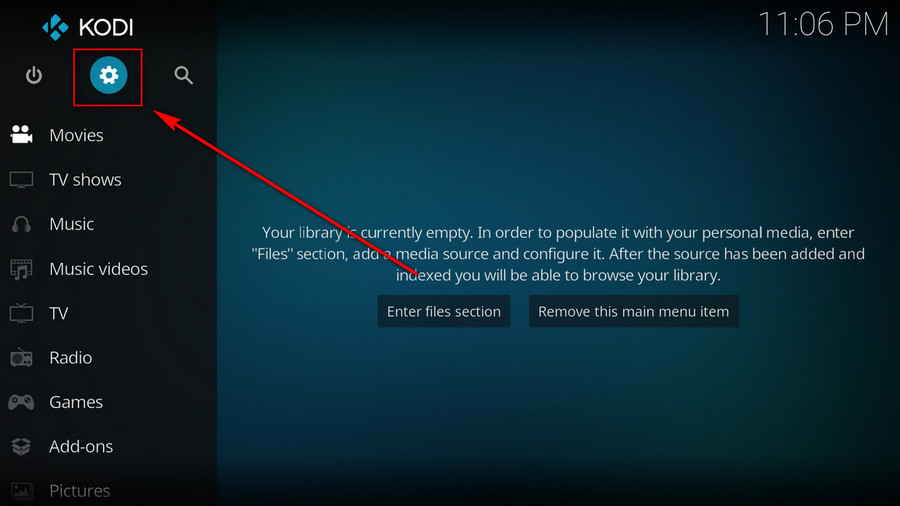
Step 1. Launch Kodi. Click on the cog icon from the upper side of the left panel to enter System.
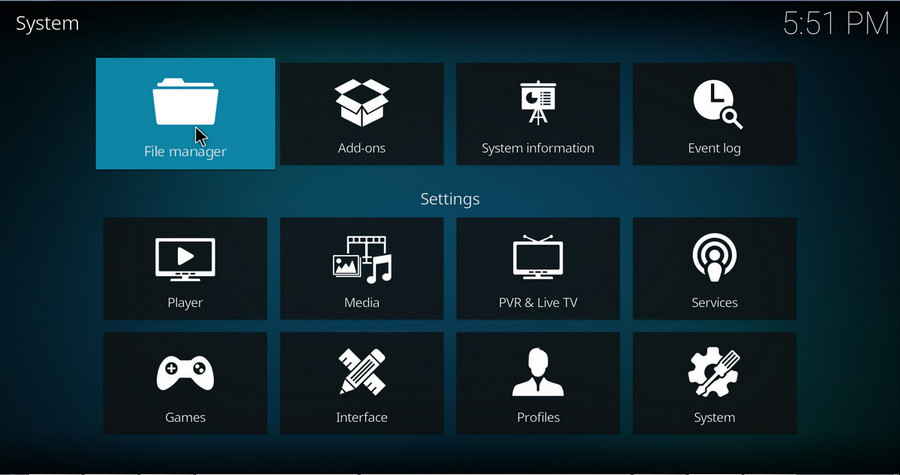
Step 2. Click on File manager from System page.
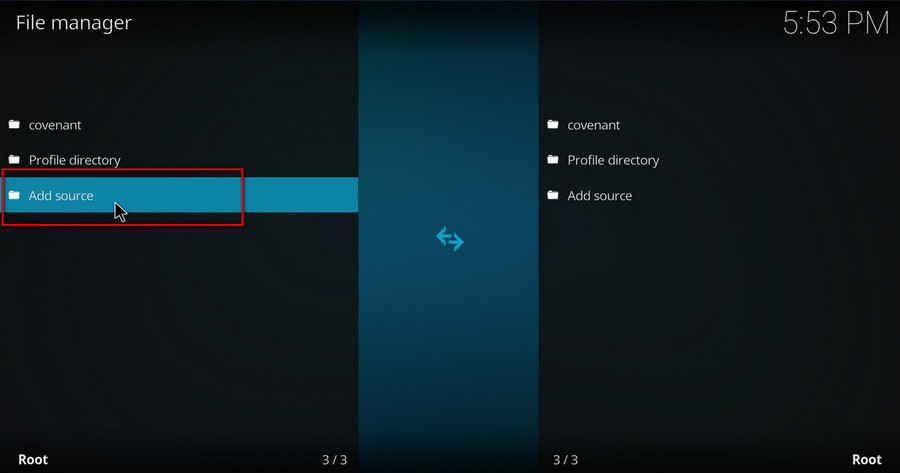
Step 3. Double click on Add source from the left column.
Step 4. Click on <None> from the box in the middle.

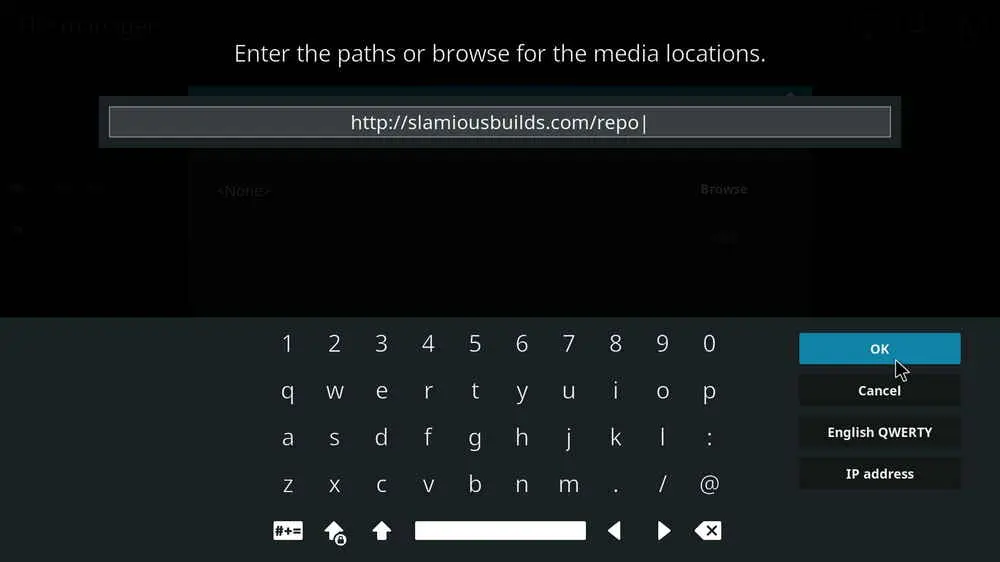
Step 5. In the pop-up box, copy & paste or type in exactly http://slamiousbuilds.com/repo to the media location box, and hit OK button from the lower-right side.
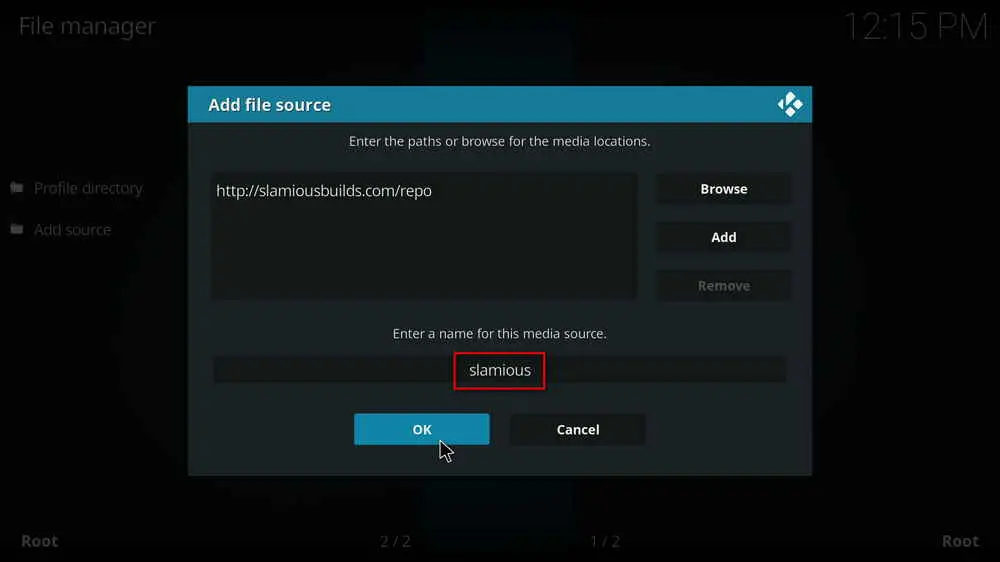
Step 6. Define a name for the media source we just added as Slamious. Make sure all characters of the source name are lower-cases, or you might encounter a problem connecting to internet server later during installation. Then click OK underneath.
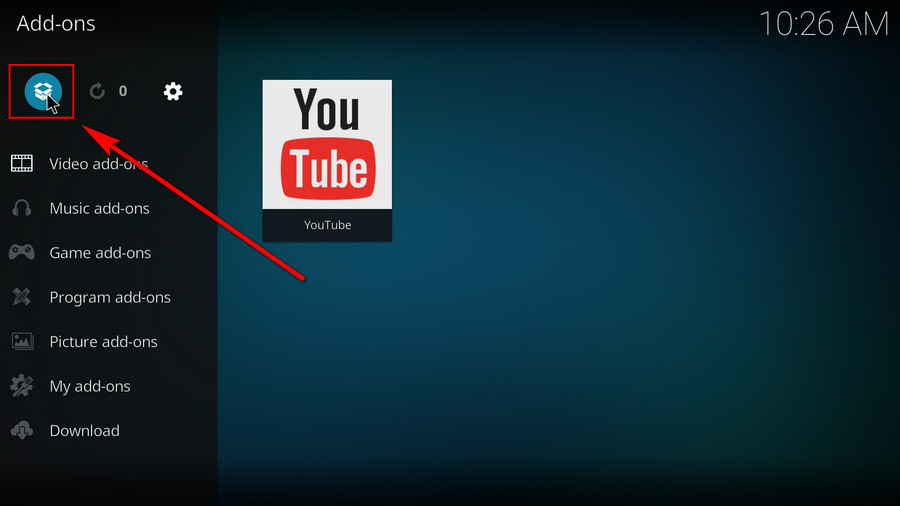
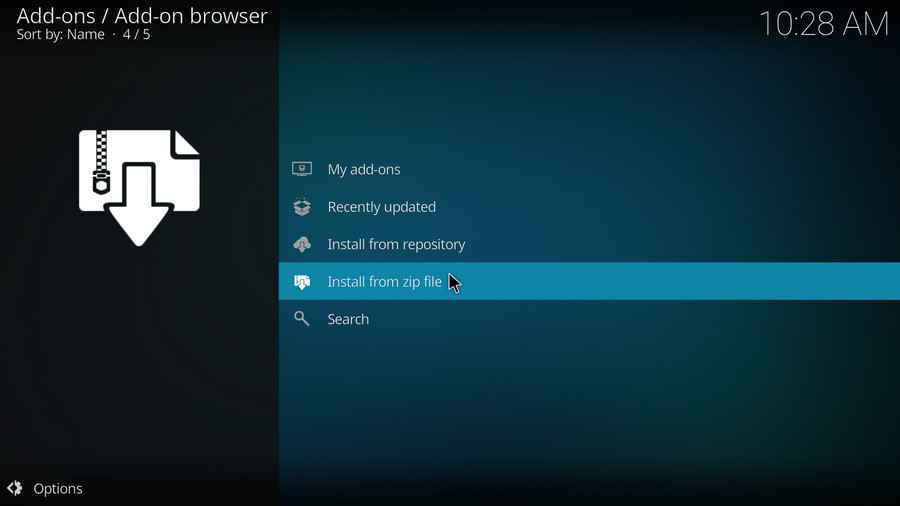
Step 7. Then get back to the main menu. Click on Add-ons from the left panel.
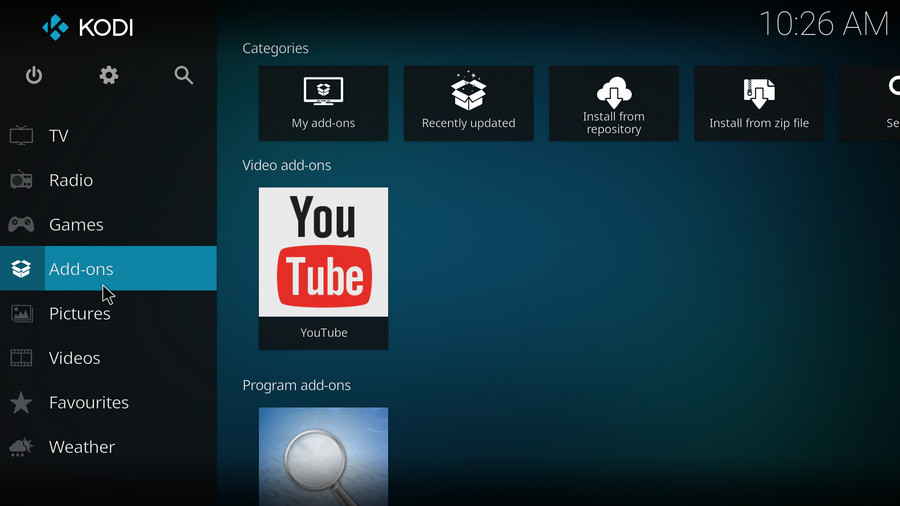
Step 8. Click on the box icon from the upper side of the left panel.
Step 9. Click Install from zip file.
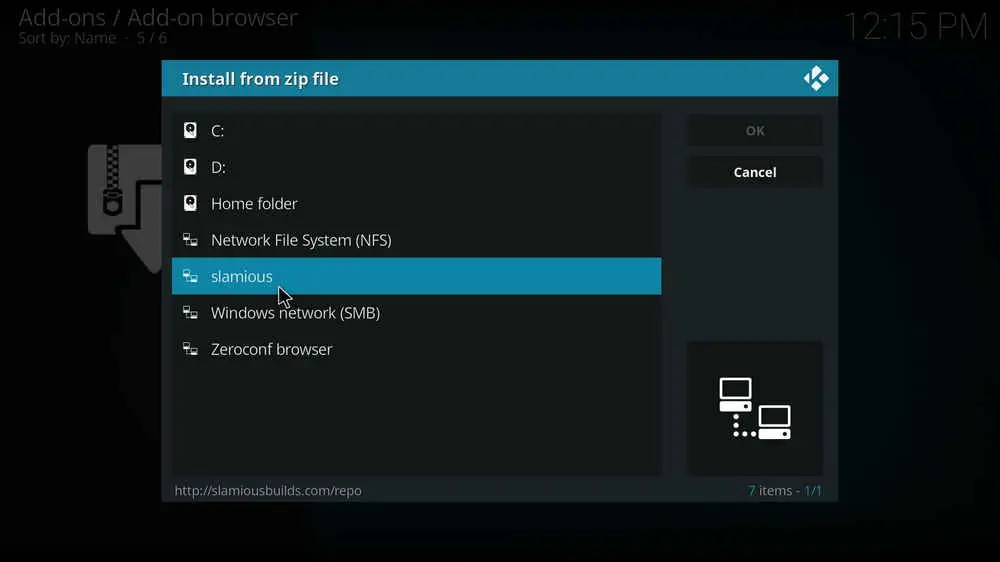
Step 10. Click on the media source Slamious we just added to Kodi.
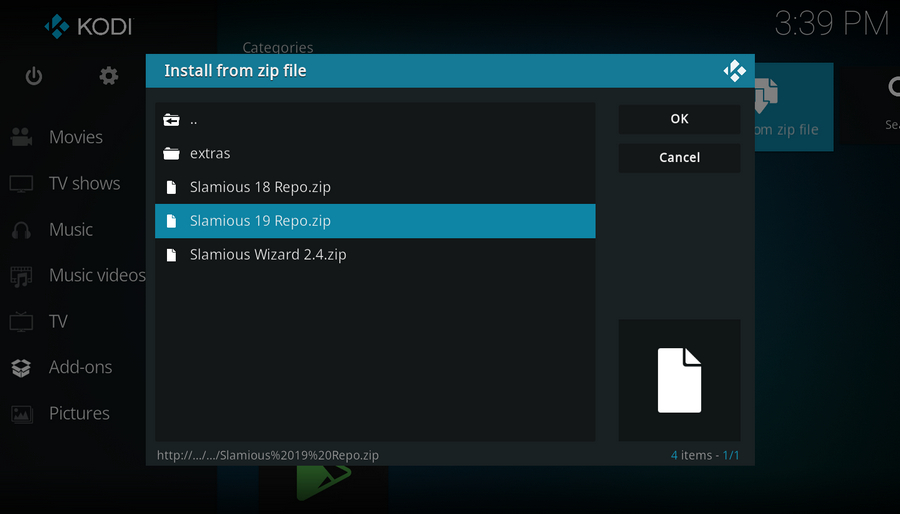
Step 11. Select the Slamious 19 Repo.zip file within. If you see failed to install addon from ZIP file, check your internet connection, reboot Kodi, and install again.
Step 12. Wait until you can see a message shows up on the upper-right side saying: Slamious Repo Add-on installed.
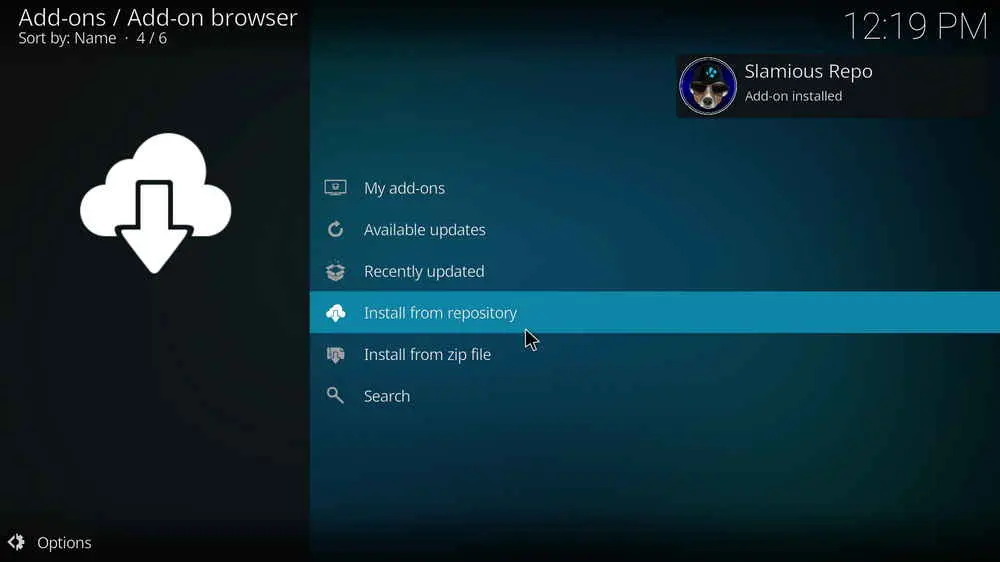
Step 13. Click on Install from repository from the current interface.
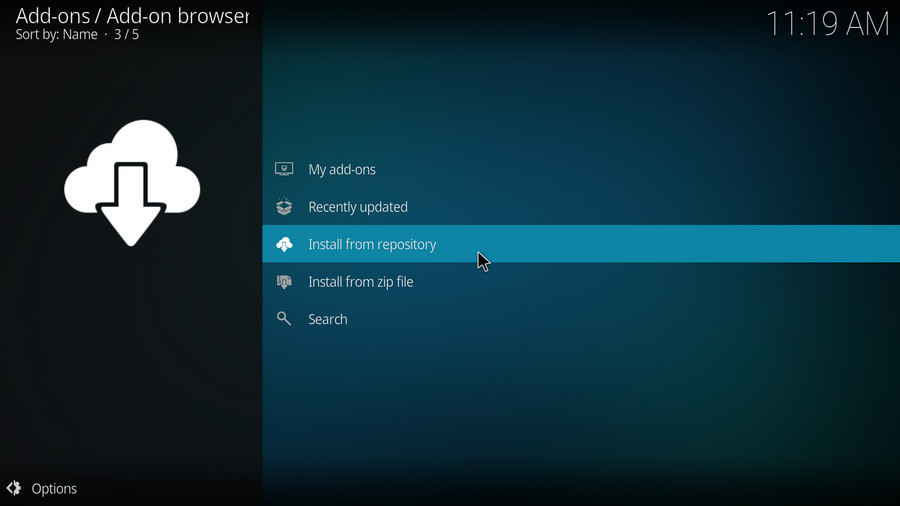
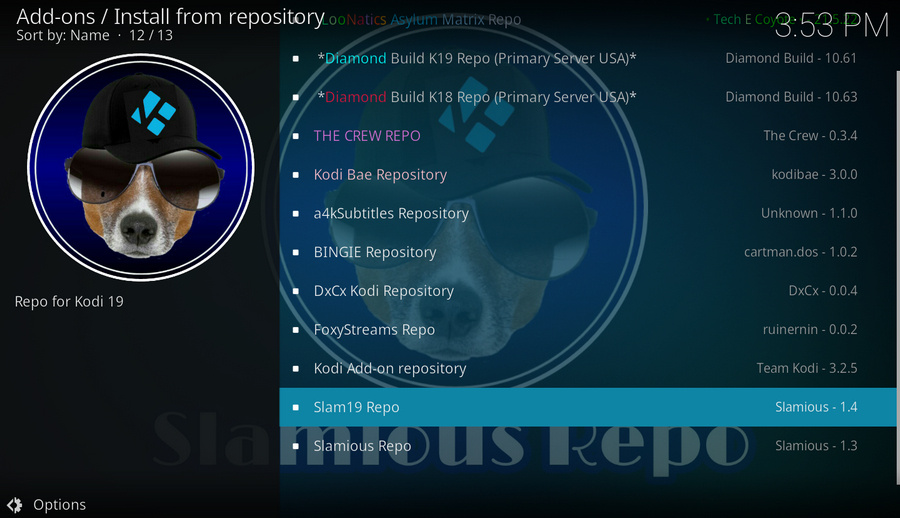
Step 14. Click on Slam 19 Repo.
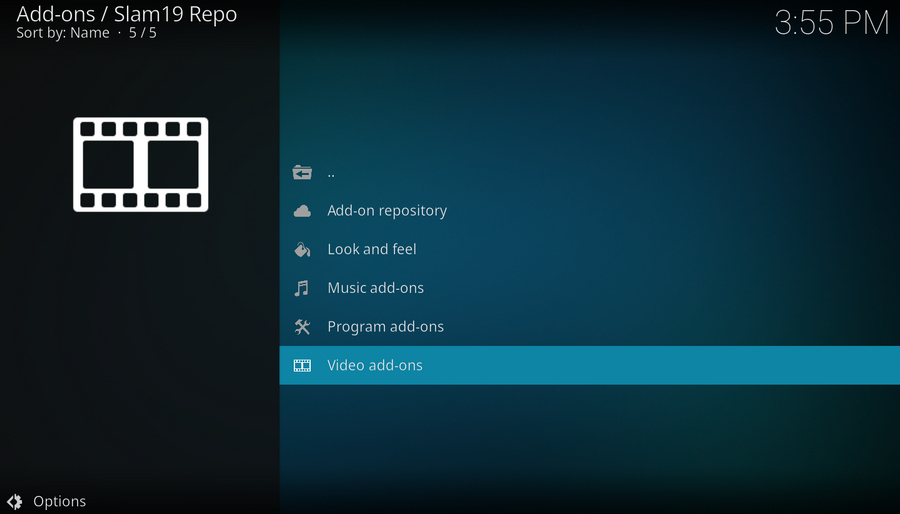
Step 15. Click on Video add-ons.
Step 16. Click on XTASY D.
Step 17. Click on Install from the lower-right side.
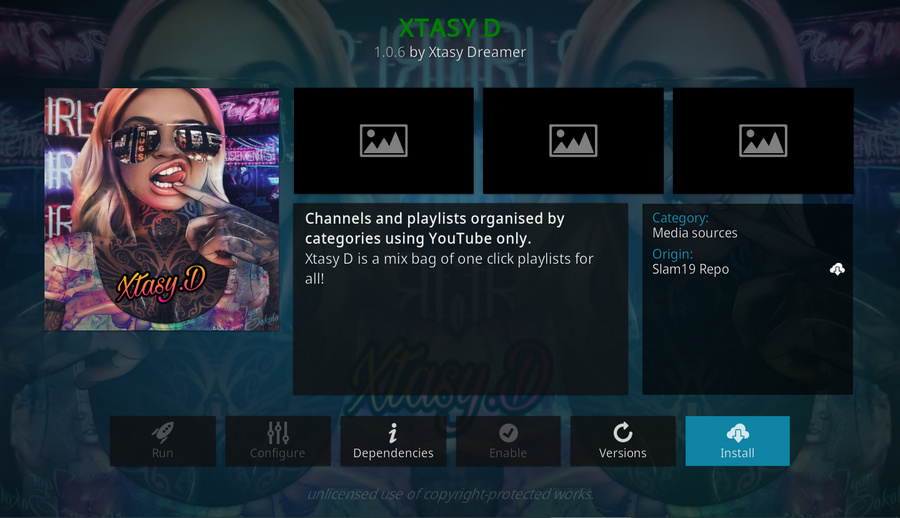
Step 18. Click OK to install essential dependencies.
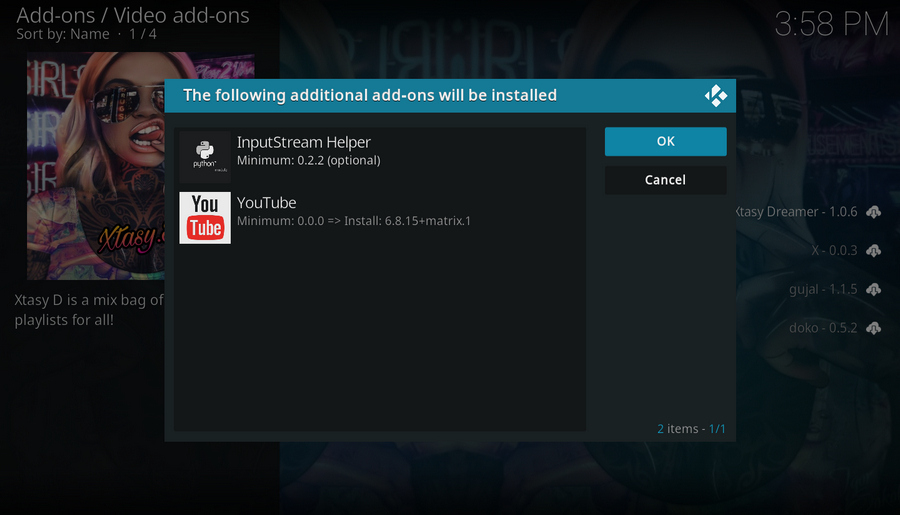
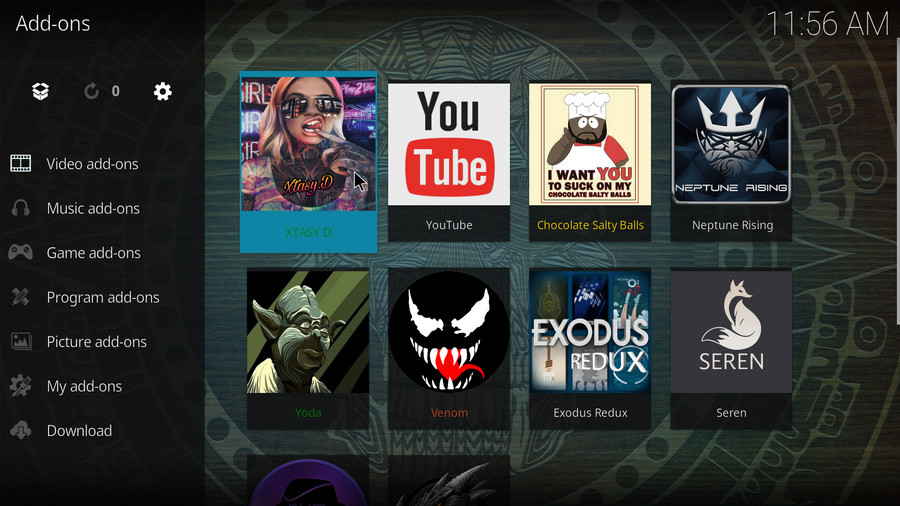
Step 19. Wait until you can see a message saying XTASY D add-on installed pops up on the upper-right side. That's it! Xtasy D is now fully installed on your Kodi, from now on, you can find it from Add-ons > Video add-ons.

Real-Debrid is a service with which you integrate Kodi to acquire faster internet stream downloads for buffering-free video playback. To get started, go to https://real-debrid.com/ to sign up for a free account, if you haven't had one already.
· Here's a post where you can learn more about Real-Debrid.
Step 1. Go to Add-ons > Video add-ons, open XTASY D.
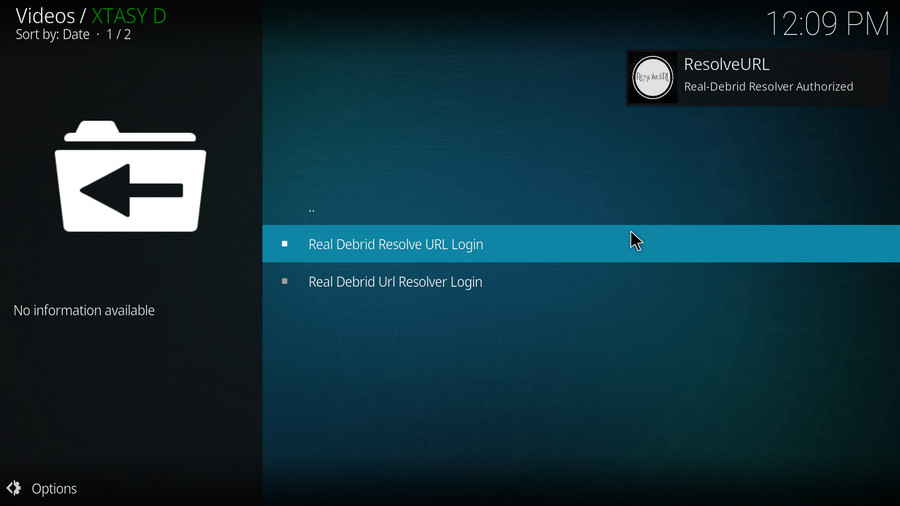
Step 2. Scroll down and click on AUTHORISE REAL DEBRID.
Step 3. Either option works. We'll take Real Debrid Resolve URL Login as an instance, click on it.

Step 4. A small window will pop up with an authorization code automatically generated, do not click Cancel now. Note that it's a temporary code that expires shortly, so we better hurry.
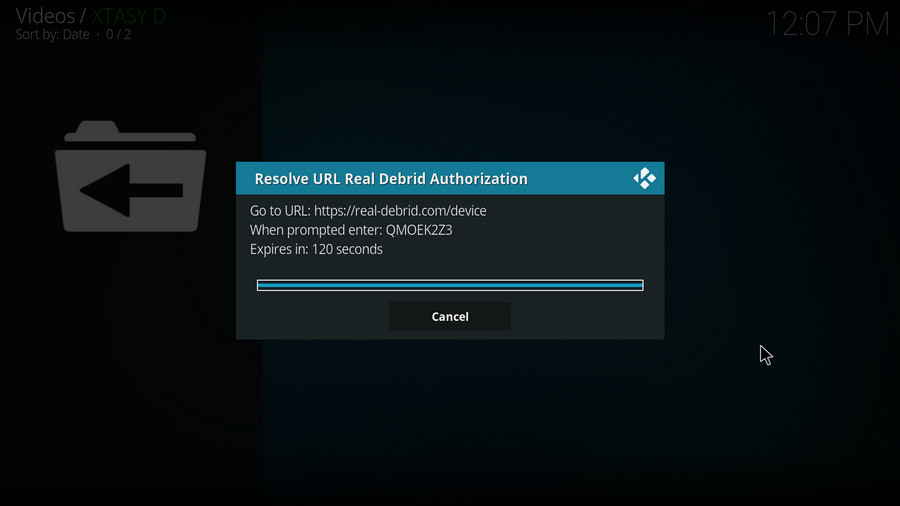
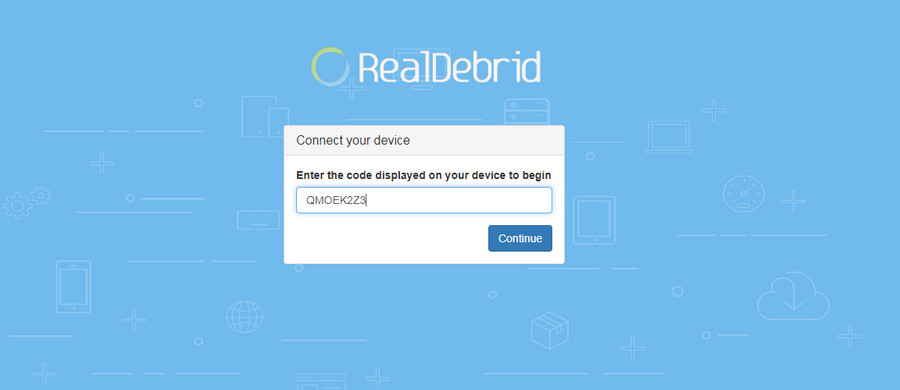
Step 5. Navigate to https://real-debrid.com/device with your browser, enter the authorization code into the box. Check if there's any typo! Then Real-Debrid will ask you to login with your account.
Step 6. Now Real-Debrid is authorized, you can set an identifiable name for your current device, like Android TV living room (if needed), and close the page.
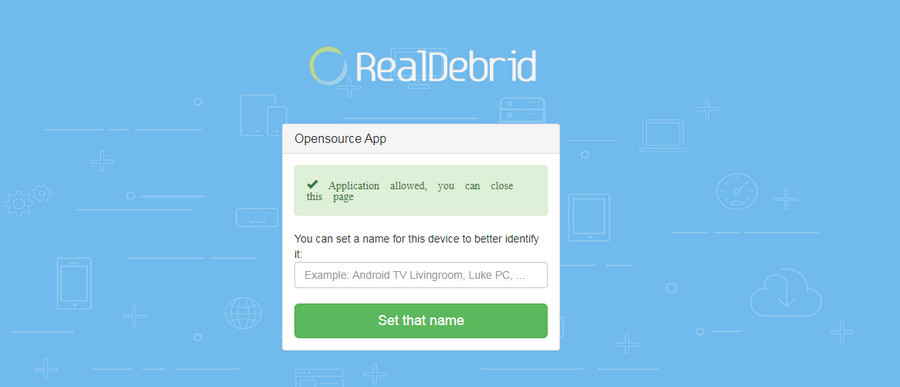
Step 7. Get back to Kodi, you can see a message saying ResolveURL Real-Debrid Resolver Authorized pops up on the upper-right side.