When encounter any issues with your computer and the program, you can first try to restart your PC and the software.
Note that to end the process of the software before restarting it.
Just go to "Task Manager" and find the "ShareX" process, then click on it and select "End Process Tree".
If restarting the PC and the software doesn't work, you can try to reinstall the ShareX app. Maybe the problem is caused by the outdated version of ShareX or some bugs or glitches in your current version.
If the issue still exists after trying the above two solutions, then you need to confirm that there are no hardware or system issues with your computer and go through all the audio input and output drivers to make sure they're all updated. Also, check the "Microphone" in the computer's system settings. Sometimes the microphone may be disabled in the system settings or the ShareX app isn't allowed to access it, which will cause the audio not recording issue in ShareX. See how to update the audio input and output drivers, enable the microphone, and allow ShareX to use it.
Update the audio input and output drivers
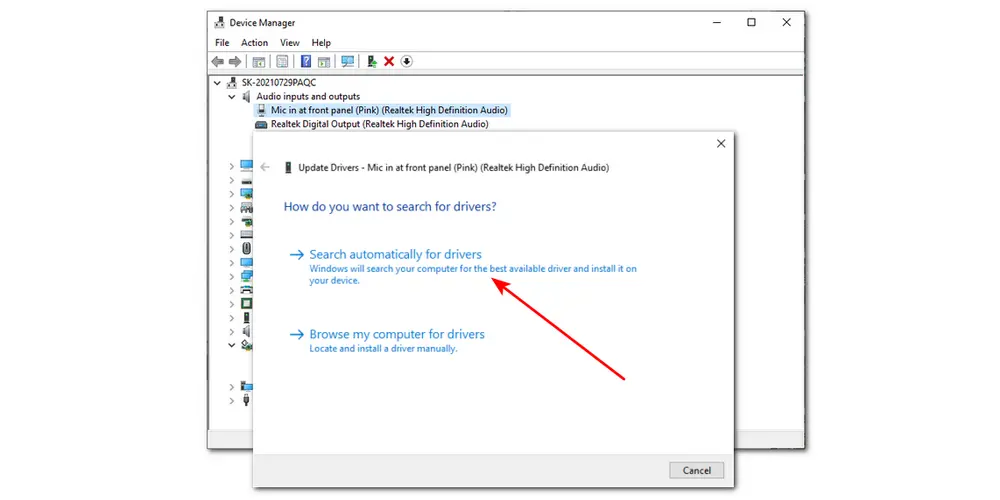
Step 1. Press “Windows + X” and select “Device Manager”;
Step 2. Click “Audio inputs and outputs” to enable the Microphone and Speakers. If needed, right-click the driver and press “Update driver” > “Select automatically for drivers” to update the audio drivers.
Check the Microphone in System Settings
Step 1. Go to “Settings” > “System” > “Sound” and scroll down to the “Input” setting, choose “Microphone”.
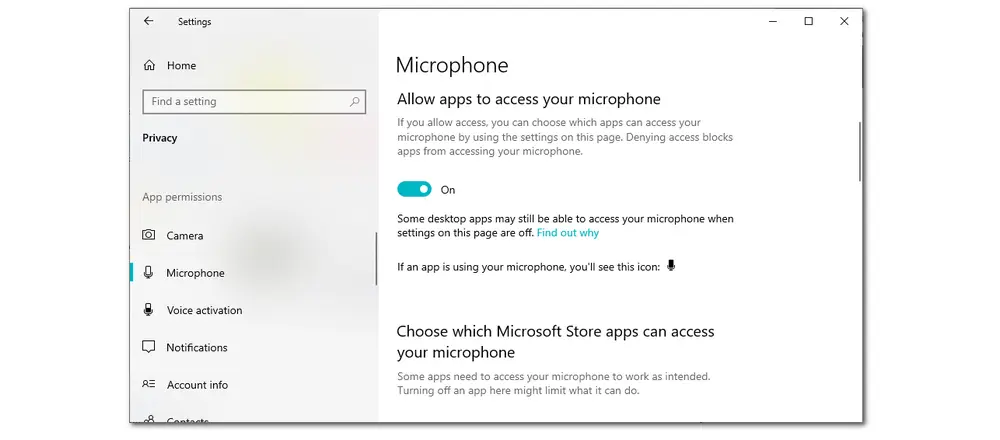
Step 2. Back to “Settings” and choose “Privacy” > “Microphone”. Make sure the “Allow apps to access your microphone” option is ON.
Step 3. Scroll down to find the ShareX app and allow it to use Microphone.
If the recorder devices are not installed in ShareX, then you may find that the audio is not recorded with the screen recording. To fix it, just follow the steps below to install them in your ShareX app.
Step 1. Launch ShareX on your computer and go to “Task Settings” in the left column;
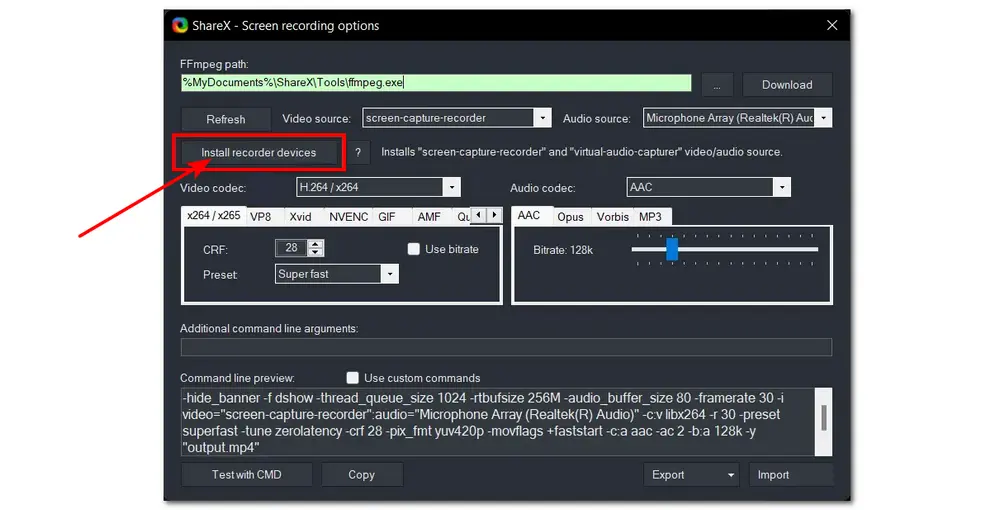
Step 2. Click “Screen Recorder” and open the “Screen recorder options...”;
Step 3. Press “Install recorder devices” to install the “screen-capture-recorder” and “virtual-audio-capturer”. Wait untill they are installed.
Note: If this option does not appear within ShareX, it is conceivable that you installed the software from the Microsoft Store. Then uninstall it and go to the ShareX official website to download and install the setup. When you launch it, you will see the "Install recorder devices" option; simply follow the tutorial above and restart your computer to see if the error has been resolved.
By default, audio input and recording are disabled in ShareX. That means the audio source may be set to none when you need to go on a screen recording with audio using ShareX. So to solve the ShareX not recording audio issue, you can change the audio source. The tutorial below will guide you to change the audio source to the right one.
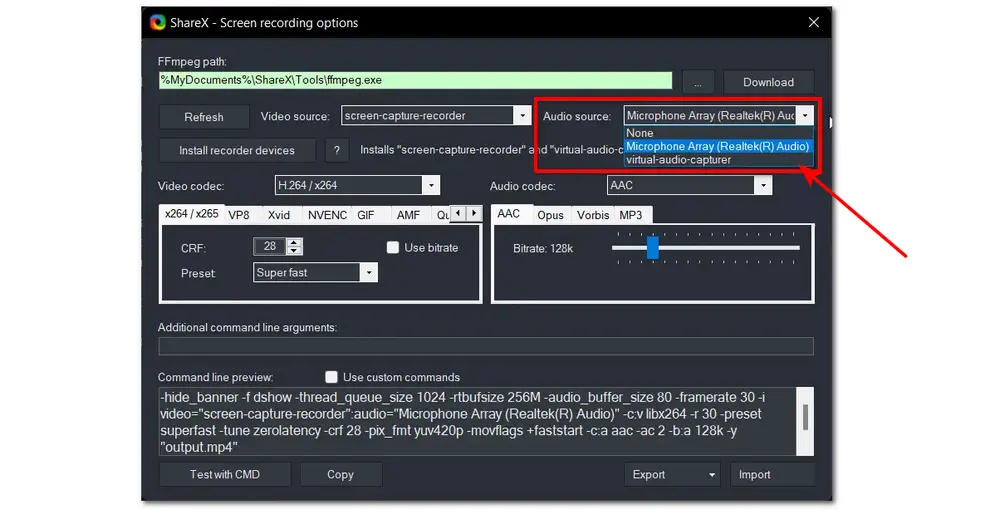
Step 1. Launch ShareX and go to “Screen Recorder options" from the "Screen recorder" tab;
Step 2. You can select or change the audio source to either your external microphone or to the "Microphone Array (Realtek(R)Audio)". Just remember, don't set the audio source to "None" or "Virtual audio capturer".
Then, restart the ShareX app to see if the issue is fixed.
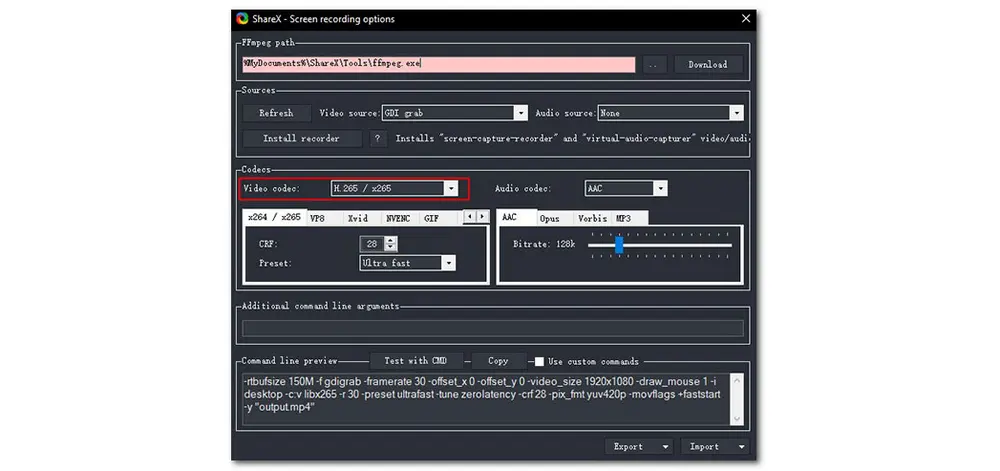
If the ShareX not recording screen problem continues, changing the video codec may also work. The following are the steps.
Step 1. Go to "Task settings" in your ShareX app.
Step 2. Find "Capture" > "Screen Recorder" > "Screen recording options..." under the "Codecs" section.
Step 3. Change the default "H.264/x264" to "H.265/x265".
Step 4. Restart ShareX and see if the recording can work properly.
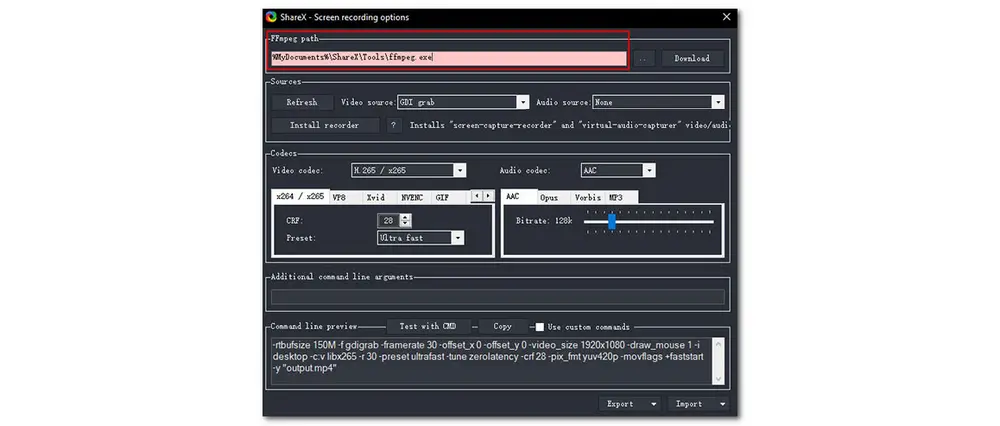
The ShareX screen recording issues may also come from the FFmpeg path, which is the output path for ShareX screen recordings. If there is not enough storage space, then the problem occurs. So, follow the guide below to change the FFmpeg path.
Step 1. Go to "Capture" > "Screen Recording" settings in ShareX.
Step 2. Find the "FFmpeg path" below the "Screen recording options...".
Step 3. Change the FFmpeg path.
Step 4. Save the settings and restart ShareX to have a try.
If the above-mentioned solutions are still not working for your issue or other recording problems occur after trying the solutions, you can give another screen recording tool a try. Here I’d like to introduce WonderFox HD Video Converter Factory Pro, which is an all-in-one video & audio processing tool that has a built-in screen recorder. It is efficient for you to start the screen recording with system audio, microphone voice, or both in high quality up to 4K / 60 fps. You can freely choose to record the full screen or part of the desktop screen. It also allows you to record audio-only files.
After finishing recording, this software can further edit, compress, convert recordings, and more.
DownloadDownload HD Video Converter Factory Pro here and follow the steps below to start recording now!
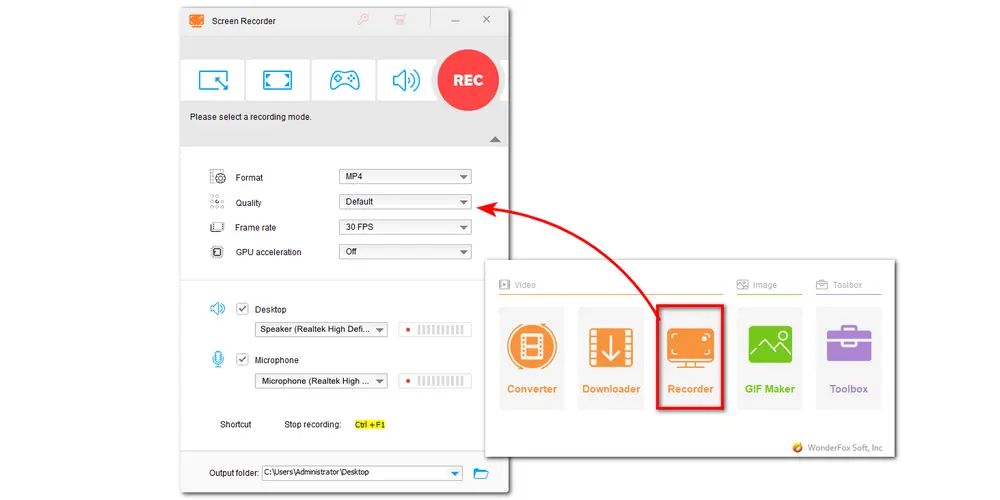
Step 1. Launch HD Video Converter Factory Pro on your desktop and enter its “Recorder” module.
Step 2. Choose a recording mode (Custom mode/Full-screen mode/Game recording mode/Audio-only mode) at the top of the recorder interface. If you want to record part of the screen, just choose the Custom mode and select the recording area by dragging the cursor.
Step 3. Move down to confirm the recording format, quality, and frame rate, and choose whether to toggle on the GPU acceleration or not. Then enable the audio source you want to record. You can definitely record the system and microphone simultaneously.
Step 4. Click the bottom triangle button to specify an output path. Then press the red “REC” button to start recording after a five-second countdown.
Step 5. When you finish recording, hit the stop icon on the floating bar or press “Ctrl + F1” to stop recording.
Above are all the fixes I want to share with you for solving the ShareX not recording audio issue. Just give them a try to see if ShareX works properly. If not, give another screen recorder like WonderFox HD Video Converter Factory Pro a try. Sincerely hope this post can be helpful to your problems.
Thanks for reading till the end! Have a nice day!
Privacy Policy | Copyright © 2009-2026 WonderFox Soft, Inc.All Rights Reserved
