Want to make a video quality higher on PC? Follow the steps below:


Besides being a free, open-source multimedia player, VLC also features advanced video settings and can serve as free video quality upscaling software. In the following parts, we'll demonstrate the detailed process of upscaling video quality in VLC. Plus, an alternative is offered in Part 2 in case you need an easier solution.
In this section, we’ll delve into the video quality settings available in VLC Media Player and how can you adjust them to let VLC upscale video quality. But note that upscaling a low-quality video to a high-quality video with perfect clarity in VLC is impossible. The improvement will be limited by the video’s original quality.
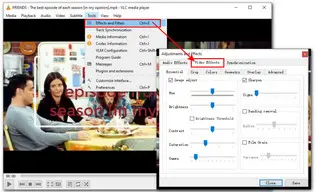
VLC offers options to change the video's Hue, Brightness, Contrast, Saturation, Gamma, Sharpen, etc., helping improve the overall visual clarity. Here are the steps:
▪ Open VLC and go to Tools on the menu bar.
▪ From the drop-down options, select Effects and Filters.
▪ Click Video Effects and go to Essentials.
▪ Check the Image adjust and move the sliders below to set the preferred Hue, Brightness, Contrast, etc. If your video looks fuzzy, you can try the Sharpen effect to make it clear.
▪ As you alter the settings, you can preview the changes in real time.

With the above steps, the changes are directly applied to the video you’re playing in VLC. If you want to keep these effects permanently, you should:
▪ Open VLC and click Media > Convert/Save.
▪ In the File section, click Add to import the video you want to upscale quality.
▪ Click Convert/Save.
▪ Select an output format from the Profile drop-down list.
▪ Click the wrench icon and go to Video codec > Filters.
▪ Choose an appropriate filter and click Save.
▪ Hit Browse to set an output folder and click Start to export the video.


VLC provides an easy solution for you to remove jagged edge artifacts from a video and then export the deinterlaced video. Follow the instructions here:
▪ Start VLC and go to Media > Convert/Save.
▪ Click Add to import your interlaced video and continue with Convert/Save.
▪ Select an export format from the Profile list.
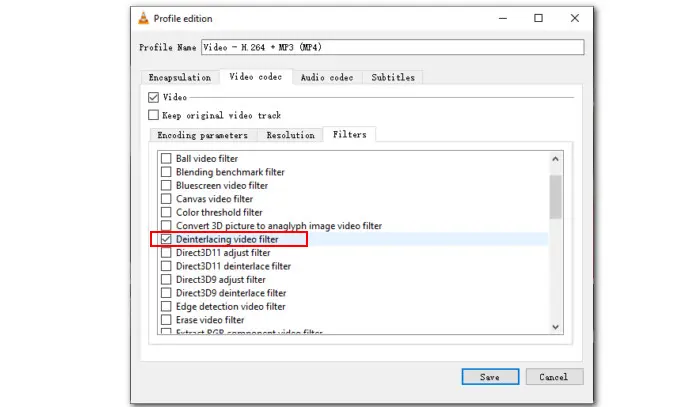
▪ Click Edit selected profile > Video codec.
▪ Check the Video box and click the Filters tab.
▪ Choose the Deinterlacing video filter option and then click Save.
▪ Now, choose a destination and then hit Start.
For real-time playback without interlaced lines in VLC, you just need to open the video file and then click Video > Deinterlace > On.
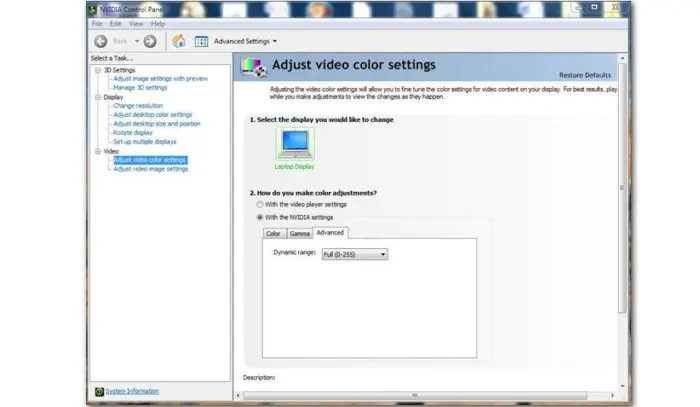
Many Nvidia card users have encountered the washed-out color issue when playing videos in VLC. If you have been troubled with the same problem, then walk along with the guide below to correct the black levels of your video:
▪ Type Nvidia Control Panel in the Windows search bar and open it.
▪ Go to Advanced Settings > Video.
▪ Then click Adjust video color settings and check the option “with the NVIDIA settings”.
▪ Below the Advanced tab, change the Dynamic range to full (0-255).
▪ Then restart VLC to put it into effect.
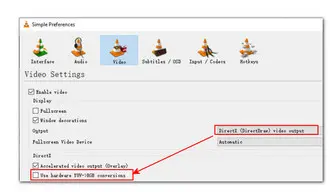
If you fail to bring up the Nvidia Control Panel or the above method doesn’t make any improvement, the issue might be with the use of YUV, which is a television standard. You can keep going with the following steps to cancel it:
▪ Start VLC and go to Tools > Preferences.
▪ Switch to Video and select DirectX (DirectDraw) video output.
▪ Then uncheck the Hardware YUV->RGB conversions option.
▪ Don’t forget to restart the VLC player.

Here is another workaround you can try to enhance the output video quality in VLC:
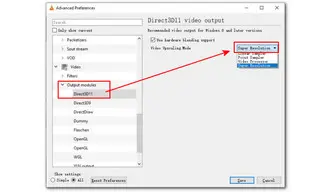
▪ Start VLC and enter the Preference settings.
▪ Choose to show All settings.
▪ On the left panel, click Video and double-click Output modules.
▪ Choose Direct3D11.
▪ Then on the right side of the window, select Super Resolution from the Video Upscaliing Mode drop-down menu.
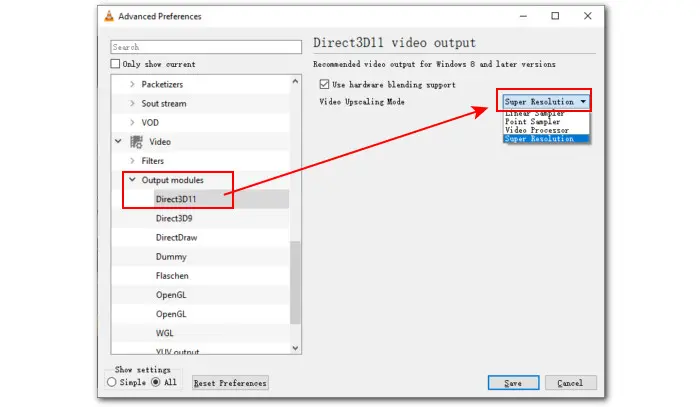
With the support for RTX Video Super Resolution, VLC does help increase the clarity and sharpness of videos, but it is far from being a game-changer. And some users even reported an instant crash when enabling this feature in VLC. But it is still worth trying. Before activating it, please ensure you have installed the newest VLC (3.0.19 or later) and have a PC running GeForce RTX 30- and 40-series graphics cards.
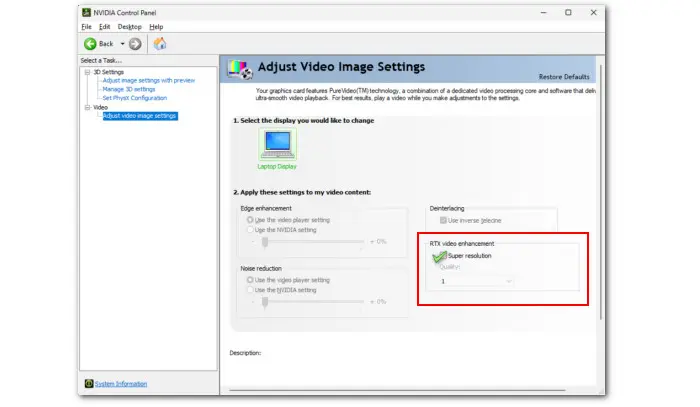
▪ Open the Nvidia Control Panel.
▪ Navigate to Video > Adjust video image settings.
▪ In the RTX video enhancement box, check the Super resolution option.
▪ Select the desired level of upscaling from the Quality drop-down options. Level 4 delivers the best performance, but also requires the most GPU resources.
▪ Finally, apply the changes.
VLC provides a wide range of adjustable settings for users, though, most changes are directly applied to the video you’re playing. If you need a permanent and easier way to upscale video quality, then look no further than WonderFox HD Video Converter Factory Pro.
This is a beginner-friendly yet functional video quality upscaler for Windows users. It can help turn a low-quality video into something better by changing the format and codec to compatible ones, adjusting the dimension size to fit the viewing device, altering bitrate, frame rate, brightness, sharpness, etc., and more. Besides, it also includes a Deinterlacing feature.
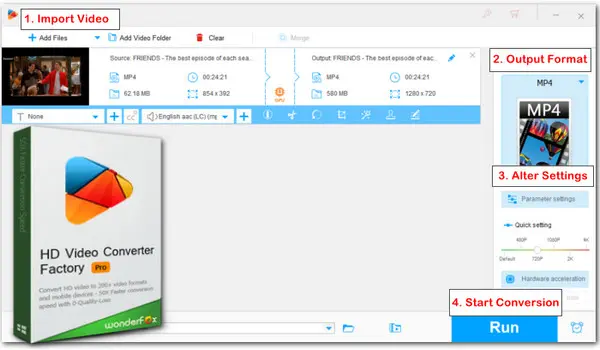
All features are easy to use. Here are the steps of how to use it to improve the quality of a video:
WonderFox HD Video Converter Factory Pro is the best choice for non-tech- tech-savvies to enhance video quality. No complicated settings. It provides you with optimized presets to choose from. Download and try it now!
Download and install WonderFox HD Video Converter Factory Pro to your computer. Then launch it.
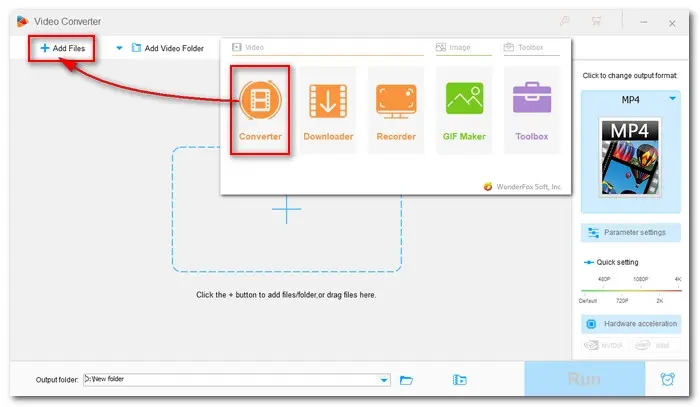
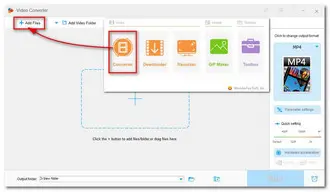
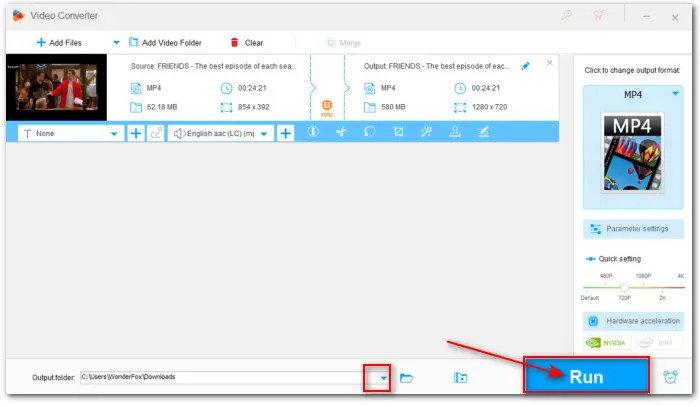
Enter the Converter module. Click the Add Files button and select the videos you want to upscale. Alternatively, you can drag and drop them into the software.
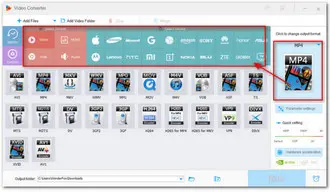
Click the right-side format image to expand the full list of 500+ output profiles. Based on your real needs, select a target-compatible format from the Video, Web, 4K/HD, Audio, and Devices sections.

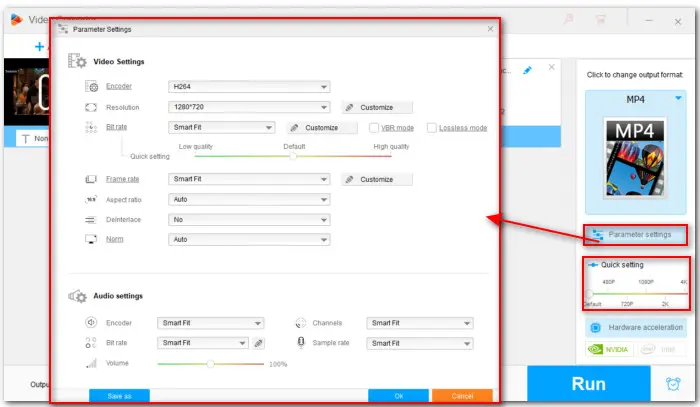
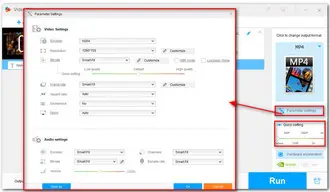
Under the format image, use the Quick setting to quickly increase the resolution. You can also open Parameter settings to customize resolution and change other video and audio output settings.
Click the bottom inverted triangle button to specify an output path for the output files. Then, press the Run button to export the processed videos.

VLC allows you to upscale video quality by applying effects, changing video color settings, adjusting output modules, and enabling the RTX VSR feature. If you’ve already had VLC on your PC, you might as well give it a try. But if you want a simpler way, we suggest you use WonderFox HD Video Converter Factory Pro.

Terms and Conditions | Privacy Policy | License Agreement | Copyright © 2009-2026 WonderFox Soft, Inc.All Rights Reserved