How to Screen Record on Microsoft Surface?
Use WonderFox HD Video Converter Factory Pro!


In this article, we’ll guide you through how to screen record on Microsoft Surface devices, whether you’re using the Surface Laptop or 2-in-1 Surface Pro, we’ve got you covered. Both native recording features and more competent 3rd-party recorders are included.
Let’s get started!
Programs |
Highlights |
Difficulty |
Download |
|---|---|---|---|
HD Video Converter Factory Pro |
▪ Record video and audio without time limit |
Very Easy |
|
Xbox Game Bar |
▪ Record the screen for free up to 4 hours |
Easy |
Built-in Windows10/11 |
Snipping Tool |
Take screencasts and screenshots for free |
Easy |
Built-in Win 11 |
Screencastify |
Offer annotation tools |
Normal |
|
OBS |
▪ Live stream and record |
Difficult |
WonderFox HD Video Converter Factory Pro brings an intuitive way to screen record on Surface Pro series. It has 4 recording modes and allows you to customize the recording area. Using it to capture quality videos like 4K/60fps is a simple process. This all-in-one tool also lets you edit, compress, and convert recordings to your needs and preference.
Free downloadFree download the robust recorder and follow our instructions to start recording screen on Microsoft Surface (with Windows 11/10/8.1/8/7...) :

Looking for a quick solution for screen recording on Surface Pro? You can go with HD Video Converter Factory. It can record any activities with mic and system sound simultaneously. High-quality, no time limit, no lag, and no watermark. Get it now!
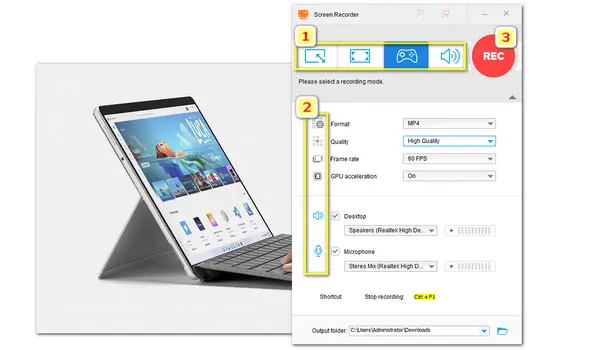
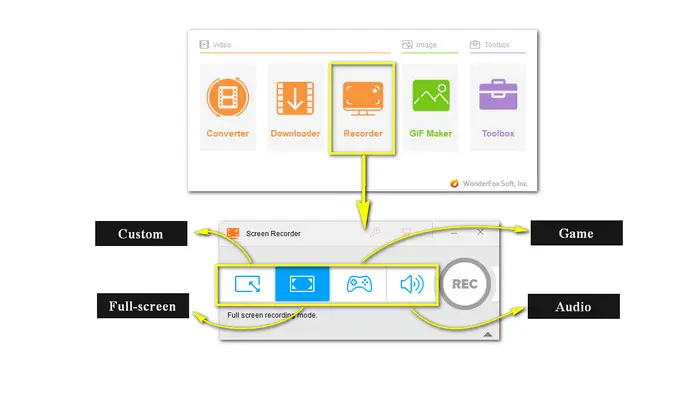
Launch it and click Recorder. Then the recording window will pop up, where you can select whether you want to record the entire screen or just a portion of the screen, or capture audio only.
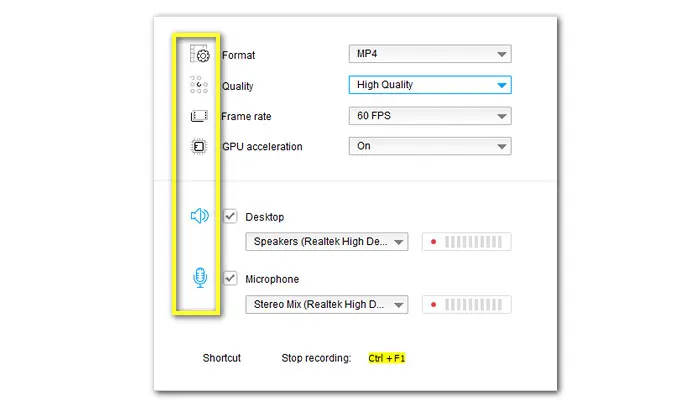
There are eight output formats available. They are MP4, AVI, MOV, and MKV for video; MP3, AAC, AC3, and WAV for audio.
You can also select an output quality and frame rate, turn GPU acceleration on/off, and tick off Desktop and Microphone simultaneously or separately.
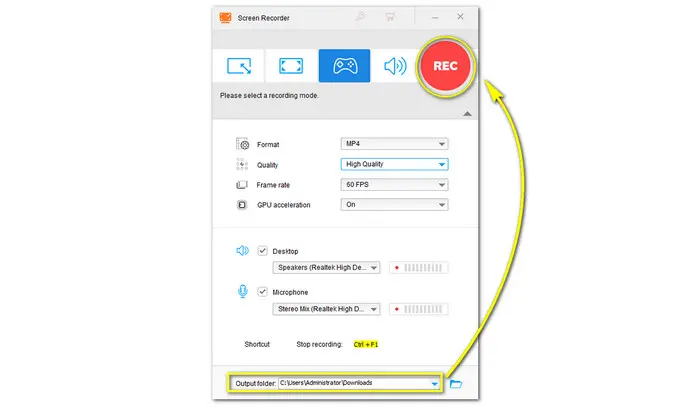
Then click REC to start recording after a five-second countdown. Click on the stop button or use keyboard shortcuts Ctrl + F1 to end it.
The recording will be automatically saved in the default folder. You can set a new folder by clicking on the downward-pointing triangle next to the Output folder.
Xbox Game Bar is a built-in recording option for Windows 10/11 PCs. You can press the keyboard shortcuts combination Windows key + G to open it up and start recording. The process is also very simple.
Next, let’s take a closer look at the steps of how to screen record on Surface Pro using the Xbox Game Bar.
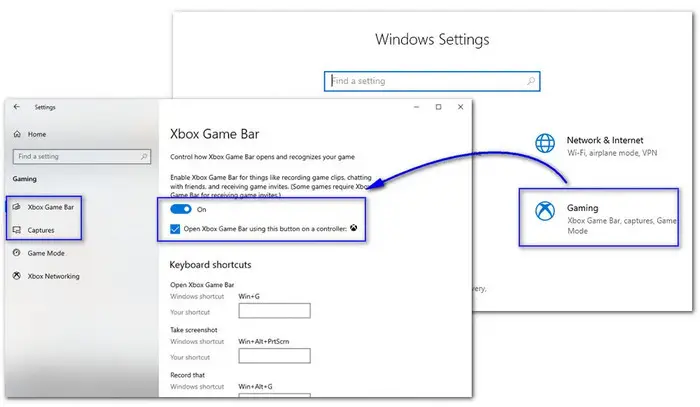
Step 1. To use Xbox Game Bar on your Surface Pro or Surface Laptop, open the Windows Settings menu and enter the Gaming module. Then tap on the slider to turn on the Xbox Game Bar feature in the Xbox Game Bar section.
Here you can also customize keyboard shortcuts according to your preference.
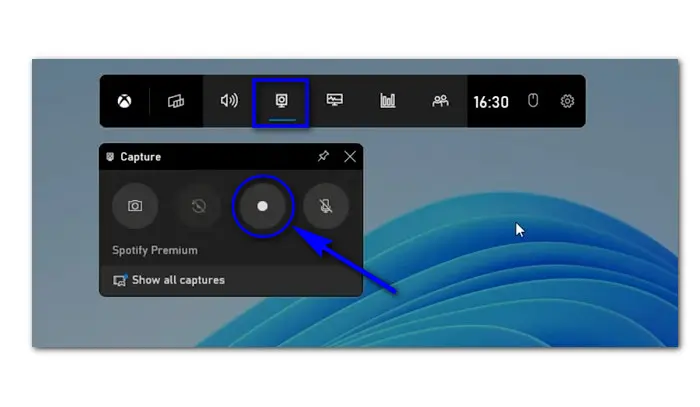
Step 2. Press Windows key + G to open the Game Bar overlay. Here you can see a menu bar.
Step 3. Click on the Capture icon on the menu navigation bar to toggle your Capture widget.
Step 4. Then hit the record icon or use the default shortcuts Windows key + Alt + R to start the recording. A Capture Status overlay will appear. You can hit the stop icon to end the recording.
Tips: Enabling the second icon allows you to record the last 30 seconds of your gameplay. However, it is likely to reduce your overall computer performance and affect your gaming experience.

Snipping Tool is a tool that comes with Windows 11/10 to take screenshots and then edit to save as PNG, JPEG, GIF, and MHT file. While with the release of version 11.2211.35.0, it is now can be used to screen record video on Windows 11. Here are the steps:
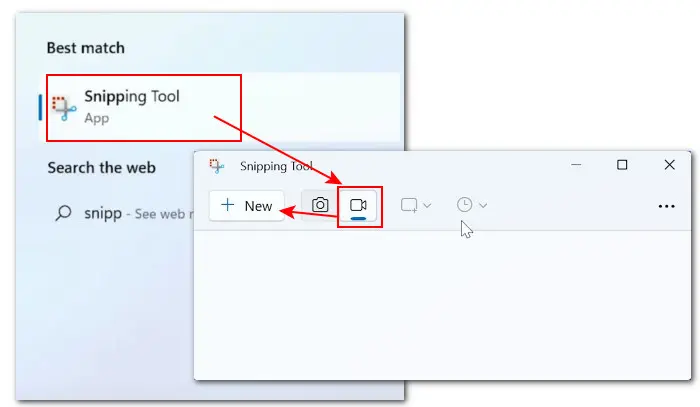
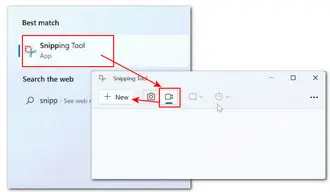
Step 1. Type Snipping Tool in the search bar to open it.
Step 2. Then hit the video camera icon to enable the recorder.
Step 3. Click + New and you will see a recorder window.
Step 4. Use your mouse to specify the portion of your screen that you want to capture and click Start to start the recording.
Step 5. To end it, hit the red stop icon. After that, you can preview the recording and then save, copy, or share it as well.
Screencastify is a popular chrome recorder extension that lets you capture Chrome tabs, desktop, and webcam. With it, you can easily capture videos on Microsoft Surface laptops and tablets. Additionally, this recorder offers tools for highlighting and editing. A simple how-to guide is given below:
Step 1. Visit Chrome Web Store to install this extension.
Step 2. Once installed, click the extension icon on the toolbar and select Screencastify to launch it.
Step 3. Create an account or sign in with your Google. Authorize the recording permission to your mic and webcam.
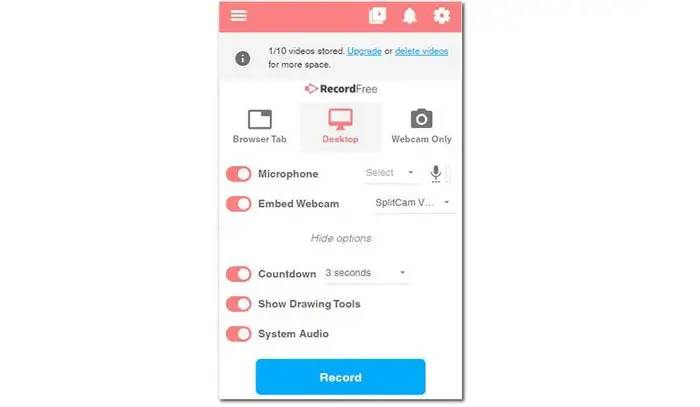
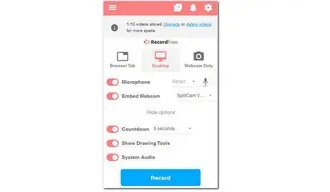
Step 4. Then on the tool’s home interface, decide whether to record the Browser Tab, Desktop, or Webcam Only. Continue with other recording settings incl. audio source, countdown timer, drawing tools, etc.
Step 5. Now, hit the Record button to start. When you finish, simply click the stop icon to end the recording.
OBS offers a free solution to screen record across different platforms, including Windows, macOS, and Linux, and is versatile enough for Microsoft Surface devices too. With it, you can record in high quality and adjust various settings, like audio input and output, screen region selection, and streaming configurations. See how to record a video on Surface with OBS below:

Step 1. Download and install OBS here: https://obsproject.com/ .
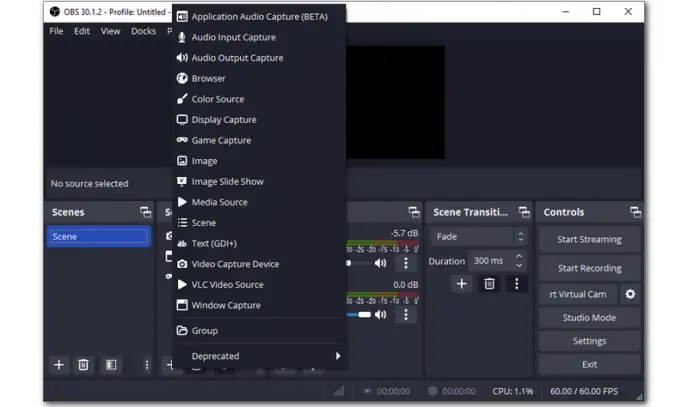
Step 2. Launch OBS. Click the + sign on the ‘Sources’ panel. Choose a recording mode depending on your purposes. For example, choose ‘Game Capture’ to record gameplay videos.
Step 3. Rename the source or leave it as the default ‘Game Capture 1’ and hit ‘OK’ to save.
Step 4. Then select a recording mode to decide the capturing area and press ‘OK’ to confirm the settings.
Step 5. When you are ready, click on the ‘Start Recording’ button in the ‘Controls’ box.
To finish the recording, you can either use a shortcut or hit the ‘Stop Recording’ button.
That’s all about how to screen record on Surface Pro or any other Windows laptop. Both methods are easy to use. If you don’t want to pay a dime, then try the built-in Xbox Game Bar or the open-source OBS. Note that the max recording length for Game bar is four hours.
But if you are looking for a quicker and more reliable solution, then you can go with WonderFox HD Video Converter Factory Pro. Free downloadFree download this all-in-one screen recorder for Surface Pro here and start your recording journey right now.

Terms and Conditions | Privacy Policy | License Agreement | Copyright © 2009-2026 WonderFox Soft, Inc.All Rights Reserved