
YouTube has videos for all viewing needs. Beyond watching online, you might want to save videos locally for offline viewing. For this, you can use a video download tool. But for those that cannot be downloaded, such as live TV or sports, knowing how to record them can be very helpful.
Here, I will walk you through the entire process of screen recording YouTube videos, including the audio, on a Windows PC. Please read on.
Disclaimer: WonderFox does not endorse or encourage recording any copyrighted works from YouTube. This article is for general informational purpose only. Please ensure your action does not violate YouTube’s terms of service.
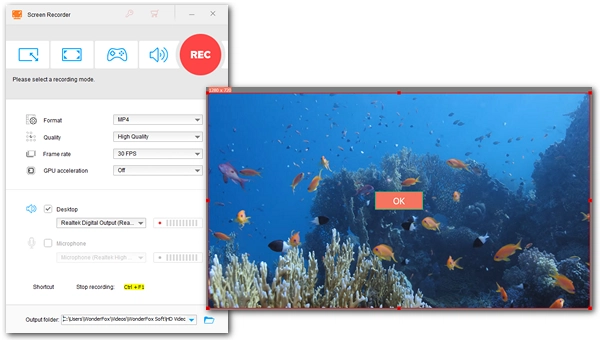
A suitable screen recorder is required to record YouTube videos. On Windows, WonderFox HD Video Converter Factory Pro is an all-in-one video toolkit with a high-quality screen recorder. It can record any part of the screen, the entire desktop, PC games, websites, etc. At the same time, it can also capture system sound and microphone. The entire screen recording process can be completed with just a few clicks. After that, you can further edit the recorded files using its built-in video editor.
Now, just download download the software and follow the tutorial to start recording a video from YouTube.
The best way to record YouTube videos in high quality without lag. No time limit and watermark-free. It is simple, fast and efficient. Try it now!
 Download for Free
Download for Free
Download for Free
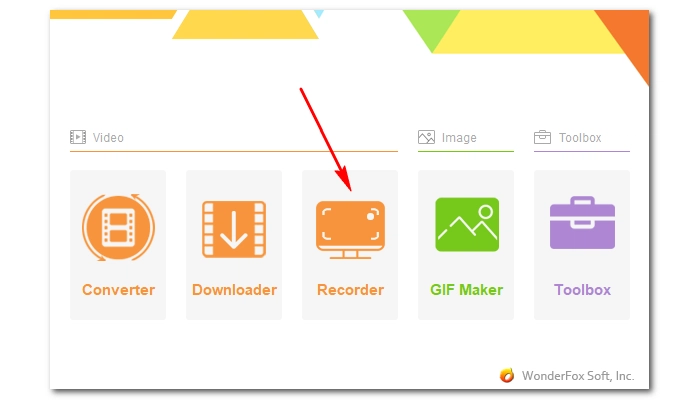
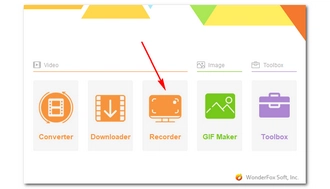
Run WonderFox HD Video Converter Factory Pro and open the Recorder.
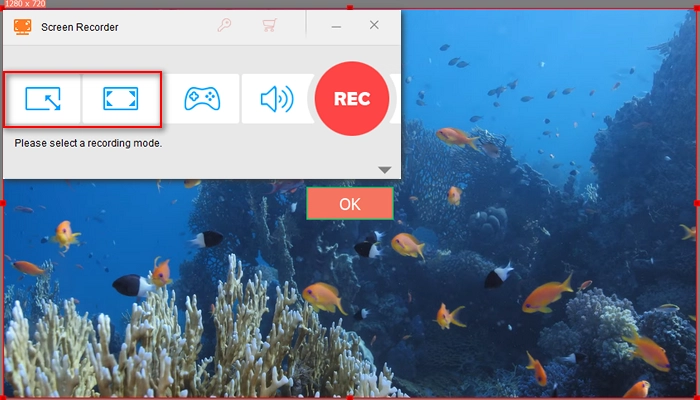
Choose the left recording mode (custom screen) and drag the cursor to select the area you want to record. You can also maximize the video player window and use the second full screen recorder to capture the video in the highest quality. After the region is selected, click OK.
Now, adjust the recording format, quality, frame rate, and GPU acceleration based on your actual needs. For example, for best compatibilty, select MP4 format, High Quality, and 30 FPS. Next, check the Desktop audio source to capture the system audio. Don’t forget to set an output folder at the bottom.
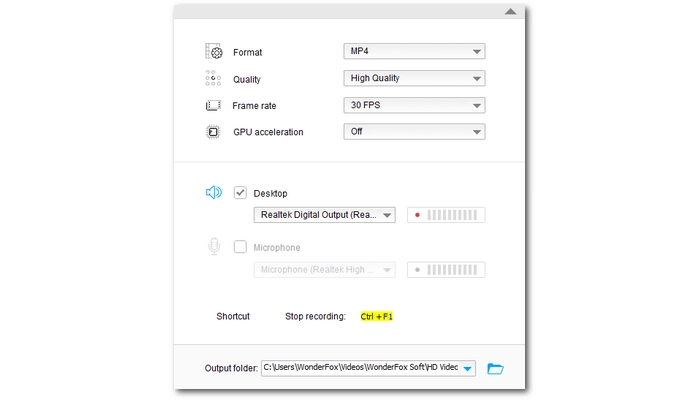
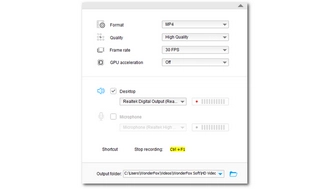
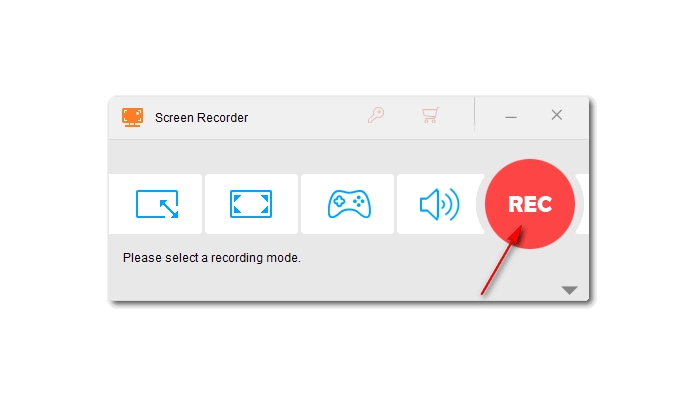
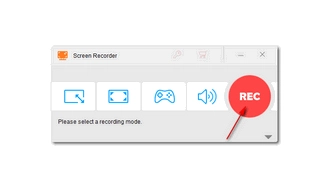
Once ready, click the red REC button to begin recording. It will start after a five-second countdown. When finished, press the hotkeys 'Ctrl + F1' to stop the recording. You can go to the output folder you just set to view the recorded files.
💡 This software also comes with a video downloader that can directly download videos from YouTube.
In fact, YouTube TV lets you record programs to watch later using its cloud DVR service. With it, you can record any airing, organized or future programs, which will be saved for 9 months, and during which time you can stream those recordings directly from your library.
The biggest advantage of using YouTube TV DVR is that it has unlimited storage, which means you can record as many shows as you want without having to worry about running out of space. But the tradeoff is that since the recordings are saved in cloud, you'll still need internet connection to access these files.
Below, you can find step-by-step guides on recording YouTube TV on different platforms.
Step 1: Go to tv.youtube.com and sign in with your YouTube account.
Step 2: Browse the programs or use the search box to find the show you want to record.
Step 3: Select the show and click the plus (+) icon to add it to your library. Now, the current show will be recorded and saved in the library.
💡 To record a show that is already in process, you can go to the airing page and click the + icon to add it to your library. The recorded show will be synced across platforms.
Step 1: Open the YouTube TV app on your phone and sign in with your account.
Step 2: Navigate to the show you want to record.
Step 3: Tap the + icon to add the show to the library. When you see a spinning circle around the + icon, it means the show is being recorded. You can tap on the + icon again to stop recording.
Step 1: Open the YouTube TV app on your TV and sign in.
Step 2: Use your remote to type the name of the show you want to record and then select it.
Step 3: Select the + icon to add the show to the library for recording. The plus icon will turn to a checkmark if you have successfully added it to the library.
🔔 YouTube TV DVR cannot record individual episodes, but rather records the entire show, including all episodes and all seasons. By the same logic, you cannot delete a single episode but the whole show. However, you can easily browse the library to find the episodes you want, and you don't need to worry about storage space as there are no space limitations.
It is illegal to obtain copyrighted works in any form, including recording, without permission. However, Fair Use gives you the freedom to use a copyrighted work under certain circumstances.
If you want to record audio from YouTube, you can use the built-in audio recorder in WonderFox HD Video Converter Factory Pro and select Desktop audio source to record YouTube as MP3 directly.
WonderFox HD Video Converter Factory Pro has the simplest operations and high recording performance, hence the best YouTube video recorder.
The YouTube TV DVR enables you to record any program on YouTube TV and keep it for nine months. It saves the recordings on the cloud and has no storage limitations.
You can record upcoming shows and events in advance as long as the schedule is available.
On the YouTube TV app, go to Library and you can find your recorded shows.
Once you subscribe to YouTube TV, you can use the DVR feature for free and unlimited.

I write about multimedia topics, including video and audio conversion, compression, editing, and downloading. I joined WonderFox in 2020, and my goal is to help readers solve everyday tech problems more easily. In this guide, learn how to use a screen recorder to record videos from YouTube with audio included.


I write about multimedia topics, including video and audio conversion, compression, editing, and downloading. I joined WonderFox in 2020, and my goal is to help readers solve everyday tech problems more easily. In this guide, learn how to use a screen recorder to record videos from YouTube with audio included.
Want to copy video and audio from DVD? This professional WonderFox DVD Ripper Pro helps to fast convert any DVDs, be it homemade or commercial, to popular audio/video formats and mobile devices (MP4, MKV, MP3, WAV, iPhone, Android, TV, laptop, etc.) in simple clicks. Get it to back up your DVD collections trouble-free!
Download for Free
Download for Free

Terms and Conditions | Privacy Policy | License Agreement | Copyright © 2009-2026 WonderFox Soft, Inc.All Rights Reserved