WonderFox HD Video Converter Factory Pro
Best All-in-one Screen Record on Windows
√ Record video and audio together or separately
√ Multiple recording modes for your choice
√ Options to preset recording format/quality/fps
√ Record game videos at up to 4K/60fps
√ offer one-stop solution to convert/edit/compress/…


Snipping Tool is a built-in screenshot utility that was first introduced in Windows Vista, and since then, has been included in other versions including Windows 10 and 11. With the release of version 11.2211.35.0 for Windows 11, you can now not only use it to take screenshots in various shapes as well as edit, annotate, and email them but also record videos on your Windows 11 screen.
With the newly introduced recording feature, you can quickly record either the entire screen or a selected portion of your screen. After recording, you can preview it and then save the recording as a .mp4 video. Also, you can share the recording via email or with nearby users.
The following steps will guide you through how to screen record video on Windows 11 using Snipping Tool.
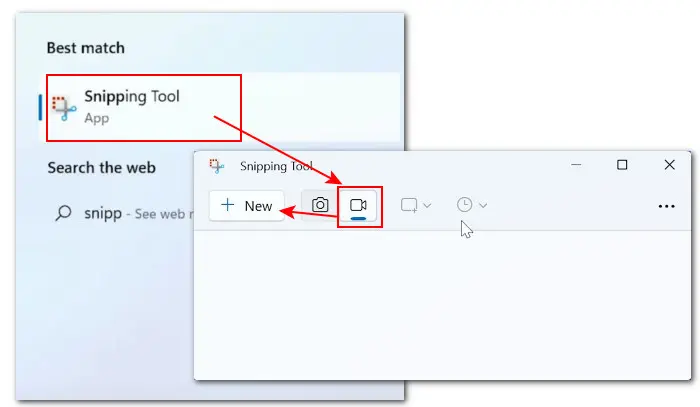
Step 1. Type Snipping Tool in the search bar to call it up.
* Note: Only the version 11.2211.35.0 and after include the screen recording capability. Make sure you’re using the right version. If not, visit the Microsoft Store to update it.
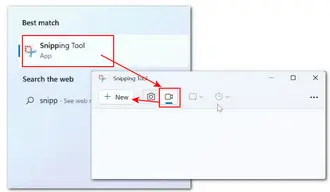
Step 2. Launch it. In the app, hit the video camera icon to select the Record feature.
Step 3. Then click on the + New button or press the shortcuts Ctrl + N on your keyboard.
Step 4. A screen recorder interface will appear on your screen. Use your mouse to drag and select the portion of your screen that you want to record.
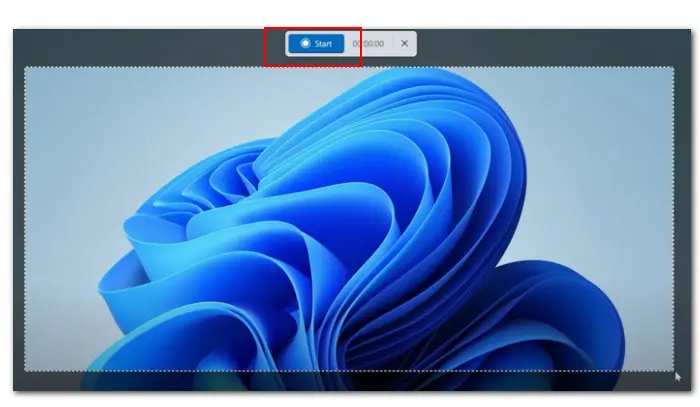
Step 5. Once you’ve selected the recording portion, click Start. After a 3-second countdown, the recording will start immediately.

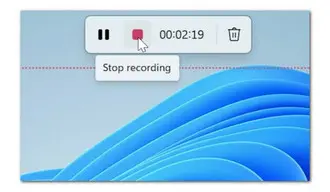
Step 6. Finally, hit the red stop icon to end the recording. You can preview the recording and then save, copy, or share the recording.

As you can see, the Snipping Tool offers limited features. If you’re serious about the recording and expect high quality, it can’t handle your situation. Given that, we’ll recommend a one-stop alternative to Snipping Tool—WonderFox HD Video Converter Factory Pro. This comprehensive toolkit includes a powerful recorder, allowing you to capture everything on your screen. You can preset the recording format, quality, and fps. After recording, you can also edit, compress, and convert the recording as you wish.
Featured with an intuitive interface, it is easy to operate. Check the simple guide below:
Step 1. Download and install Download and install the program on your Windows (11/10/8.1/8/7…).
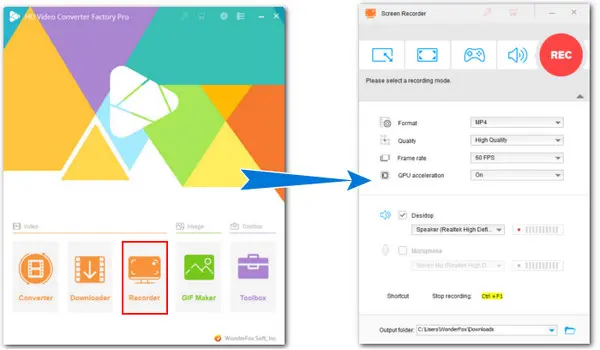
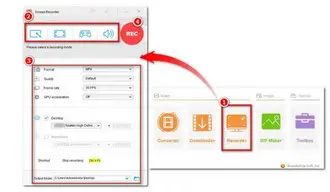
Step 2. Launch HD Video Converter Factory Pro and enter Recorder.
Step 3. Choose a recording mode and select the portion of the screen you want to record.
Step 4. Then move down to set the desired format, quality, frame rate (up to 60fps), audio source, and output folder.
Step 5. Finally, hit the red REC button to start. To end it, press “Ctrl + F1”.

Disclaimer: It is illegal to record copyrighted materials without the copyright holder’s permission. WonderFox does not approve of copyright infringement in any way. All information provided in this article is presented for general informational purposes and personal fair use only.
As a default app of Windows 11, Snipping Tool can be easily accessed, making it an ideal choice for some in-a-hurry recording tasks. While convenient, this tool has some obvious caveats. For example, it doesn’t support audio recording currently and the export format is limited to MP4. Additionally, there are no editing features within the app. Therefore, for some complicated recording tasks, you need to opt for 3rd-party recording tools with additional features, such as OBS Studio, Snagit, Camtasia, WonderFox HD Video Converter Factory Pro, Bandicam, ScreenPal, etc.
Q1. How do I record videos using Snipping Tool?
Keep in mind that only version 11.2211.35.0 and later offer the record button. To let the Snipping Tool record video, start the app from the Start menu, click Record, and then define the recording area on your screen. Then hit Start.
Q2. Is there a screen recorder like Snipping Tool?
Yes. In addition to the Snipping Tool, Windows 11 comes pre-installed with an Xbox Game Bar application that also includes a simple screen recorder. Xbox Game Bar is available on Windows 10, too. Besides, there are many third-party screen recorders out there capable of capturing your screen.
Q3. How do I record a video of myself on my computer?
To record a video with yourself on a computer, you’ll need a screen recorder that has the webcam recording capability, such as OBS, Snagit, Camtasia, Clipchamp, Loom, and so on.
Terms and Conditions | Privacy Policy | License Agreement | Copyright © 2009-2026 WonderFox Soft, Inc.All Rights Reserved