


Apple ProRes is an intermediate codec format developed by Apple Inc. for post-production in editing software such as Final Cut Pro X and Adobe Premiere Pro. It uses frame-by-frame encoding (called intraframe compression), which is easier to encode and decode than interframe codecs like H.264 and H.265. In other words, compared with these video formats, ProRes requires much less processing power and is much faster to edit. This is why many people prefer to convert their footage to ProRes before putting it into editing software.
Our topic today is converting video to ProRes for easier and faster editing. Below, you will find powerful a ProRes converter for Windows and how to convert to ProRes format on Windows in simple steps. Keep reading!
Converting ProRes videos requires a suitable converter. If you want simple and smooth ProRes conversion, WonderFox HD Video Converter Factory Pro is highly recommended. It is the best Apple ProRes converter for Windows and can quickly convert any video to ProRes format and vice versa. Learn more about the specific features it provides for ProRes conversion:
Download the ProRes Converter Windows:
Note: The example below demonstrates how to convert to Apple ProRes 422 on PC. Before start, please free download free download the ProRes converter and install it on your PC.
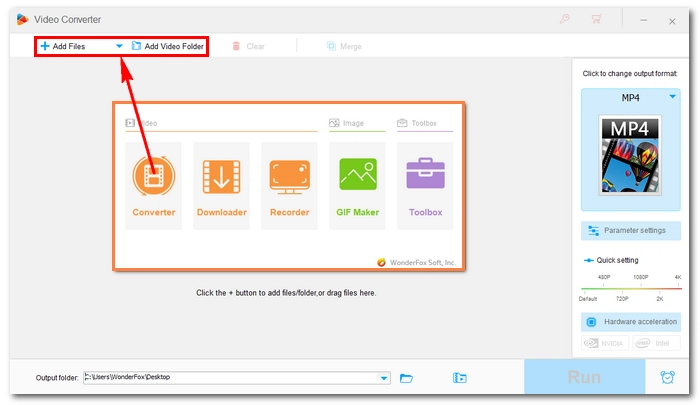
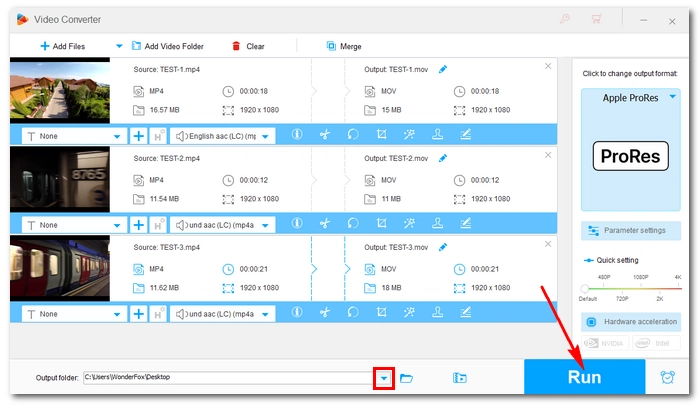
Launch HD Video Converter Factory Pro and open the Converter. Next, click Add Files or Add Video Folder to load the footage you want to convert into the conversion list. You can also drag the needed video file(s) into the program directly.

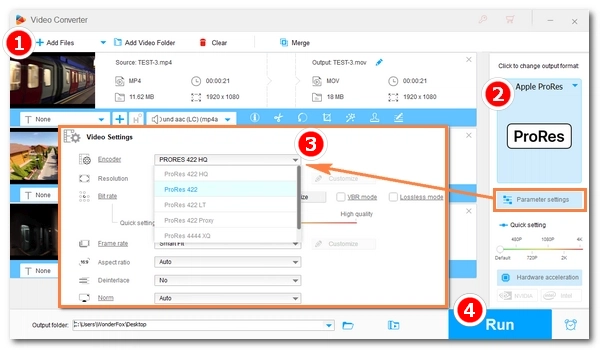
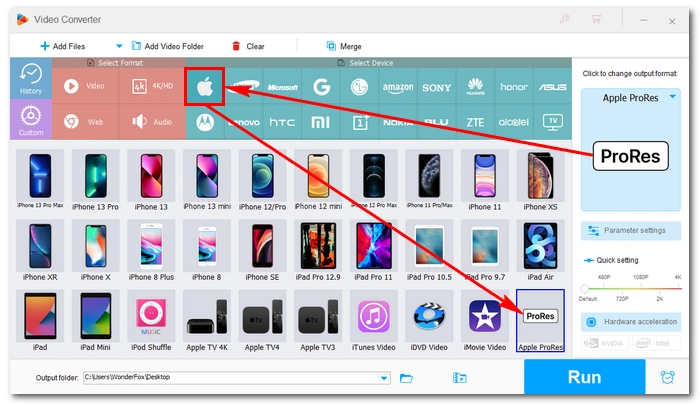
On the right side of the converter interface, click on the format image to open the output format library. Then go to the Device section and select Apple device (as shown in the screenshot). Next, choose ProRes from the Apple profiles below. The default ProRes codec for this profile is ProRes 422 HQ. To use a different ProRes type, move to the next step.

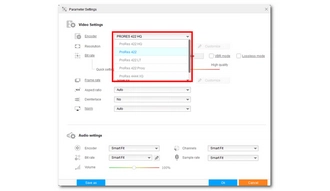
If you want a specific ProRes codec, navigate to the Parameter settings (below the format image) and find the video encoder. Click to open the encoder drop-down list and select your wanted ProRes type. For example, if you want to use ProRes with Premiere for post-production, you could try ProRes Proxy for a lightweight process. Then click OK to save the changes.

Click the ▼ button to specify an output path or leave it as default. Finally, hit Run to convert to ProRes 422 Windows.


WonderFox HD Video Converter Factory Pro can help you more in:
In addition to converting videos to ProRes, you can also convert ProRes to other formats to reduce file size and improve compatibility. You can also use WonderFox HD Video Converter Factory Pro to do this. It provides more than 500 formats and devices for output. If necessary, please follow the simple tutorial below:
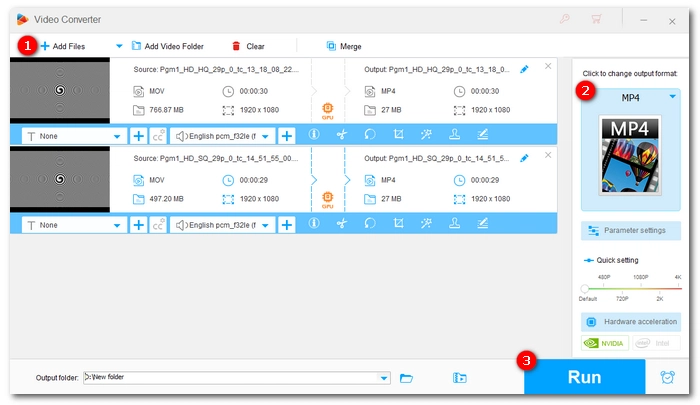
Step 1: Open the software and go into the Converter module. Then drag your ProRes videos into the program.
Step 2: Open the output format page on the right and select the video format you desire.
Step 3: Specify an output path at the bottom and click Run to start the conversion.

Converting video files to Apple ProRes can greatly speed up the editing process. With the right tool like WonderFox HD Video Converter Factory Pro, you can easily convert videos to ProRes on your Windows PC. In addition, the ability to convert ProRes back to other formats also makes this converter useful when it comes to sharing videos.
That’s all I want share about ProRes video conversion on Windows with a dedicated ProRes converter and ProRes decoder for Windows. Hope you’ll find this article helpful. Thanks for reading.
Converting to ProRes is beneficial if you need easier and faster editing performance, especially in professional post-production workflows.
Yes, MP4 can be converted to ProRes using a suitable video converter like WonderFox HD Video Converter Factory Pro.
Converting video to ProRes generally maintains high quality, as ProRes is designed to preserve as much detail as possible during the editing process. However, depending on the source material and the settings used during the conversion, some minor loss may occur, but it is usually minimal.
Terms and Conditions | Privacy Policy | License Agreement | Copyright © 2009-2026 WonderFox Soft, Inc.All Rights Reserved