What should you do when your burned DVD won't play in a DVD player? This article explains the common reasons, shows the right way to burn a playable DVD from video files or a VIDEO_TS folder, and clarifies whether VLC can burn DVDs. In the end, a practical DVD ripper will also be introduced for easier DVD backup and playback: https://www.videoconverterfactory.com/download/dvd-ripper.exe

Burn DVD
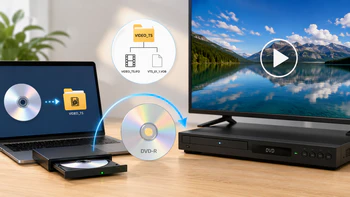
DVD burning is not just copying a video file to a blank disc. If you want a burned disc to play in a living-room DVD player, it usually needs to be authored as a DVD-Video disc with the right folder structure, video standard, disc type, and burning settings. Otherwise, the disc may work on a computer but fail on a standalone player. Below are the most common reasons behind the problem and what you should check before burning again.
This is the most common reason. A data DVD simply stores files such as MP4, MKV, AVI, MOV, or WMV. Many old DVD players cannot decode these files even though the disc itself is readable. A DVD-Video disc, however, has a specific structure, usually with a VIDEO_TS folder that contains VOB, IFO, and BUP files. If your player only supports standard DVDs, you need DVD authoring/burning software to create that DVD-Video structure instead of just dragging videos onto a blank disc.
Standard DVDs use MPEG-2 video. NTSC DVDs normally use 720x480 at 29.97fps, while PAL DVDs normally use 720x576 at 25fps. Audio also matters. AC3, PCM, or MPEG audio is more suitable for DVD playback than modern audio codecs inside MP4 or MKV files. If the source video is not DVD-compliant, convert it first with a video converter such as HD Video Converter Factory Pro, and then author/burn it with a DVD burning tool.
Blank DVD types include DVD-R, DVD+R, DVD-RW, DVD+RW, DVD-R DL, and DVD+R DL. Newer players usually support most of them, but older DVD players may prefer DVD-R over DVD+R or may not read rewritable discs well. Before buying blank discs, check the manual or label of your DVD player and DVD burner. For best compatibility, a good-quality DVD-R burned at a moderate speed is still a safe choice.
If you already have a VIDEO_TS folder, do not place it inside another folder such as "My Movie\VIDEO_TS". The VIDEO_TS folder should be in the root directory of the disc, and the files inside it should remain unchanged. A standard DVD may also include an empty AUDIO_TS folder for older-player compatibility. If you burn only the VOB files, rename files, or change the folder level, the DVD menu and playback may fail.
VLC is a media player and converter, not DVD burning software. It can help transcode a video to a DVD-friendly MPEG-2/VOB-style file, but it cannot create a complete DVD-Video disc and write it to a blank DVD by itself. After using VLC or another converter, you still need DVD authoring/burning software to create the DVD structure and burn the disc.
The bad condition of the DVD player itself may also cause failed playback. Some old DVD players do not recognize homemade DVDs well, especially rewritable discs or discs burned at high speed. If possible, test the disc on another DVD player or computer DVD drive to confirm whether the problem comes from the disc or the player.
A badly scratched disc, dust, fingerprints, poor-quality media, or thick adhesive labels can make a DVD unreadable. Use clean, reputable blank discs, avoid paper labels, and keep the recording side clean before burning.
Faster is not always better in DVD burning. Very high burning speed can increase the chance of read errors on standalone DVD players. If your burner and disc allow it, try 4X or 8X instead of the maximum speed, and enable the verify option after burning.
A bad burn may also be caused by a failing DVD burner, outdated burning software, an interrupted burning process, incorrect PAL/NTSC selection, or source files that were already damaged. When a burned DVD fails, test the source video first, then try another blank disc, a slower speed, and a different burning program.
To make a playable DVD, the key is to create a DVD-Video disc, not a simple data disc. The exact workflow depends on what you already have: common video files, an authored VIDEO_TS folder, or a video you tried to process with VLC.
If you already have a complete VIDEO_TS folder, the job is easier because the DVD structure has already been authored. Use DVD burning software such as ImgBurn to write the folder to a blank DVD.
Step 1. Insert a blank DVD into your DVD burner. Use DVD-R if your old DVD player is picky about disc types.
Step 2. Open ImgBurn and choose Write files/folders to disc.
Step 3. Add the VIDEO_TS folder as the source. Make sure the folder is placed in the root of the disc, not inside another parent folder.
Step 4. Choose a moderate burning speed, such as 4X or 8X, enable verification if available, and start burning.
Step 5. After burning, test the DVD on your computer first and then on your standalone DVD player.
If your source is MP4, MKV, MOV, AVI, or another regular video file, convert it to a DVD-friendly format first and then use DVD authoring software to create a DVD-Video disc. A proper DVD authoring tool will generate the VIDEO_TS folder and burn it to disc. During authoring, choose NTSC or PAL according to your region and DVD player.
Although VLC can transcode video to a DVD-friendly MPEG-2 file through advanced settings or command line, it cannot finish the DVD burning process alone. If VLC is too complicated, use a simpler converter to create a DVD-compatible file, then burn it with a real DVD authoring/burning program.
Use DVD-Video structure instead of a data disc; keep VIDEO_TS in the disc root; select the correct NTSC/PAL standard; use a compatible blank disc; avoid maximum burning speed; and verify the disc after burning. These small checks greatly improve the chance that your burned DVD will play in a DVD player.
Burning is useful when you need a physical disc, but many users now prefer a digital copy for TV, USB drive, phone, tablet, or media server playback. If you already have DVDs at home and want to watch them without relying on a DVD player, DVD ripping is a more flexible option.
You may have too many DVD discs that occupy space, or your new computer may not even have a DVD drive. In that case, you can copy a DVD into your computer and then transfer the video to a USB drive or other device for playback.
Here I recommend WonderFox DVD Ripper Pro.
WonderFox DVD Ripper Pro can rip homemade DVDs as well as many protected movie DVDs to MP4, MPG, MKV, ISO, VIDEO_TS folder, and device presets. It can also keep the main movie, choose audio tracks/subtitles, compress large DVD content, and make DVD playback easier on modern devices.
Free download the best DVD ripper to copy DVD with much more ease.
Firstly, launch WonderFox DVD Ripper Pro and insert the DVD into your PC's DVD-ROM. Then, preset an output folder at the bottom. After that, click on "DVD Disc", select the DVD you want to rip and hit "Ok" to start analysis.
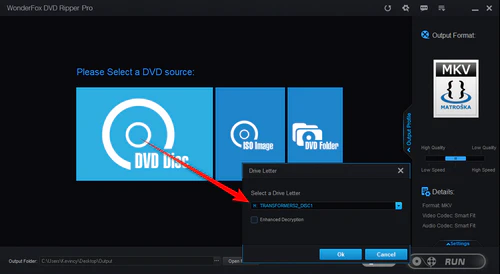
Load a DVD Disc
After a short while, the analysis will be completed. The main movie is usually marked automatically. You can choose subtitles and audio tracks, select an output format such as MP4, MPG, MKV, ISO, or VIDEO_TS. For DVD backup, MPG, ISO, or VIDEO_TS can help preserve DVD content more directly, while MP4 is better for phones, TVs, and USB playback.

Choose an Output Format
Click on "Run" to start the ripping process. When it finishes, open the output folder you preset before and play the file to check the result.
Tips: Before the conversion, you're able to expand the "Settings" panel on the right side to customize the parameters like resolution, bitrate, frame rate, etc. If your DVD suffers from interlacing, choose DVD "Deinterlace" right there.
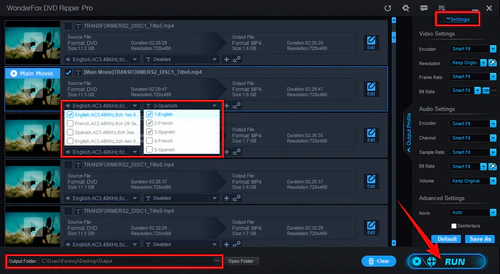
Start ripping
No. VLC can play DVDs and convert videos, but it cannot author and burn a complete DVD-Video disc by itself. You still need DVD burning software after conversion.
Your disc is probably a data DVD, or the video codec is not supported by the DVD player. Computers can play many formats with software players, while standalone DVD players usually need a standard DVD-Video structure.
You can burn MP4 files as data, but that does not guarantee playback on a DVD player. For better compatibility, convert and author the MP4 into DVD-Video format before burning.
Both can work, but DVD-R is often safer for older DVD players. Check your player manual if you are not sure.
Try 4X or 8X when possible. Very high speeds may finish faster but can make the disc harder for some DVD players to read.

Kevincy joined the WonderFox team in 2014 and has been a senior columnist ever since. With over two decades of experience in the video editing industry, he shares tutorials, tips, and how-to guides on video/audio processing and personal DVD backups. Family-oriented and passionate about helping others, he is dedicated to making video and audio processing easier for readers.
![]()
![]()
![]()
![]()
Articles: Convert Video | Rip DVD | Download Video | Play Video | Share Media Files | Record Screen | Edit Video | Toolbox | Third-party Software | Kodi
Store | Download | About | Contact | Support | Privacy | Copyright © 2009-2026 WonderFox Soft, Inc. All Rights Reserved
 Free Download
 Recommended by the author