VLC player can not only let you rip a DVD to a computer but also allow you to record it using the built-in Record button. And this post will guide you through how to record DVD with VLC. However, VLC cannot record and rip some commercial DVDs due to copy protections. Don’t worry, we provide a powerful DVD ripper to help you take a clip or copy the entire DVD, be it DRM-free or protected, to your device with ease. Read on to learn more details:
Tips: Here is the recommended DVD ripper for easier and quicker disc backup:https://www.videoconverterfactory.com/download/dvd-ripper.exehttps://www.videoconverterfactory.com/download/dvd-ripper.exe
VLC offers an easy and free way to play and record DVDs/Blu-ray discs with no copyright protection. Here is the how-to guide:
Step 1. Get the latest VLC media player on your computer from: https://www.videolan.org/vlc/
Step 2. Insert your DVD into the computer. Open VLC. Go to Media > Open Disc… on the top nav bar.
Step 3. Make sure the right DVD is selected in the Disc Device box. If not, click Browse to locate your DVD.
Step 4. At the bottom, select Play to enjoy the DVD movie with VLC.
Step 5. On the top menu bar, head to View and select Advanced Controls to enable the Record button.
Step 6. At the bottom of the play window, press the Record button (with a red dot) to start recording. And hit it again to stop.
By default, VLC stores the recorded videos in the Video folder on Windows and the Movies folder on Mac.

As you can see, recording DVDs with VLC is not hard and this open-source software can even record and rip some copy-protected DVDs with libdvdcss installed. But when it comes to strictly copy-guarded DVDs, VLC is incapable. Moreover, some users complained that there are times when VLC records video with no audio or VLC crashes on Windows PC. In such cases, you may need a more reliable way to save a clip of a DVD movie or copy the entire content to your computer. It is strongly suggested to get this job done with WonderFox DVD Ripper Pro, a professional DVD ripping software for Windows.
WonderFox DVD Ripper Pro allows copying digital files from either homemade or copy-protected DVDs with 1:1 video quality. Over 300+ output formats are offered so you can enjoy them on any device without a DVD drive/player. Fast and safe! Give it a shot now!
With advanced decryption tech for Disney 99-title, copy-protected, region-locked DVDs, WonderFox DVD Ripper Pro allows you to get a digital copy of any DVD on a PC quickly and easily.
Besides, it offers 300+ output presets so you can save the DVD movie in a standard format like MP4, MKV, MOV, etc., or directly convert it to a device profile such as a TV, phone, or Xbox game console. Even better, it has a built-in editor, allowing you to cut any desired clip of the DVD.
If copy protections are such a big hassle when recording a DVD with VLC, then try this roundabout solution to save your DVD collections on PC in clicks. Free download it here and follow the steps below:
Before we get started, insert your DVD into the DVD-ROM drive.
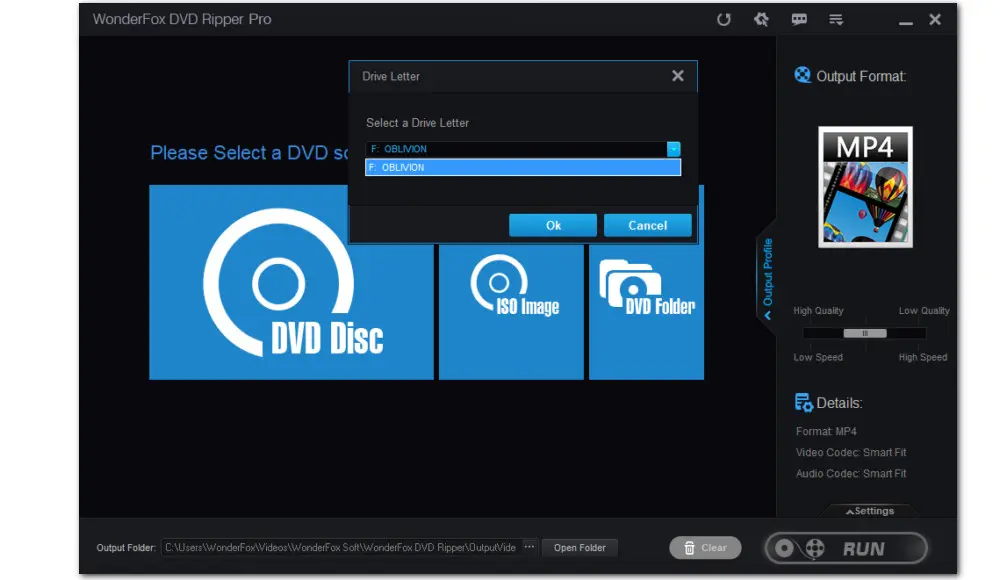
Launch WonderFox DVD Ripper Pro and press the “DVD Disc” button to select the inserted disc. It will scan and display all DVD content. Meanwhile, the main movie will be marked automatically.
Tips: In addition to the physical disc, you can also import DVD ISO image and a complete Video_TS folder.
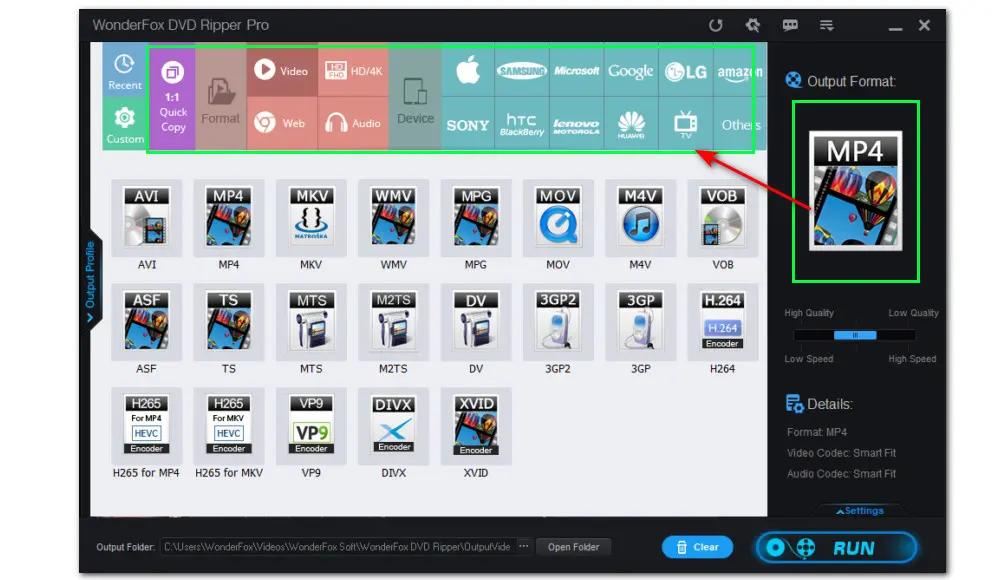
Hit the Output Format profile on the right side to enter the entire list of 300+ predefined presets. To make the output playable on most devices, you can go to the Video section and choose MP4 as the output format. Also, you can choose other formats or device profiles based on your actual needs.
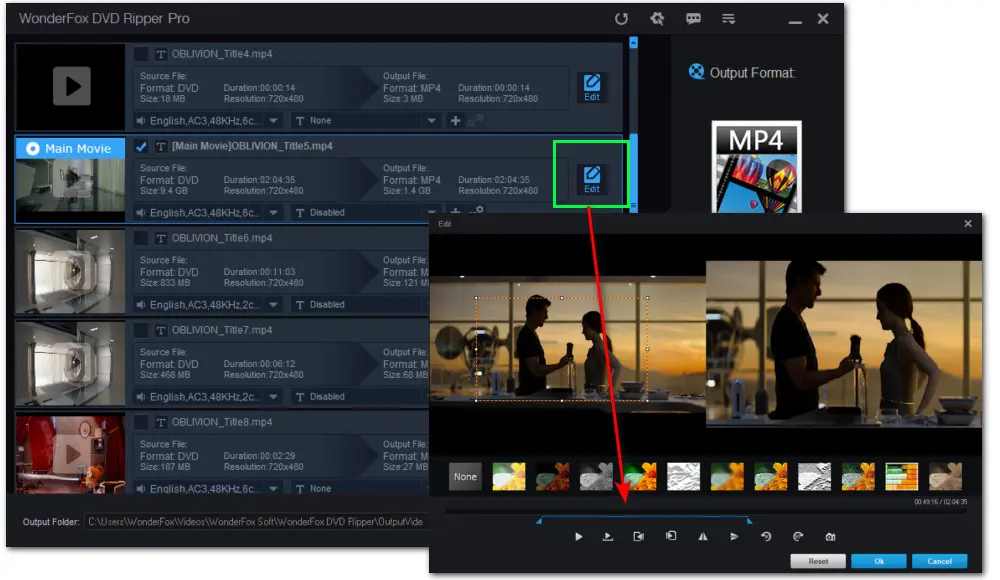
Hit the Edit tab to enter the editing window. Here you can drag the blue sliders on the timeline to choose the part you want to keep and hit OK to save the clip.
As you can see, you can also edit the DVD by applying effects, rotating, and flipping.
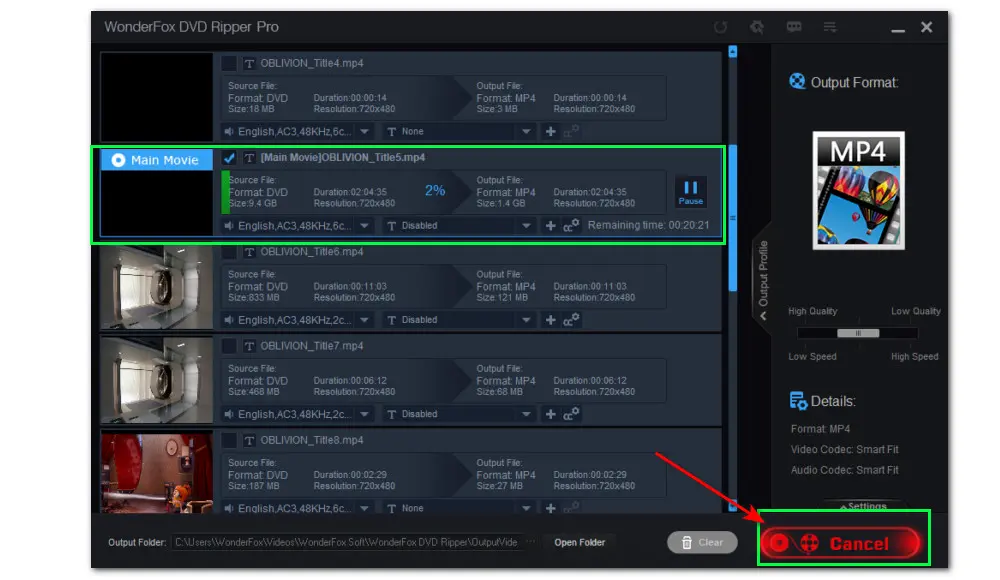
Set a destination on the bottom to save the converted digital video file. Lastly, press “RUN” to copy the DVD with hardware acceleration enabled.
Also read: ISO to MP4 | Rip DVD to Video_TS | Ripper for DVD with 99 Title Tracks
Instead of a professional DVD ripper software, some may just want a dedicated DVD recorder if the VLC recording button doesn’t work. Well, we also got you covered!
Though there are a lot of options lying around, in consideration of ease of use and functionality, WonderFox HD Video Converter Factory Pro outperforms many competitors.
This one-stop software includes multiple recording modes, covering most of your recording needs. Apart from recording DVDs video clips, it enables anyone to record DVD audio only, capture gameplay video, zoom meetings, streaming music, and so on. No limits on the recording length and no watermark!
Download to install it here and then record a DVD with the functional VLC alternative:
Step 1. Open your DVD with a DVD player. Then launch the WonderFox Recorder on your desktop and enter the “Recorder” module.
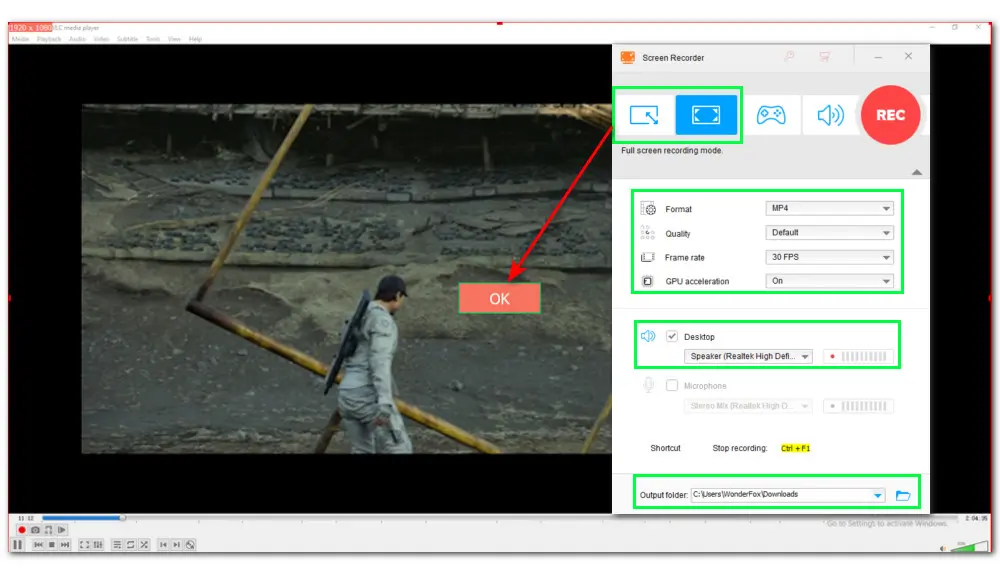
Step 2. If you play the DVD movie in full screen, hit the second Full-screen recording mode to capture the entire screen. Or you can minimize the playback window and then choose the first Custom recording mode to drag the dotted line and record the selected window.
As for recording audio only from the DVD, press the last speaker icon to activate the Audio-only mode.
Step 3. Next, you can adjust the recording settings below, including the recording format, quality, frame rate, and GPU acceleration.
Step 4. Then, check the “Desktop” option to record DVD audio along with the video.
Step 5. Don’t forget to specify an output path at the bottom Output folder box. At last, click the big red “REC” button to start recording the DVD after a 5s countdown.
Step 6. To stop the recording, you can either click the “Stop” button or press “Ctrl + F1” on your keyboard. The recorded file will automatically pop up in the output folder you just set.
1. 500+ optimized presets for a fast conversion;
2. Batch convert and compress video/audio files;
3. Download SD/HD/4K/8K videos from 1000+ sites;
4. Enhance video quality to 4K resolution;
5. Extract subs/audio, make GIFs, and more...
Note: WonderFox doesn’t advocate any illegal duplication and distribution. Please refer to the DVD copyright laws in your country before ripping a copy-protected DVD.
That’s all for how to record DVD with VLC. Plus, two alternative ways are offered in this guide to help you out if you come across any VLC DVD recording issues.
Q1. Where can you find the recorded DVD clips?
If you haven’t changed any settings related to the file location, the default directory of the recorded videos for VLC is:
Windows: C:\Users\Username\Videos
Mac: Macintosh HD > Users > Your Username > Movies
If you want to change the file location, here are the steps:
Q2. How to rip an unprotected DVD with VLC?
The DVD ripping process is not as straightforward as that of WonderFox DVD Ripper Pro. We’ll guide you through the steps:
Privacy Policy | Copyright © 2009-2024 WonderFox Soft, Inc.All Rights Reserved
