The audio volume is an important part of a video. Sometimes you need to lower the volume for a comfortable experience or increase the volume to hear clearly. Fortunately, this post shares how to lower volume in Premiere Pro. Moreover, an easier way to decrease the video volume on Windows is also introduced in this post. Just follow this post to find the suitable way for you to adjust/lower volume now!
Tips. If you only want to lower or increase the video volume without doing other professional edits, you can download and try this simple video volume reducer.
https://www.videoconverterfactory.com/download/hd-video-converter-pro.exe https://www.videoconverterfactory.com/download/hd-video-converter-pro.exe
As stated Before, there are many ways to adjust the volume in Premiere Pro. But this post mainly shares the two straightforward ways. With them, you can easily adjust the file volume by decreasing or increasing.
To lower the volume level in Premiere Pro, one of the easiest ways is to adjust the volume on the timeline. The following is a detailed guide for you.
Step 1. Drag and drop the media file whose audio volume needs to be lower into Premiere Pro. You can also use the Project Window or File tab’s drop-down option to import the media file. Then don’t forget to drag the file to the timeline.
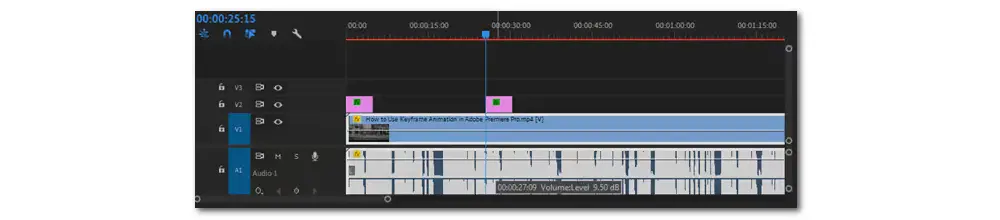
Step 2. Select the audio from the sequence timeline and Enlarge the audio track by double-clicking on it.
Step 3. Move your mouse over the audio band from the sequence timeline. Then you can drag it downward to decrease the volume or drag it upward to increase the volume.
This way can not only add special effects to your video but also adjust the video volume to your desired level. The following is a detailed tutorial on how to lower audio volume in Premiere Pro.
Step 1. Import the media file into DaVinci Resolve or directly drag and drop the file.
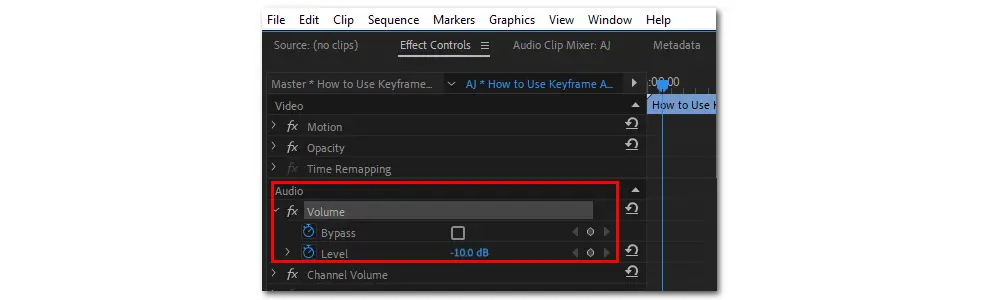
Step 2. Select the file in the timeline and then navigate to the Effect Controls panel below the main menu. You can also directly access it with the keyboard shortcut “Shift + 5”.
Step 3. Locate the Volume option in the Audio section and then find the Level property. Click the “Stopwatch” icon beside the “Level” to turn off Keyframes. By default, the Level is always set as 0.0 decibels (dB), which means that the volume hasn’t been changed. You can also type in the number of decibels you prefer to lower the volume or simply click and drag it to the left side. (If you want to increase the video volume, just move it to the right.)
After you adjust the volume to your desired level, you can then save your file to your device or go through other professional editing steps.
You May Be Interested in: [Premiere Pro Export MP4] How to Save Adobe Premiere Project as MP4?
Want to lower the volume with a simple tool? Try WonderFox HD Video Converter Factory Pro! It offers a direct way to make a video/music file less loud with a few simple clicks. Its batch processing mode even makes the job more efficient and time-saving for multiple file tasks.
For users who only want to lower the volume for a better listening experience, Premiere Pro may be a little troublesome to adjust the volume. So this post also provides an easier tool to help you lower video volume effortlessly.
WonderFox HD Video Converter Factory Pro is a handy and efficient tool that can even help non-tech-savvy users to decrease or increase the volume without difficulty. As an all-in-one video and audio processing tool, it offers a wide range of features, including volume adjustment. The user-friendly interface and intuitive workflow can help you quickly output the desired files in high quality. Furthermore, if you have a bunch of files that need to lower the volume, HD Video Converter Factory Pro can also help you batch process them.
Free downloadFree download this tool first and read the following to see the volume-reducing tutorial.
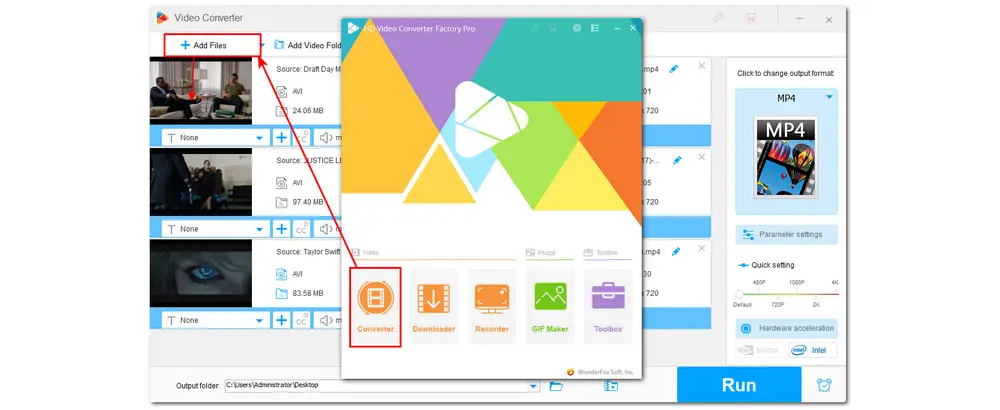
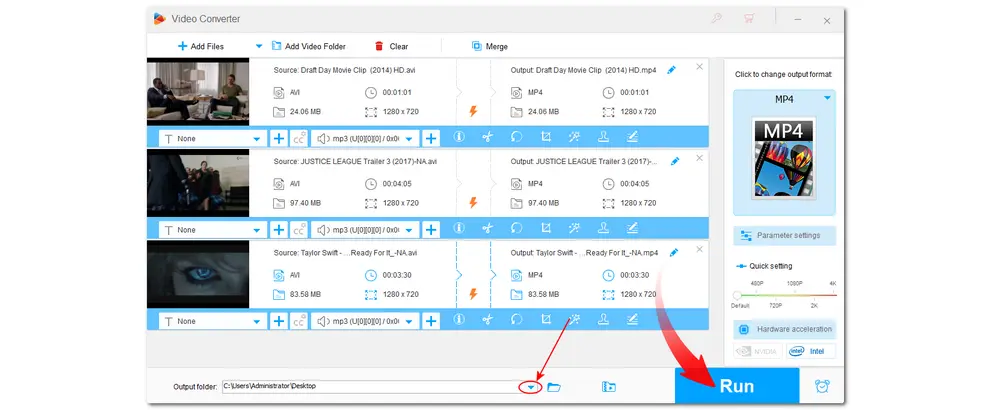
Launch HD Video Converter Factory and open the “Converter” module. Click “+ Add Files” to import the source files or directly drag and drop them into the program.
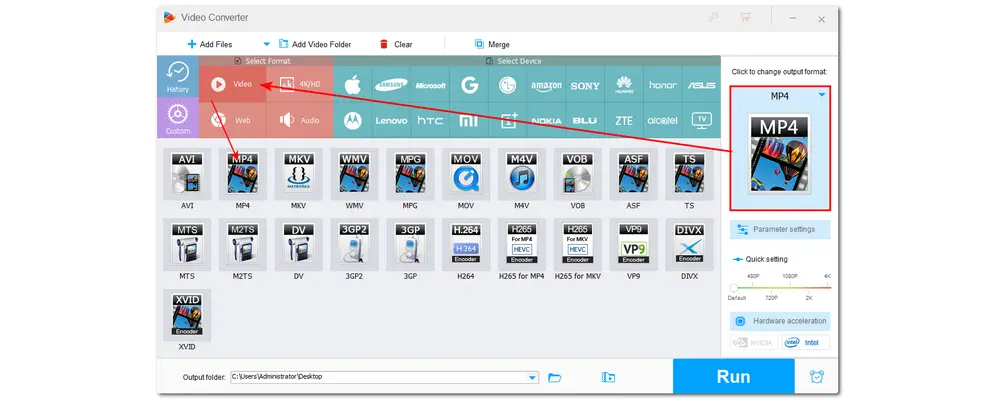
Hit the format image on the right side of the interface to expand the output format library. You’re recommended to choose “MP4” under the “Video” category for the best compatibility with various platforms. You can also choose the original format if you don’t want to change the file format.
Now, press the “Parameter settings” button underneath the format image. In the pop-up window, navigate to the “Audio settings” section and find the “Volume” option. You can move the slider to the left to lower the volume on a percentage basis. If you drag the slider to 0%, then it will mute the video files. On the contrary, you can also drag the slider to the right to boost the volume up to 200%. Then click “OK” to save the change and go back.
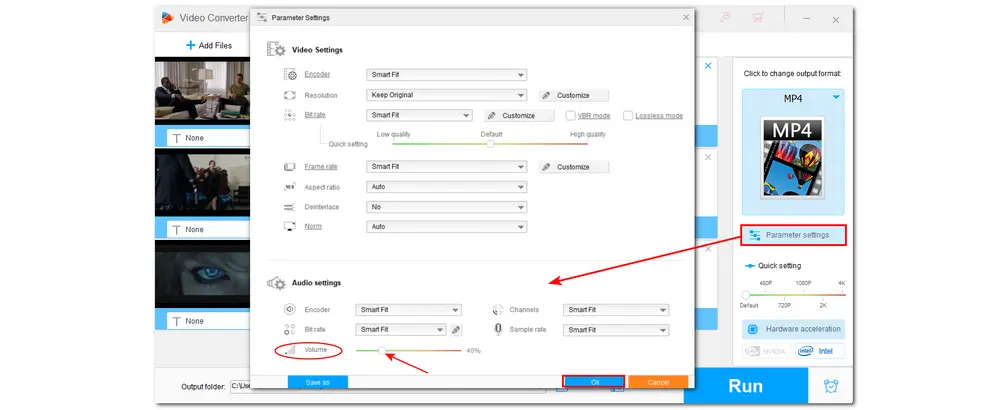
You can also change the video codec, resolution, bitrate, frame rate, etc. if needed in the "Parameter settings" window.
Once you decreased the volume, you can now click the down arrow icon at the bottom of the interface to specify an output path for the exported files. Finally, press “Run” to start exporting files with GPU acceleration enabled.
Besides decreasing the file volume, HD Video Converter Factory Pro can convert unsupported files for Premiere Pro. With its wide format support, issues like Premiere Pro MKV, MP4, AVI, etc. can be easily solved by changing the file format or encoder.
If Premiere Pro won’t play the sounds, it might be because of the following reasons:
The sound could be disabled;
The sound could be muted;
The file contains the incompatible audio codec;
There is no audio in the video file;
...
You can check the possible solutions in this post: Quick & Handy Fixes for Premiere Pro Audio Not Playing.
In Audio Premiere Pro, the Audio Gain setting is independent of the output level settings. You may adjust the gain of the master clip to ensure that all instances of the clip added to the timeline have the same gain levels, or you can also change the gain of a single clip in the timeline.
Now, you have known how to adjust the audio volume in Premiere Pro in the timeline panel and Effect Controls panel. But if you want to lower the volume more quickly, just give HD Video Converter Factory Pro a try. BTW, it also enables you to change the file format/codec for smooth importing to Adobe Premiere Pro.
Thanks for reading. Have a nice day!

WonderFox DVD Ripper Pro
WonderFox DVD Ripper Pro is ready to help you back up your DVDs and convert them to digital formats without difficulty. The DVD to ISO image/ DVD folder feature enables you to copy your DVD with flawless 1:1 quality and content. It also enables you to convert DVDs to 300+ digital formats you want. DVD editing and compressing are also provided. Download it here to enjoy a fast and trouble-free DVD-ripping experience.
* Please DO NOT use it to rip any copy-protected DVDs for commercial purposes.
Privacy Policy | Copyright © 2009-2024 WonderFox Soft, Inc.All Rights Reserved
