A vertical video refers to a video with a vertical orientation, which means that its height exceeds its width. When using TikTok, Snapchat, Instagram, etc. mobile apps, you will notice that the majority of videos are recorded vertically. If you want to upload your recorded videos to such platforms to gain more views, you can also record your videos in vertical mode.
The following content shares two handy tools to help you record vertical video on Windows and Mac. Read on if you’re wondering how to record vertical videos on PCs.
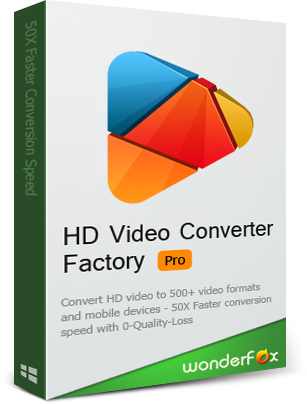
WonderFox HD Video Converter Factory Pro is a handy video processing tool designed for Windows. It offers an HD screen recorder that can help you capture a PC screen in any region to make vertical videos. You can use it to record video calls, tutorial videos, online meetings, streaming videos, etc. in high quality, even up to 4K at 60 fps. Before starting recording, you’re allowed to freely adjust the recording format, quality, frame rate, audio source, and more.
Download the software and follow the instructions below to start the recording!
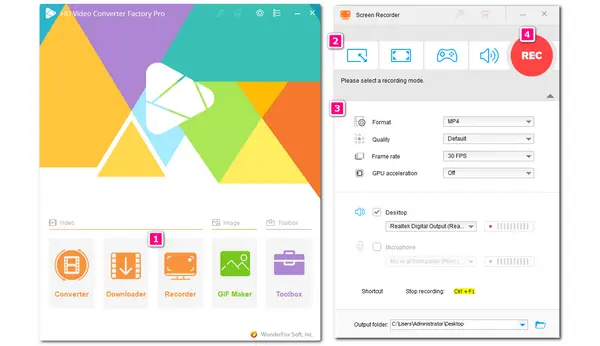
Launch WonderFox HD Video Converter Factory Pro and enter the “Recorder” module.


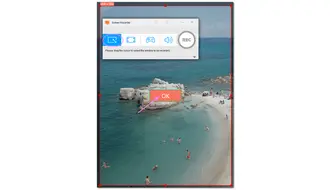
Choose the “Custom” mode and drag the cursor to select a specific part of the screen you want to record in vertical mode. Then click the "OK" button to confirm the recording region.

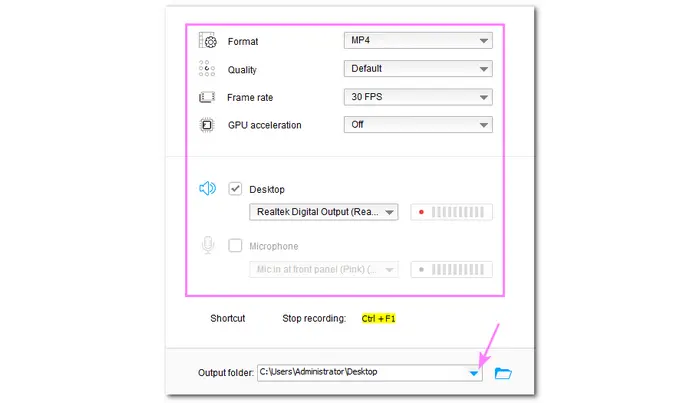
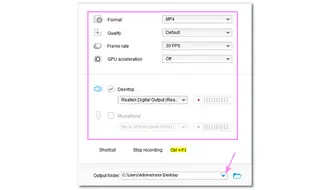
Choose the recording format, quality, and frame rate, and turn on/off GPU acceleration according to your needs.
Then, check the audio source you want to record on the screen. “Desktop” is for system sound, and “Microphone” is for external audio.
Next, click the ▼ button at the bottom to set the output folder.
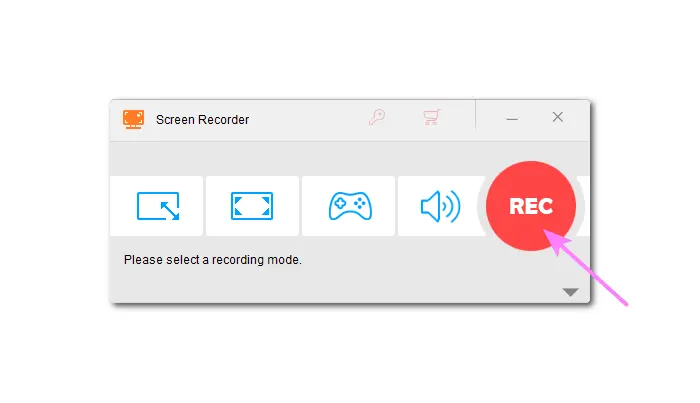
Finally, click the “REC” button, and it will start recording after a five-second countdown. After recording, press the hotkey "Ctrl + F1" to stop recording.

Tip: After recording, you can also crop, trim, merge, add effects, compress, and convert the recorded files using its internal video editor in the “Converter” module.
If you want to record vertical videos on a Mac, QuickTime Player is a good option. It is a multimedia player preinstalled on Mac. You may usually use it to play or edit videos on a Mac. Not only that, it also allows you to do screen recording on a Mac. You can use the QuickTime Player's built-in screen recorder to locate a recording area vertically and start recording without hassle.
See how to screen record vertically with QuickTime Player in the following.
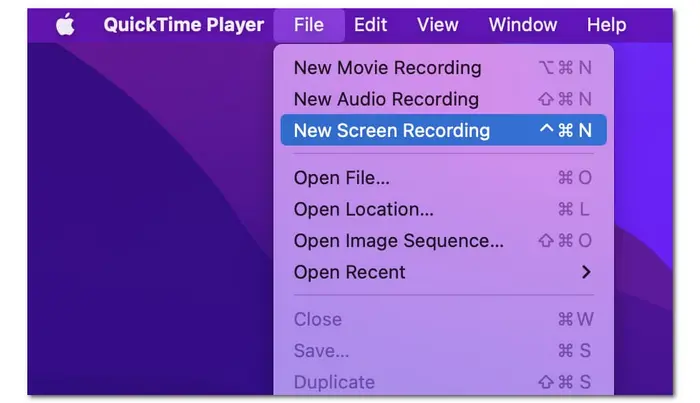
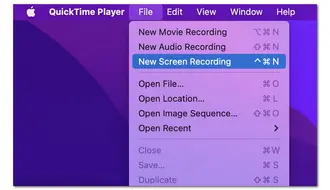
Step 1. Open QuickTime Player and go to “File” > “New Screen Recording”.
Step 2. In the pop-up “Screen Recording” window, click the small down-arrow icon beside the recording button to modify the recording settings.
Step 3. Right-click and drag over the section to select the recording region in vertical mode. Then press “Start Recording”.
Step 4. Once the recording is finished, you can click the stop icon in the top menu bar. Go to “File” > “Save” to save the recorded video on your Mac.
Note that QuickTime Player won’t record the system audio. If you want to screen record with system audio, go and see this post: QuickTime Player Screen Recording with Audio on Mac.
Capturing videos in vertical mode on your PC can make your recorded videos more attractive on mobile screens and social media platforms. With the instructions provided in this post, you can easily record vertical videos on Windows and Mac.
I hope you can successfully record the vertical videos you want on your PC. Thanks for your reading. Have a nice day!
Yes. You can turn a horizontal video into a vertical one with any video editor that supports the rotate feature.
WonderFox HD Video Converter Factory Pro can help you convert landscape video to portrait on Windows. For Mac users, you can use QuickTime Player or iMovie to rotate the recording vertically.
Yes. You can record a vertical video in OBS. You just need to change the video resolution to a vertical ratio in its settings window.
If you want to use OBS Studio to record vertical videos on your PC, just follow the steps below:
Step 1. Launch OBS and click the “+” button under the “Source” tab to select a recording source. Name the project and select the recording content.
Step 2. Navigate to “File” > “Settings” > “Video”. Here you can input a resolution like 1080 x 1920 in “Base (Canvas) Resolution” and “Output Resolution” to change the aspect ratio of canvas to 9:16, and then hit “OK”.
Step 3. Modify the audio source and click “Start recording”.
Terms and Conditions | Privacy Policy | License Agreement | Copyright © 2009-2024 WonderFox Soft, Inc.All Rights Reserved